With so many people baking nowadays, I figured it was time I created a Baking Troubleshoot Guide for you as a resource! A lot of people are brand new bakers and things can be confusing when the recipes don’t turn out as you thought they would. Simple mistakes and common misconceptions can be preventing you from optimal results! Hopefully this guide will be an excellent resource for your next baking adventure!
Substitutions
Check out my Baking Substitutions post HERE.
Measuring
Baking isn’t like cooking where measurements can be arbitrary. It’s more of a science, which can scare people off. But not to fret! When you learn to measure properly, you’ll get the best results. For optimal results, weigh or spoon and level your dry ingredients. Especially flour! So many people (including celebrity chefs on TV!) dunk their measuring cup into a flour container and measure it out that way. This method could result in 30-40% MORE flour than the recipe calls for because it was not properly measured! Too much flour can lead to dense, hard, or tougher baked goods.
For best results: Weigh your flour using a baking scale for THE most accurate results. No time? The next best step is to stir your flour around with a spoon to aerate and sift it lightly. Then, spoon the flour into the measuring cup until full. Level off any remaining flour with a butter knife.
Baking Pans
This is a very controversial subject for me because I am passionate about baking pans and how dramatically they can affect your baked goods! For best, most accurate and optimal results, I recommend using light metal baking pans. Why? Light metal baking pans conduct heat the most evenly and consistently, resulting in a baked good that is baked perfectly at or closely around the baking time listed in the recipe. Dark metal pans conduct heat SUPER fast and very hot, resulting in baked goods with burned or over-done sides and bottoms. Glass pans are my least favorite because they conduct heat the poorest, resulting in baked goods that may be done on the bottom and sides but completely gooey and raw in the center, making baking time much longer than the recipe states.
For best results: Use a light metal/aluminum baking pan or disposable foil pans for the most accurate baking results.
Cake Troubleshooting
Problem #1: Cake collapsed in the middle: If your cake collapsed in the middle during or after baking, there could be one of three possible reasons. First, the leavening agents you used may have been too high in quantity. Second, you opened the oven door too much during baking, which causes a rush of cool air causing the cake to sink. (Likewise, slamming the oven door after putting in the cakes or while checking on them could cause the cakes to fall and sink). Third, the cake wasn’t put in the oven immediately after being poured in the pan.
How to save a sunken cake: Fill the sunken well with softened ice cream and spread out to the edges. Freeze for an ice cream cake. Or, fill the sunken well with fresh or canned fruit filling, whipped cream, pudding or custard, or whipped cream.
Problem #2: Cake is very dense or it didn’t rise properly: If your cake is super dense, this could be due to over-mixing the butter and sugar together or expired leavening. First, check your leavening agents (baking soda and/or baking powder). Once opened, their shelf life is only about 6 or so months, even if the expiration date hasn’t passed. If they aren’t fresh, your cakes won’t rise properly. For dense cakes, this could be due to over-mixing your ingredients. Incorporating too much air while beating the butter and sugar(s) together can cause the air to escape and your cake rise to deflate in the oven, resulting in very dense cakes. Likewise, always ensure you have measured your flour properly. Too much flour can result in a dense, drier cake.
For best results: Always update your leavening agents every 6 or so months if opened. Only cream your butter and sugar mixture for about 1-2 minutes max.
Problem #3: Cake has cracked on top: Possibly due to your oven being too hot or using a dark metal pan instead of a light metal one. Surprisingly, not all ovens are calibrated the same and over time, yours can become miscalibrated. Luckily, there’s an easy fix: by using an oven thermometer, you can check precisely how hot your oven runs and adjust it accordingly.
Problem #4: Cake stuck to the pan: For best results, I always recommend lining your cake pans with parchment paper and spraying the parchment liberally with cooking spray or greasing with shortening and flour. Bundt pans are notorious for sticking because most of the time, the pan’s designs are so intricate that it’s almost impossible to grease all those nooks and crannies. When it comes to Bundt pans, I always very liberally grease with shortening and dust with flour. Tap out the excess flour. If making a chocolate cake in a Bundt pan, replace the flour with cocoa powder.
Problem #5: Cake has a soggy bottom or a sticky top: This is always due to improperly cooling the cakes. For best results, allow the cake to cool in the baking pan for about 10-20 minutes or until pan is slightly cool enough to handle, then carefully transfer the cakes to a wire rack so air can circulate around the cake and cool it evenly. If a cake is frosted or wrapped for storage while still warm, it can cause a soggy bottom or a very sticky top. It is always best to frost or store cakes once they have cooled completely to room temperature.
Problem #6: Cake is super crumbly: This could be due to the cake batter ingredients not being room temperature. When it comes to making biscuits and scones, you want chunks of cold butter… but when it comes to making cake batter, all the ingredients should be room temperature. This is important because technically, cake batter is an emulsion. An emulsion is a combination of ingredients that don’t normally combine together (think of what a bottle of salad dressing looks like before you shake it up – how the oil separates from the vinegar. Once you shake it, you’ve emulsified it). For best results, allow all of your ingredients (butter, eggs, buttermilk/sour cream, dairy) to come to room temperature for at least 30 minutes, preferably for one hour, on the counter before baking.

Cookie Troubleshooting
Problem #1: Cookies are too dark: Too dark cookies are usually due to over-baking or the type of cookie sheet used. First, over-baking: your oven can be miscalibrated, causing it to run a bit too hot. Again, an oven thermometer can help combat this so you know exactly what degree your oven runs. Second, the cookie sheet type is important! Dark metal cookie sheets conduct heat very quickly, resulting in cookies that may be scorched or burned on the bottom. A light metal baking sheet is best.
Problem #2: Cookies are crumbly or dry: This is due to over-baking and/or using too much flour. Again, make sure you’re weighing or properly measuring your flour to ensure your cookies have the correct texture.
Problem #3: Cookies are way too doughy in the middle: This can be caused by an oven that isn’t hot enough, resulting in done edges of the cookie but underdone centers. Try reducing the temperature of your oven and increasing the baking time.
Problem #4: Cookies are tough: This could be because of using too much flour and/or over-mixing the dough. Over-mixing the dough allows more gluten strands to develop which results in a very chewy but tough texture. Just cream together the butter and sugars for about 1 minute.
Problem #5: Cookies flattened into a puddle on the baking sheet: This could be due to a multitude of things, but one is the dough being too wet. When you over-cream the butter and sugars, it can warm the butter up too much, resulting in the butter losing its ability to hold its shape. Again, just mix for about 1-2 minutes at most. Likewise, if the dough is too sticky or wet, add in a Tablespoon or two of additional flour to compensate.
Another reason your cookies spread too much into puddles could be related to pans: was the pan greased and the cookie dough placed on a greased pan? The grease could cause them to spread further. Likewise, putting cookie dough onto a hot pan can cause the cookies to lose their shape.
Too much or expired leavening agents (baking soda and/or powder) can cause them to deflate as well.
Another misconception: your butter! A lot of people are purchasing margarine sticks unknowingly instead of actual butter. Margarine is mostly oil and water so it will definitely melt into puddles. Always make sure your butter is actually butter and not margarine!
Lastly, I recommend scooping your cookies and shaping them to be very tall and stacked rather than discs or smaller balls.
Problem #6: Cookies didn’t spread enough: This could be due to dough being too cold (too cold dough going into the oven may not spread as well, if at all). I recommend bringing your chilled cookie dough to a cooled room temperature – allowing it to sit at room temperature for about 10-15 minutes before baking. It could also be due to reducing the amount of fat in the recipe. For best results, do not decrease the butter, oil, or shortening in the recipe. Lastly, your oven may be miscalibrated and be too cold. Always check the temperature of your oven with an oven thermometer so you can adjust accordingly.
Problem #7: Cookies fall flat after baking: Try not to over-mix your butter and sugars. Cookies naturally deflate some after baking, but usually this can be fixed with keeping your creaming mixture within the 1-2 minute mark.
Problem #8: Cookies are misshapen or have uneven borders: There’s an easy fix for this! Immediately after removing the baking sheets from the oven, take an offset or icing spatula and gently push the edges of the cookie toward the center, aiming for a circular shape. The key is to do this immediately after baking while the dough is still malleable and hot.
Quick Breads
Problem #1: Bread is tough: Definitely due to over-mixing! Just barely allow the dry mixture to mix in with the wet. There should be small streaks of flour but no pockets of flour. It is natural to want to incorporate it perfectly and thoroughly, but too much stirring will make a tough bread.
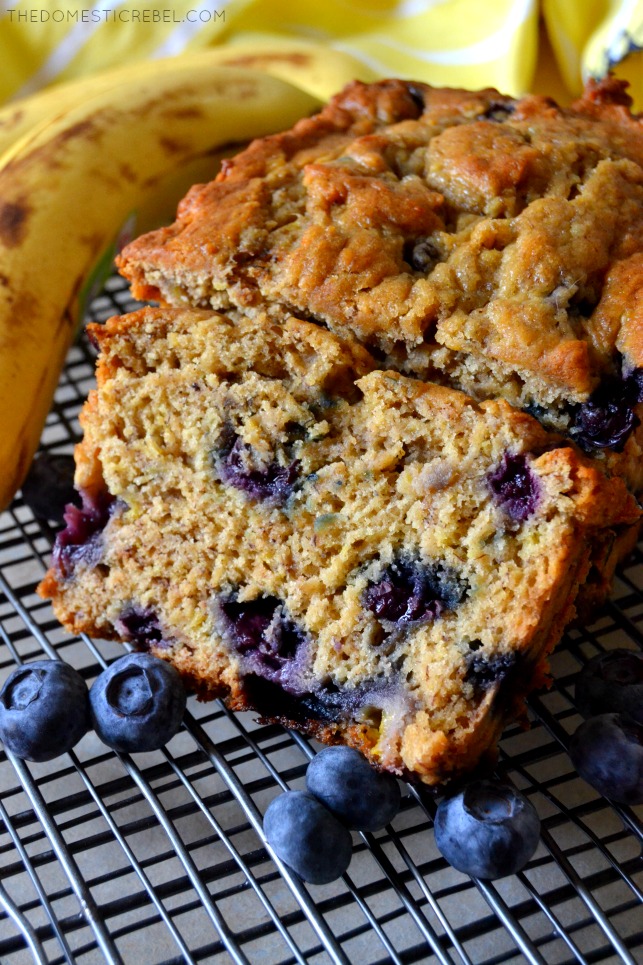
Problem #2: Bread is undercooked in the center: It is 99% to be blamed on your pan. Most people who have issues with my banana bread recipes are baking it in a clear glass pan. Glass does not conduct heat properly at all, resulting in bread that is likely cooked on the bottom and sides but completely undone in the center. I highly recommend baking any quick breads in a light metal baking pan for best results. Likewise, a dark metal pan can result in a bread that is far over-cooked. In a pinch, I love a foil disposable baking pan for consistent results!
Follow the Recipe!
Most important of all, it is paramount to follow the recipe exactly. Always ensure you’ve checked your ingredients expiration dates beforehand, allowed your ingredients to truly come to room temperature, and to properly measure your ingredients. Actually preheat the oven, do not over-mix the butter and sugars, and above all else, have fun!
Have a super sweet day!
xo, Hayley
![]()
