Love toasted panini sandwiches? Ever wondered how to make a lot of them in a jiffy? This super easy sheet pan panini recipe is a lifesaver and perfect for busy weeknights!
Are non-recipe recipe Wednesdays a thing?
Because that’s the situation we have going on today. And I’m kind of liking this idea of a meal so simple you barely need a recipe…but with a result so delicious, you’re going to want to make it week after week after week.
As a strong panini lover (my whole family is in on this trait), paninis are a staple for quick dinners around here. There’s just not a lot to complain about when it comes to toasty soft bread loaded with meat and warm melty cheese.
And while I have a panini press (ok, two) that I love (this one and this one – aff. links), I’ve wondered how I could go about getting a quick weeknight meal of panini sandwiches on the table even faster.
Enter the sheet pan panini.
It’s such a simple concept, but one that has paid off big time the last several months for us.
I’ve used both homemade French bread and a loaf from the store. Both work great for these sandwiches (the homemade bread browns up on the outside crust faster while baking). But I would definitely recommend using a soft French or Italian loaf vs an artisan crusty loaf.
Let’s walk through the easy peasy process so I can highlight just a few more notes, shall we?
Line a large, rimmed baking sheet with parchment paper or foil (probably not necessary, but I do it for easy cleanup) and slice the loaf of bread in half lengthwise. Add a layer of cheese and then meat to that bottom half.
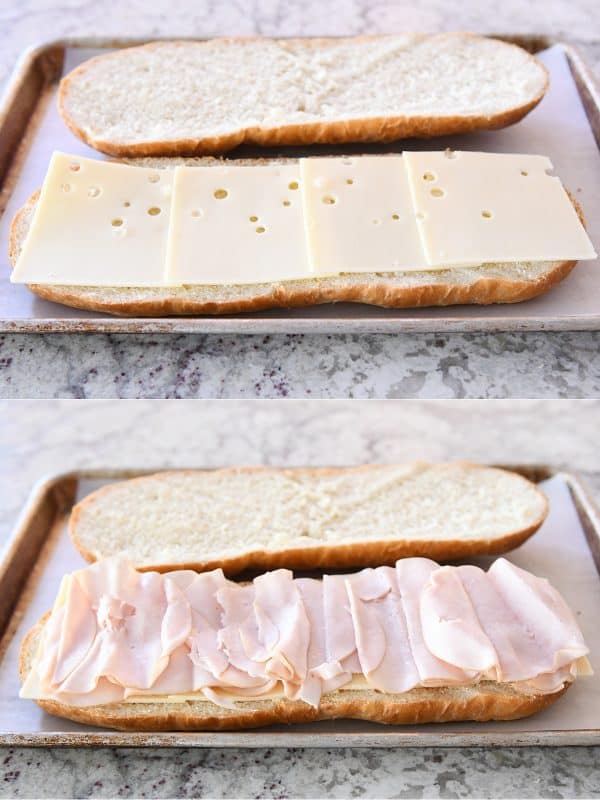
I like to double layer both the meat and cheese with thick loaves of French bread, however, if your loaf is on the thinner side, I think you could get away with a single layer of each.
Speaking of thinner loaves, I think a ciabatta or focaccia bread would work great here! I might have to try that.
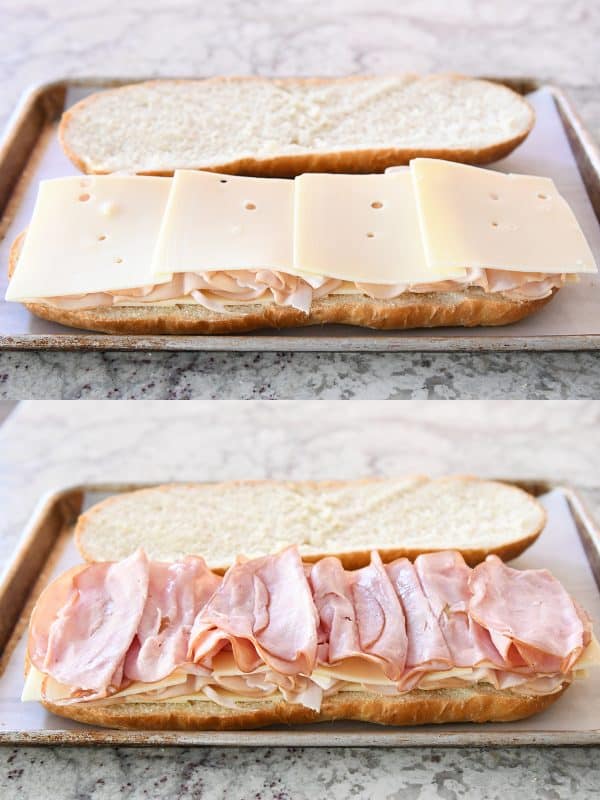
Now slap on that second layer of cheese and meat. I like to end the layering with meat so that the top half of bread rests on the meat and not the cheese. This means that I can bake the sheet pan panini just like this – with meat and cheese only – and then once it’s golden and toasty, everyone can pull off the top piece of bread and add toppings or sauces as needed.
But you could definitely add spreads or sauces or other toppings before baking as well.
Grab the top half of the bread and place it back on top. Beauty!
And take another sheet pan and place it on top of the sandwich. Give it a good press to flatten the sandwich!
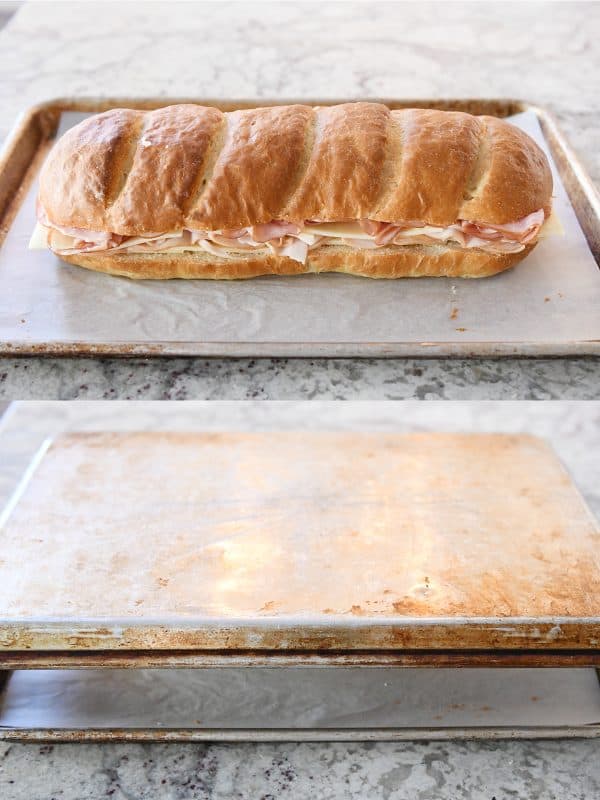
We want to add some weight at this point that can stay on the sheet pan while baking. I use this heavy cast iron pot. You can see how it takes its job seriously smashing that panini right down to appropriate smithereens.
After taking these pictures, I’ve since learned a less bulky option – a heavy pizza stone also makes a great flattening tool! I’m sure you can get creative with other heavy items to use. Just make sure they are oven safe!
Pop that whole contraption into the oven and bake for 20-30 minutes until the sandwich is toasty and cheese is melted. If you want to speed things up, you can take off the heavy pot (or pizza stone or whatever) and the top sheet pan halfway through baking.
The sandwich will be well-pressed at that point and can finish baking (just be aware that the crust may brown up a bit more if doing this).

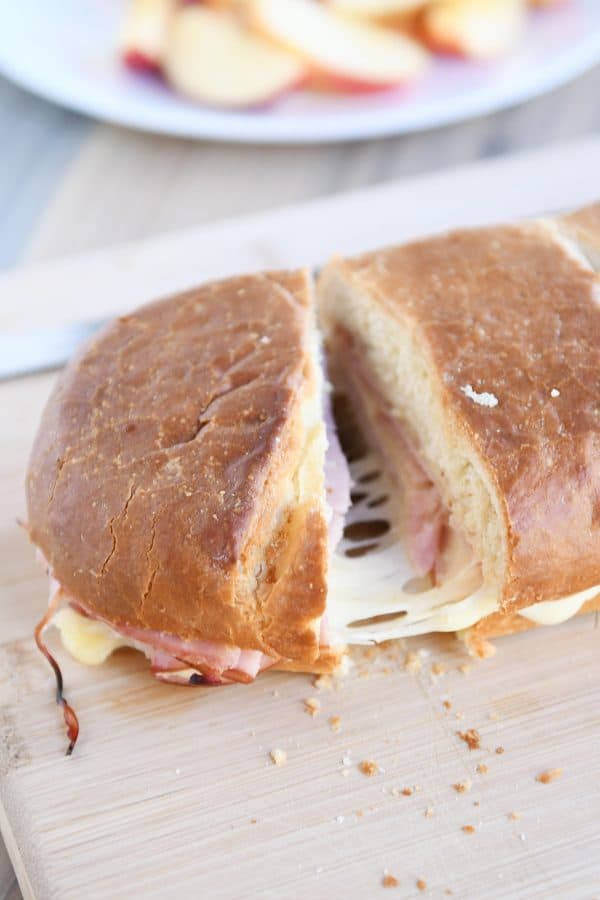
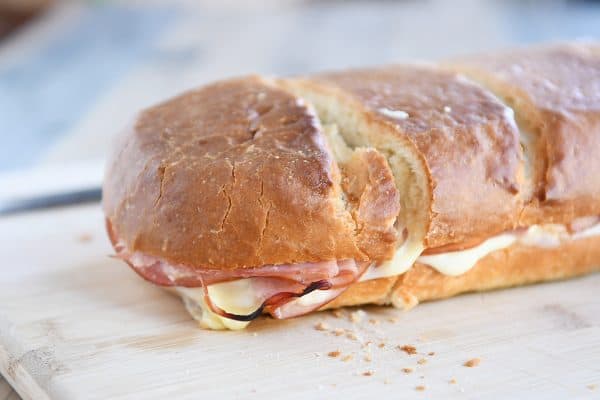
And there you have it! This sheet pan panini is easy, delicious, and actually kind of fun to make!
It goes without saying that the meat and cheese is totally customizable. Go crazy! Make the sheet pan panini of your dream.
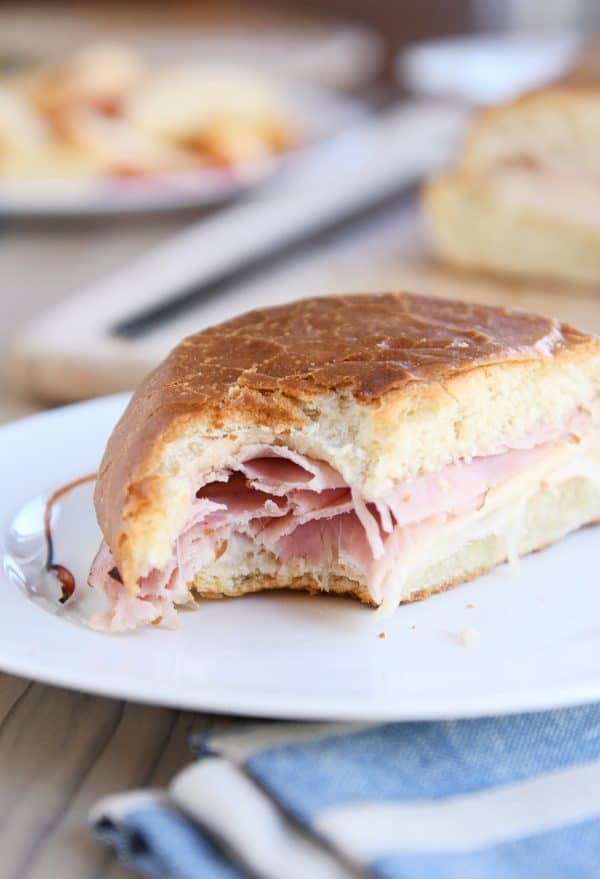
Also, leftovers save pretty darn well. When we have them (not often), we throw the slices of panini in the fridge and then heat them up lightly in the microwave before eating. The bread is slightly softer after rewarming, but still very yummy.
If you’re needing a quick weeknight dinner saver OR your teenager just told you he may or may not have invited 13 friends over for dinner in 20 minutes, this sheet pan panini will fit the bill for all things yummy and easy.
One Year Ago: Soft and Chewy Chocolate Chip {or Chocolate Chunk} Cookies
Two Years Ago: Hawaiian Brownies {Chocolate + Macadamia Nuts}
Three Years Ago: 15-Minute Homemade Root Beer
Four Years Ago: Creamy Glazed Fruit Salad
Five Years Ago: Whole Grain Banana Chocolate Chip Muffins
Yield: 4-6 servings
Easy Sheet Pan Panini

Ingredients:
- 1 loaf soft French or Italian bread (about 10 to 11 inches long)
- Deli meat of choice (ham, roast beef, turkey, salami, etc)
- Thin sliced cheese of choice (Swiss, cheddar, Pepper Jack, etc)
- Sandwich toppings and sauces of choice
Directions:
- Preheat the oven to 350 degrees F.
- Slice loaf of bread in half lengthwise and place the bottom half on a parchment or foil-lined baking sheet.
- Top the bottom half with a layer of cheese followed by a layer of deli meat. Repeat those two layers.
- Place the top half of the bread back onto the sandwich and use another baking sheet to press down on the sandwich. Place a heavy pot or a pizza stone on top of the baking sheet to add weight and put the whole thing in the oven.
- Bake for 20-25 minutes until the sandwich is toasty warm and the cheese is melted. Carefully remove the pot or pizza stone (it will be hot!) and the top baking tray. Transfer the sandwich to a cutting board and cut into slices. The top half of the bread can be easily removed (since there’s no cheese glueing it together) to add any additional toppings or sauces).
Notes:
If you want to speed things up, you can take off the heavy pot (or pizza stone or whatever you used to weight it down) and the top sheet pan halfway through baking. The sandwich will be well-pressed at that point and can finish baking (just be aware that the crust may brown up a bit more if doing this).
All images and text ©.
Follow @melskitchencafe on Instagram and show me the recipes you are making from my blog using the hashtag #melskitchencafe. I love seeing all the goodness you are whipping up in your kitchens!
Recipe Source: from Mel’s Kitchen Cafe
Disclaimer: I am a participant in the Amazon Services LLC Associates Program, an affiliate advertising program designed to provide a means for me to earn fees by linking to Amazon.com and affiliated sites.


