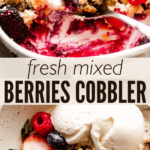

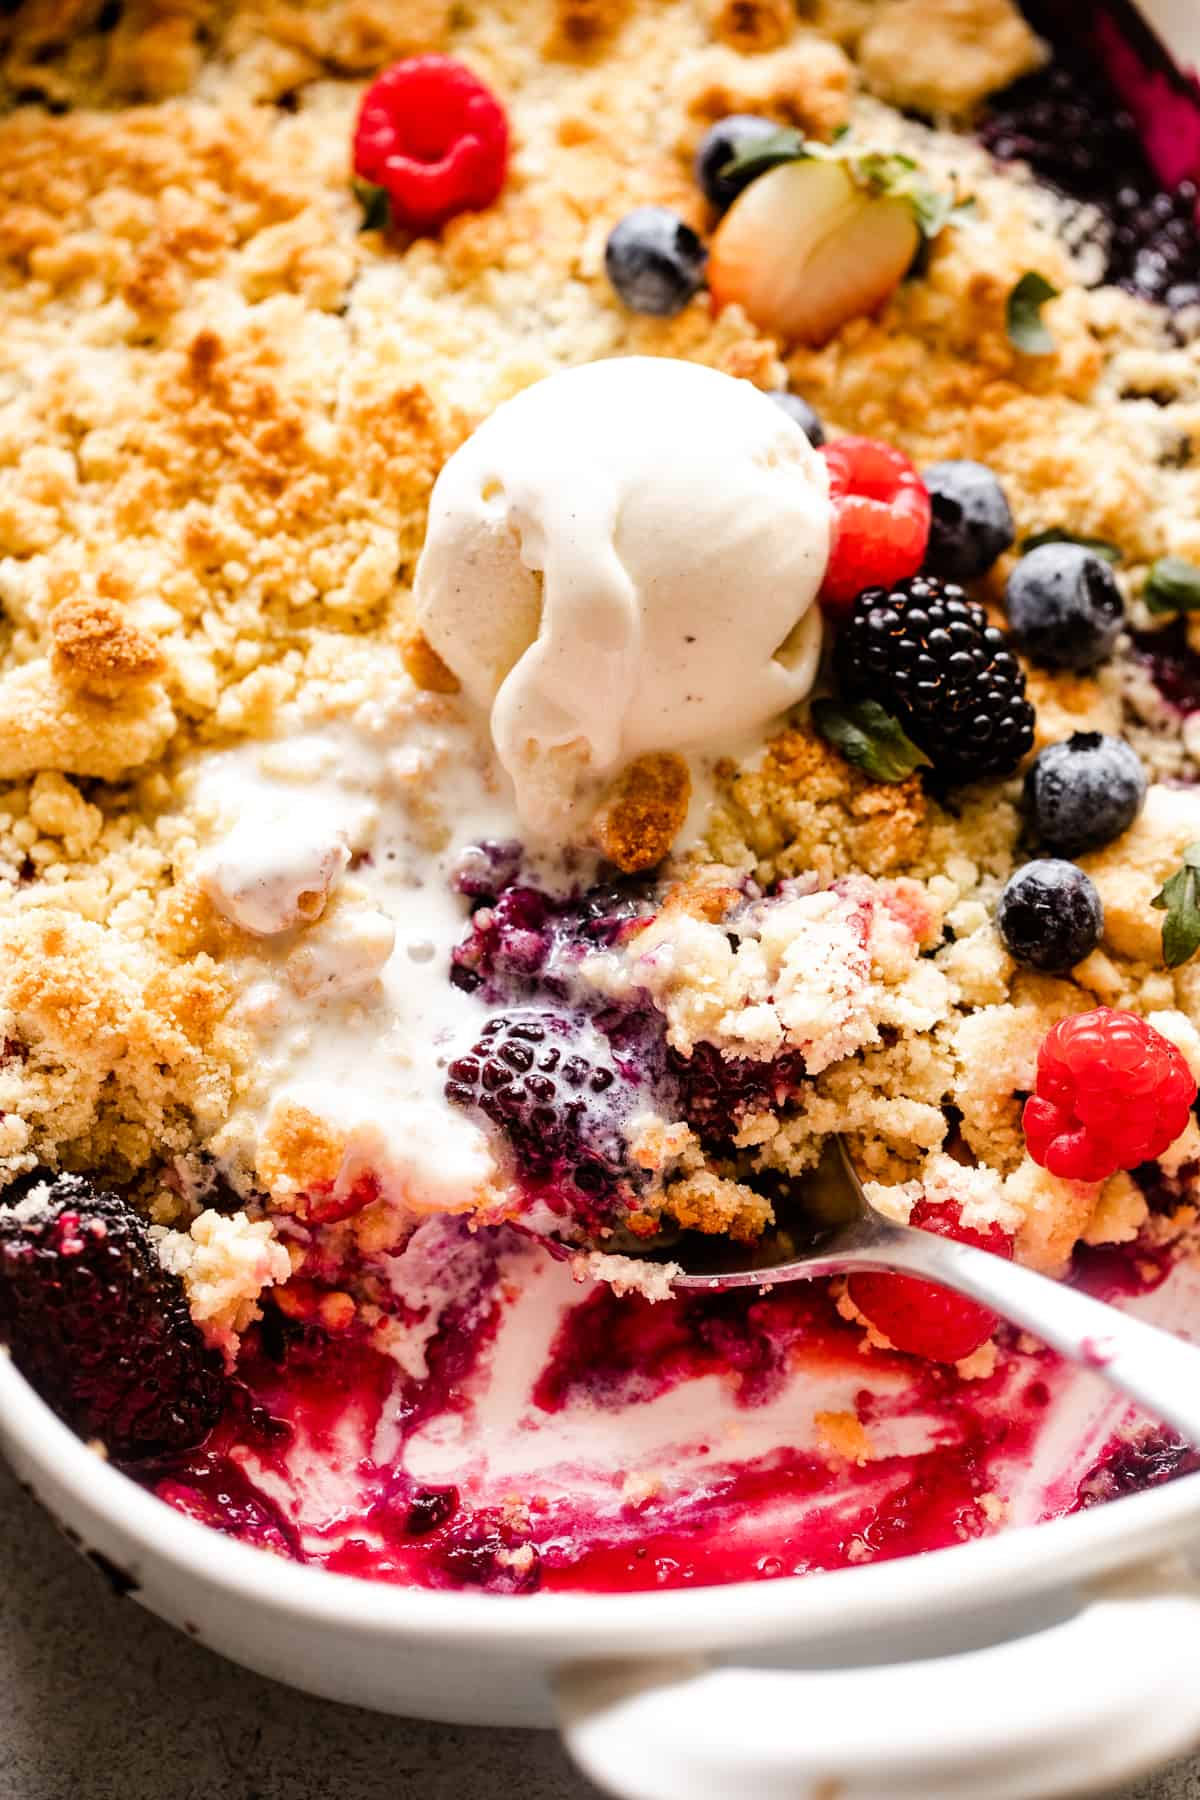
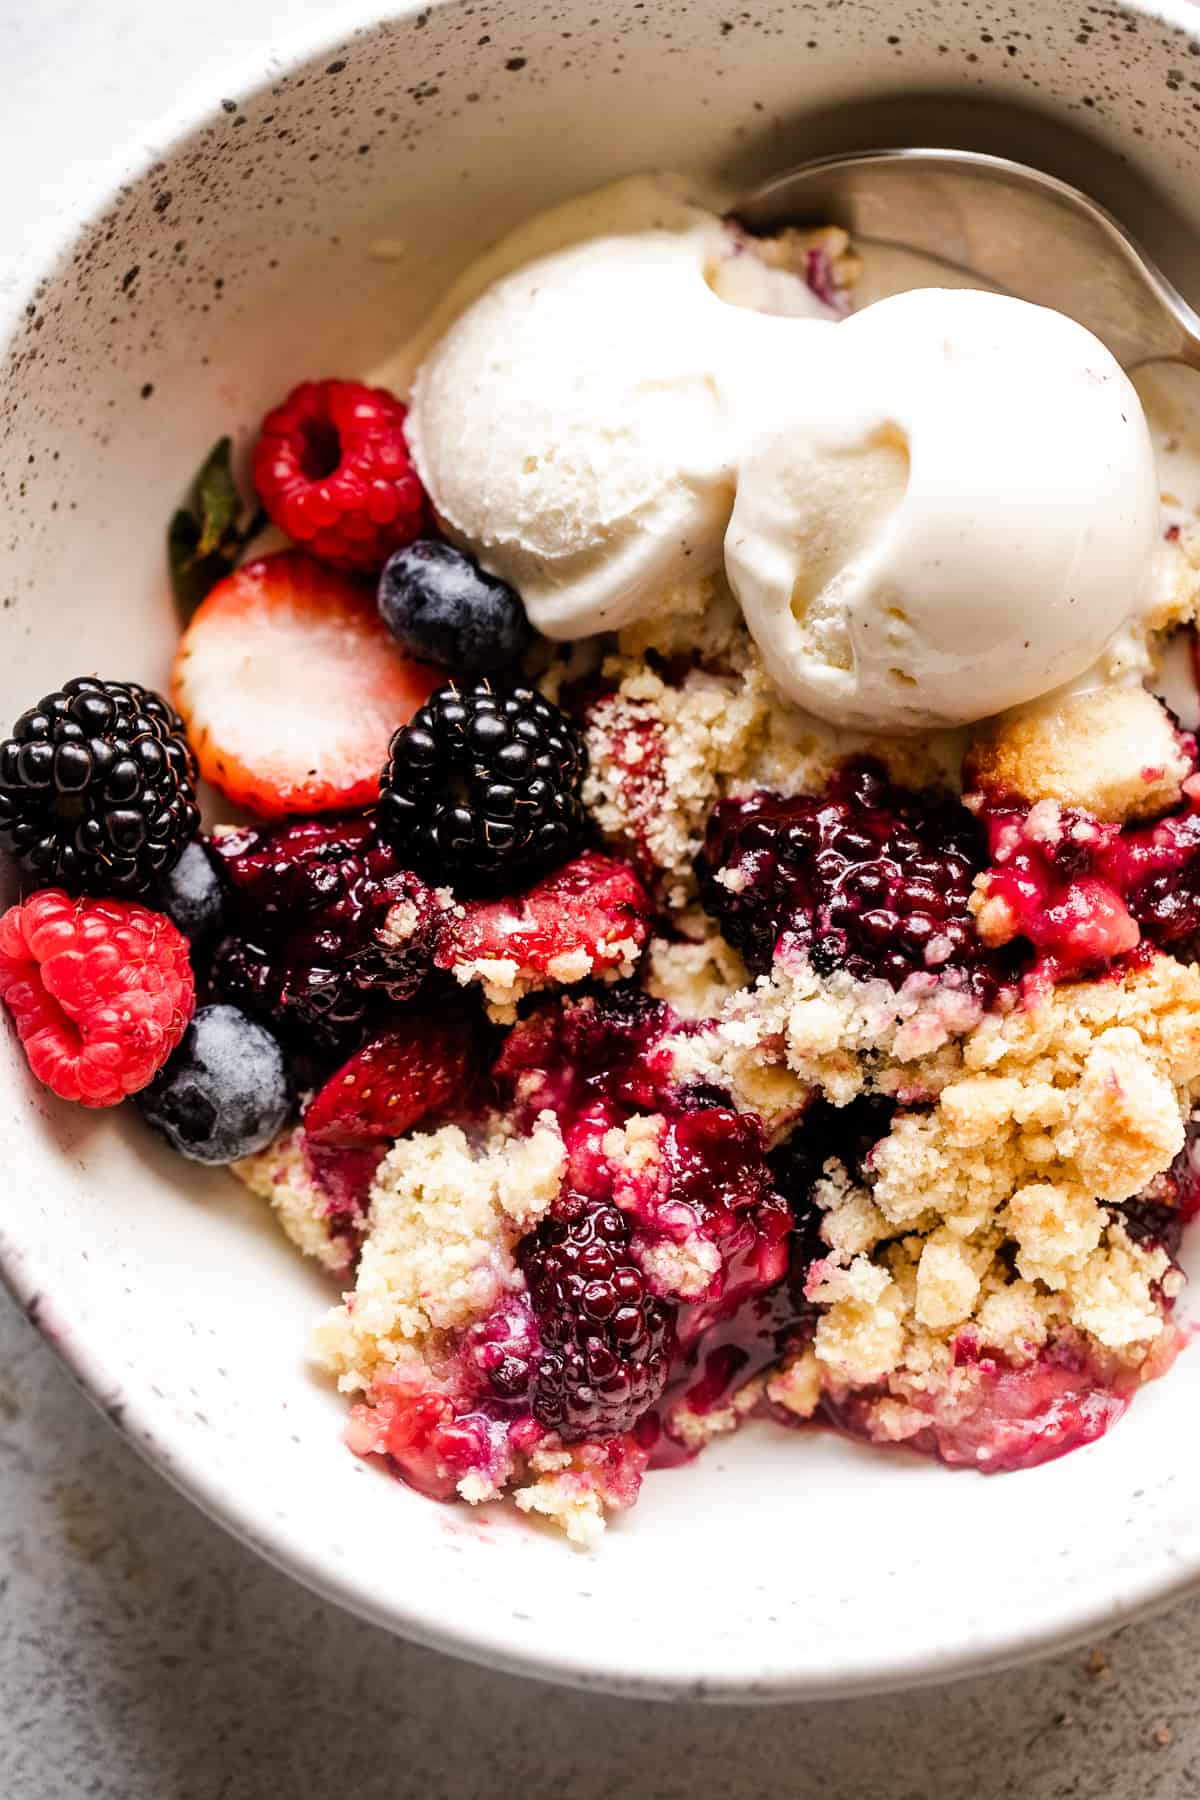
Soak in the last of summer with this delicious and classic Fresh Berries Cobbler! This recipe is super simple to prepare with juicy mixed berries and a crisp, sweet biscuit topping.
A Classic Dessert With Fresh Mixed Berries
Today we’re making the most of my late-season berry harvest with a classic summer dessert. I’m talking ripe and juicy, crispy and buttery, heaven-in-a-spoonful fresh berry cobbler! No better way to enjoy the last day of summer!
Cobblers are one of the best ways to use up fresh fruit. They have to be one of my favorite easy desserts to make, and this one always turns out amazing. I mean, I’ve never met a cobbler I didn’t like, so this tantalizing, fruity, sweet cobbler with berries is no exception!
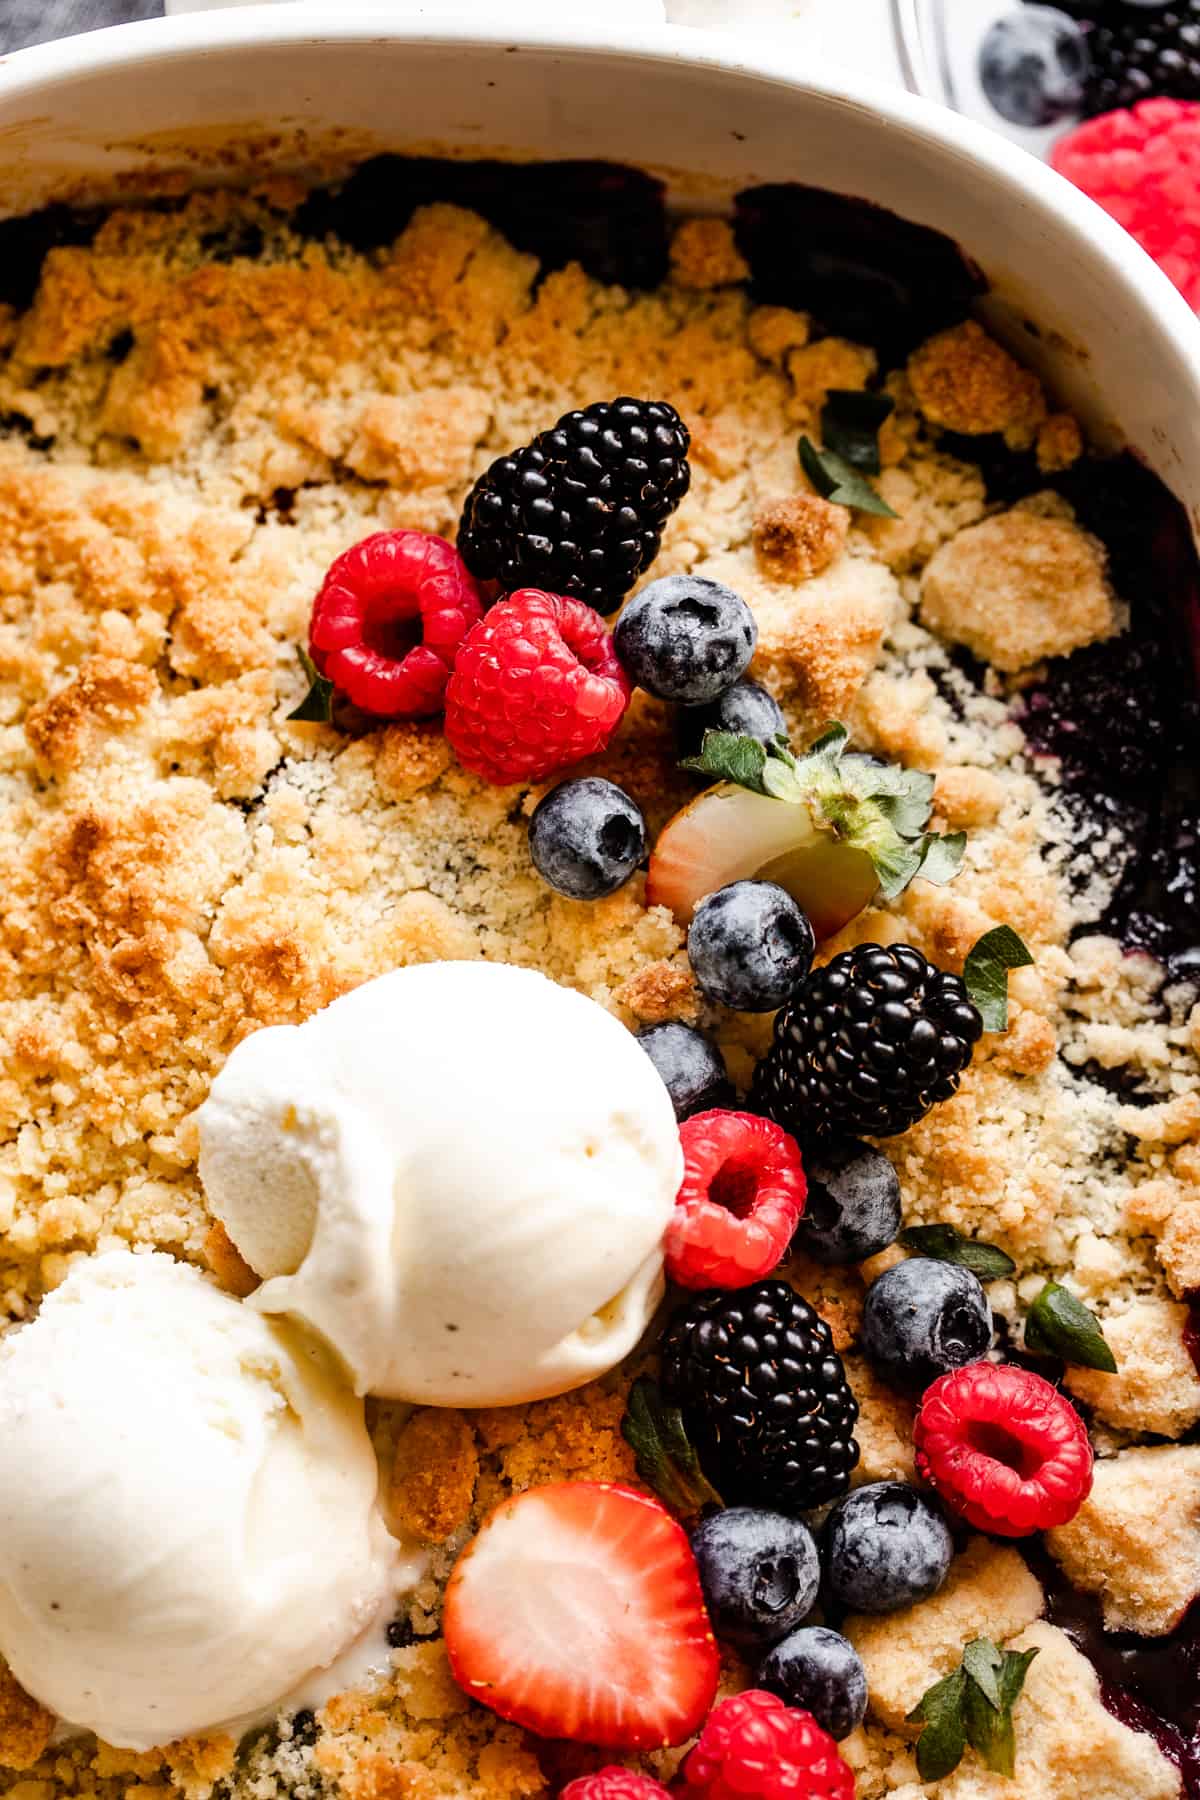
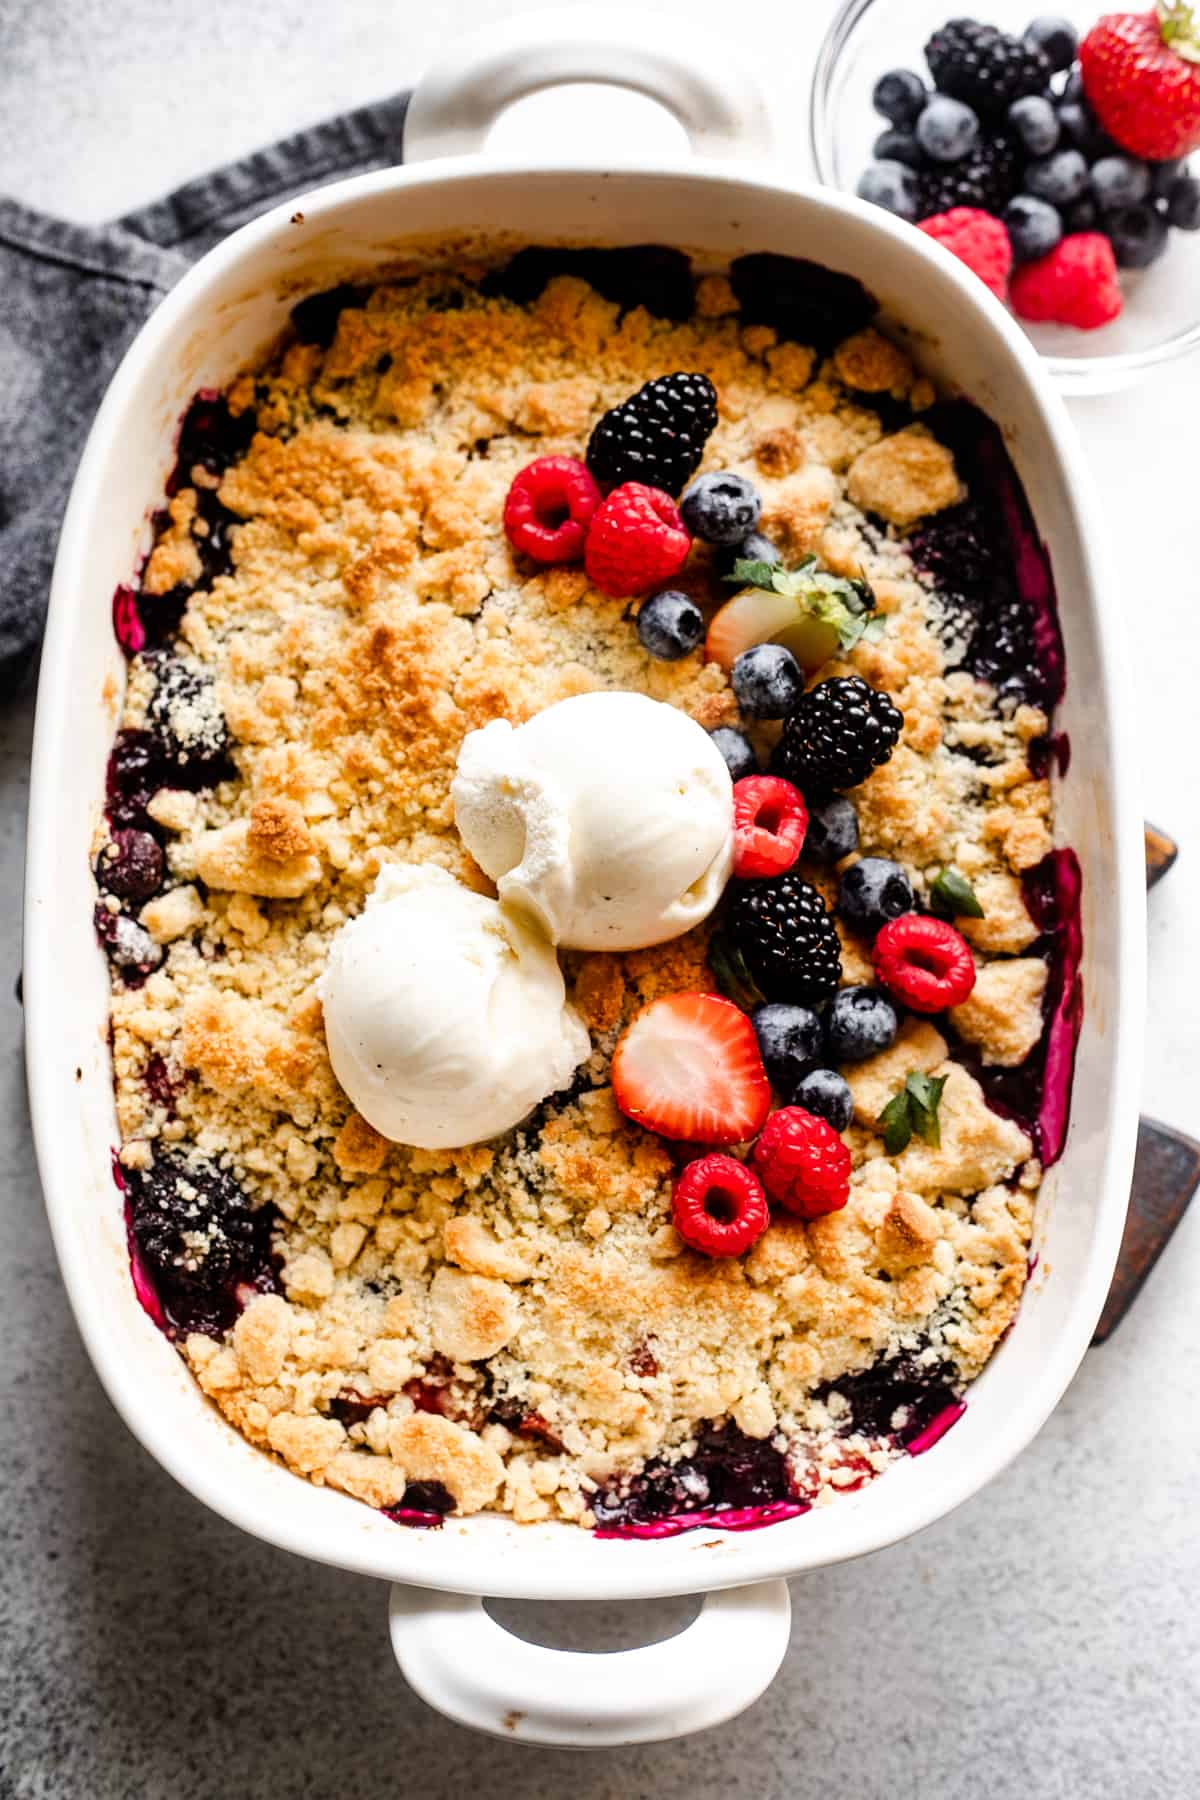
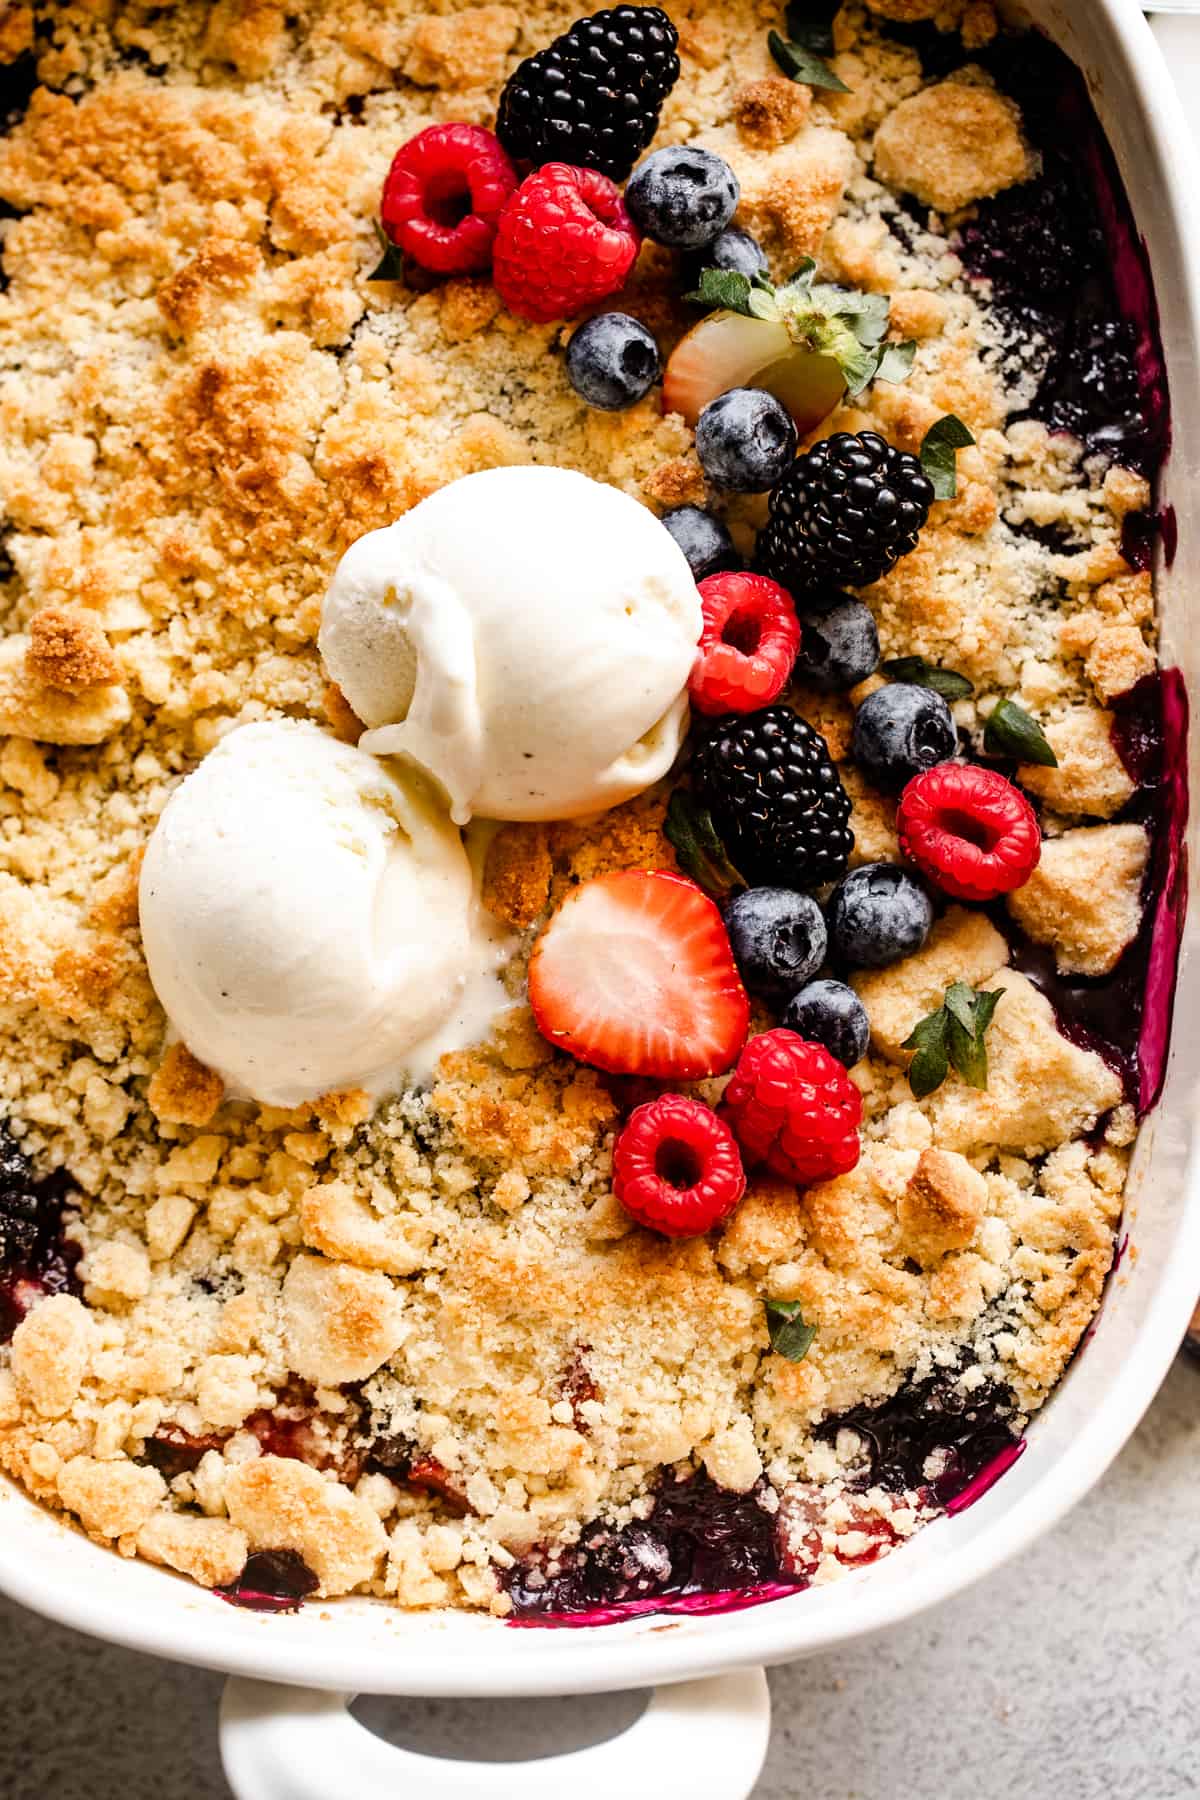
My mixed berry cobbler is topped with my favorite tender and sweet biscuit topping. The batter mixes up in minutes with just a few easy ingredients, ready to be scooped right over the top of that luscious, caramelized berry filling.
The Ingredients
A few of the ingredients in this cobbler overlap between the berry filling and the biscuit topping. Don’t you just love when a recipe keeps it simple?? Below is a roundup of the ingredients, and don’t forget to scroll down to the recipe card for the full amounts you’ll need.
- Mixed Berries: For this cobbler recipe, I use a classic combination of fresh mixed berries for the filling. You can really use any combination of fresh seasonal berries you’d like – strawberries, blueberries, raspberries, or blackberries. You can really make a cobbler out of just about any fruit, see later on for recipe variations!
- Flour: All-purpose flour gives structure to the berry layer, and also forms the base of the batter for the cobbler topping.
- Sugar: I’ve had the best results with granulated sugar, for coating the berries and for sweetening the dough topping. Light brown sugar could also work.
- Butter: Butter adds flavor to the berry filling as well as the dough topping. If you’re using salted butter for this recipe, you may want to leave out any added salt in the filling and topping, to prevent the cobbler from turning out too salty.
- Baking Powder: Helps the cobbler dough rise.
- Salt
- Vanilla Extract: Pure vanilla extract gives the cobbler topping extra flavor.
How to Make Fresh Berry Cobbler
While your oven is preheating to 350˚F, get your baking dish greased up with a pat of butter. Next, give your berries a rinse and gently dry them. Once you’re prepped and ready, it’s time to make some fresh berries cobbler:
- Prep the Berries: Toss the mixed berries with flour, sugar, and a pinch of salt. You can toss them right in the greased baking dish you’ll be using to bake your cobbler! Next, sprinkle over the chopped butter bits. Pop the berry layer into the oven to pre-bake until it’s nice and bubbly, then stir.
- Mix the Topping: While your berries are baking, go ahead and whip together the dry topping ingredients, leaving out the butter and vanilla. In a separate dish, melt the butter and stir in the vanilla extract, then combine this butter mixture with the flour mixture. Stir everything together until you have a smooth, crumbly batter.
- Assemble: Now it’s time to get a little messy! I use my hands to scoop and drop clumps of batter over the berries. One less spoon to clean, amiright? Of course, you can use a spoon to do this if you prefer. Once the batter is arranged over the top of the berries, it’s time to get your cobbler back in the oven.
- Bake: Bake the cobbler for about 20 minutes or so, or until the biscuit topping is gorgeous and browned. If you’re not sure how to tell when your cobbler is done baking, I’ve included some handy tips in the section below!
- Once the cobbler is out of the oven, take it out and let it stand for a bit. 1) This avoids the potential for scorching the roof of your mouth with hot berries (yikes) and 2) it lets the cobbler firm up for serving.
How Do You Know When Fruit Cobbler Is Done?
So, if a cobbler filling doesn’t set up until it’s cooled, and the underside of the topping is a mystery, how do you tell when your cobbler is done?
- By Eye: The first way to tell if a fruit cobbler is finished baking is by the biscuit topping. The topping should be crisped up, and the color should be on the browner end of golden brown, with the filling bubbling around the edges.
- By Temperature: If you’re still unsure, your next best bet is to take the cobbler’s temperature. A kitchen thermometer inserted into the center of the cobbler, at the thickest part of the topping, should read in at 200ºF.
Tips and Tricks
A fresh fruit cobbler is one of the easiest desserts you’ll ever make! Here are my tips to make this recipe even more of a success:
- Don’t Skip the Flour: Ok, so this might be obvious in the topping. But since fresh fruit holds a lot of water, coating the berries in starch, such as flour, prevents the cobbler from becoming overly soupy. Cornstarch will also work to thicken the filling in place of flour.
- Can I Use Canned Fruit?: I usually suggest steering clear of canned fruit when making cobbler (with some exceptions, such as canned peaches). Many canned fruits come in a watery syrup that tends to turn the filling gummy and overly sweet.
- Leave Gaps In the Topping: Try not to completely cover your berry filling with the biscuit batter. You want some of those beautiful berries to poke through for that authentic, classic cobbler look. Another reason isn’t just for the aesthetics – a cobbler with overcrowded topping will trap steam inside, and turn out wetter than expected. Give those berries gaps to breathe.
Recipe Variations
You can’t go wrong with a classic berry cobbler recipe. But mixing things up never hurt anybody, either! Let’s have a look at some ways you can change up this recipe:
- Frozen Berry Cobbler: Yes, this cobbler can be made with frozen berries, too. The texture may vary slightly, though, and I recommend thawing and draining the berries before you begin.
- Other Fruit: Just about any seasonal fruit can be used to make a homemade cobbler. Try other variations like fresh Peach Cobbler in the summer, or Apple Cobbler in the fall.
- Spices: I’ve kept this easy cobbler recipe Plain Jane, and it still tastes amazing! If you’d like to spice up your cobbler, add in a pinch of cinnamon, nutmeg, or mixed spice.
- Lemon: A squeeze of fresh lemon over the baked berries brightens the flavors of the cobbler.
- Booze: You heard me. Sprinkle a splash of rum or brandy into the berry filling for even more added flavor.
- Crunch: Dusting the top of your cobbler batter with coarse or sanding sugar gives the biscuit dough a delightful crunch.
- Gluten-Free: If you’d like to make this a gluten-free cobbler, swap out the regular all-purpose flour with your preferred gluten-free flour.
Storing and Reheating
- Once baked, this cobbler can be left out at room temperature for up to 2 days.
- Alternatively, store this berry cobbler covered in the fridge for up to 4 days. I recommend leaving it in the baking dish to cool completely, and wrapping it tightly in plastic wrap (unless your dish already has a lid). This saves the trouble of transferring the cobbler to an airtight container!
- For longer-term storage, you can also freeze berry cobbler. Once the cobbler is completely cool, wrap it with plastic wrap plus a layer of foil, and store it frozen for up to 6 months. Thaw the cobbler in the fridge before reheating.
- I like to reheat my cobbler in the oven at 375ºF for 10 minutes or so until the top is warm and crispy again and the berries are hot throughout.
Can Cobbler Be Made Ahead of Time?
Yes! Most fruit cobblers can be made in advance, including this berry cobbler.
- You can prepare both the berries and topping ahead of time to keep in the fridge for up to 3 days. However, the filling and topping should be stored separately until you’re ready to bake. This keeps the topping from becoming soggy.
- You can also freeze the berries and biscuit batter separately for up to 3 months. Thaw both overnight in the fridge before you use them.
ENJOY!
-
Preheat the oven to 350˚F.
-
Lightly grease a 9×13 baking dish with a bit of butter.
-
Wash the berries, then arrange the berries in the baking dish; sprinkle with flour, sugar, and salt, and mix to combine.
-
Dot with the chopped butter and bake for 18 to 22 minutes, or until bubbly around the edges. Remove from oven and stir.
-
In the meantime, whisk together the ingredients for the topping; flour, sugar, baking powder, and salt.
-
Melt the butter and then whisk in the vanilla extract.
-
Pour the melted butter mixture over the flour mixture and stir until everything is well combined and the batter is crumbly.
-
Using your hands, sprinkle the batter over the berries.
-
Bake for 20 to 25 more minutes, or until the top is golden brown.
-
Remove from oven and let stand 10 to 15 minutes.
-
Serve warm with ice cream.
Calories: 442 kcal | Carbohydrates: 64 g | Protein: 4 g | Fat: 20 g | Saturated Fat: 12 g | Polyunsaturated Fat: 1 g | Monounsaturated Fat: 5 g | Trans Fat: 1 g | Cholesterol: 51 mg | Sodium: 252 mg | Potassium: 186 mg | Fiber: 5 g | Sugar: 38 g | Vitamin A: 661 IU | Vitamin C: 4 mg | Calcium: 51 mg | Iron: 2 mg | Net Carbs: 59 g
Nutritional info is an estimate and provided as courtesy. Values may vary according to the ingredients and tools used. Please use your preferred nutritional calculator for more detailed info.
