A smooth and creamy ice cream with dollops of Biscoff spread is going to become your new favorite summertime treat! No-Churn Biscoff Ice Cream is so easy to make and even easier to love.

It’s time for some no-churn ice cream! This is an easy dessert to make, and it’s simple enough that you can get the whole family involved. They will love having their own homemade ice cream!
Our family LOVES all things Biscoff, have you tried our favorite Biscoff cookies? Yeah, they are divine! Well, just wait until you try this Biscoff ice cream, you are going to be in Biscoff heaven! It is the perfect summer treat!
No-Churn Ice Cream
No-churn means you don’t need an ice cream machine to make ice cream and you don’t start with the traditional egg custard base. The secret ingredients are heavy whipping cream and sweetened condensed milk. They come together to make a super creamy ice cream. It’s basically magic ice cream!
You only need a mixer and some freezer space to make creamy No-Churn Biscoff Ice Cream. You won’t ever go back to store-bought once you have homemade ice cream in your life!
What is Biscoff Spread?
Biscoff Spread is a sweet creamy spread made with Biscoff cookies that is similar in texture to peanut butter. It’s perfectly spiced with cinnamon, nutmeg, ginger, allspice, and cloves and has a caramel flavor. It is basically heaven in a jar.
If you haven’t tried it, you are missing out. It is good eaten by the spoonful but even better in ice cream form!
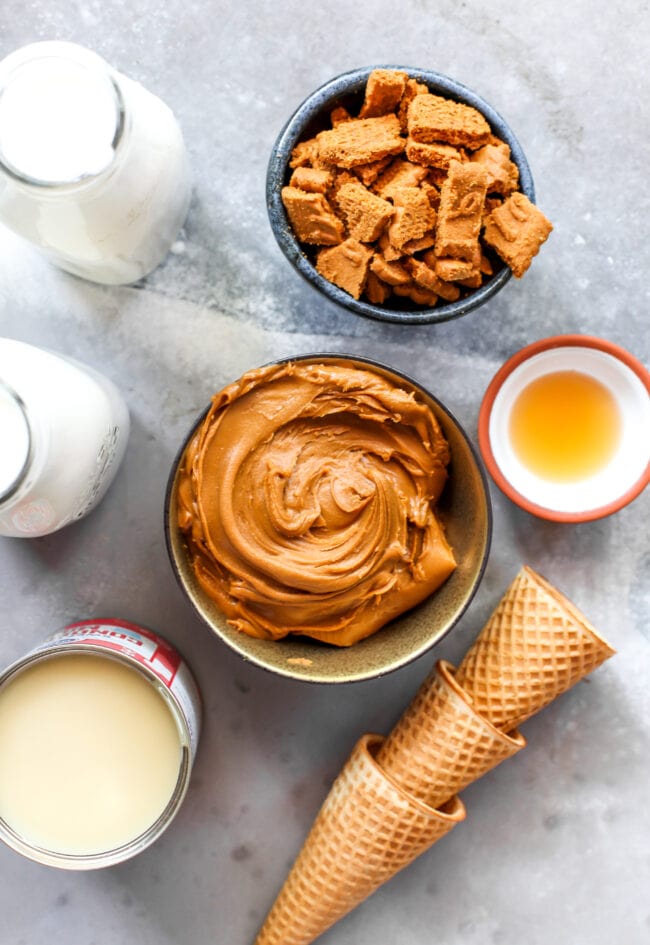
Ice Cream Ingredients
This is a super short ingredient list! Put these items on your grocery list and make this delicious ice cream ASAP. You won’t regret it!
- Sweetened condensed milk– use full fat for the creamiest ice cream.
- Biscoff spread– you can find Biscoff spread at most grocery stores. Look by the peanut butter. You can also use Trader Joe’s Cookie Butter.
- Heavy whipping cream– a must for creamy ice cream!
- Vanilla extract– just a splash!
- Biscoff cookies– Chopped up Biscoff cookies are stirred into the ice cream and sprinkled on top for garnish. Look for the cookies in the cookie aisle. Yes, these are the tasty cookies you get on Delta flights:)
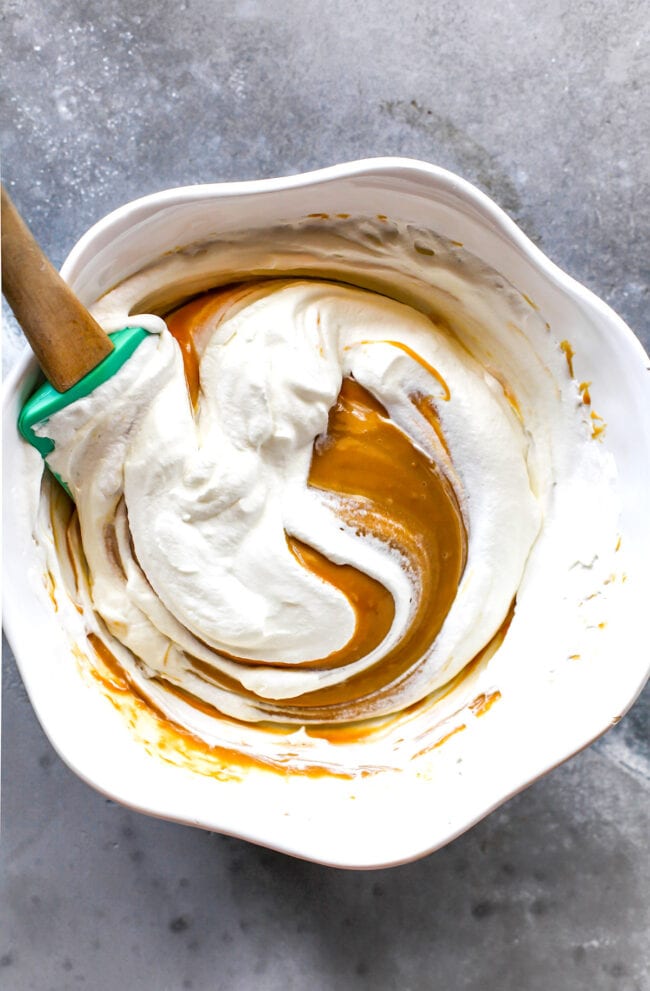
How to Make Biscoff Ice Cream
This is such a fun way to make ice cream without any special equipment! Homemade ice cream just tastes better, doesn’t it? Follow these step-by-step instructions to create your new favorite treat for a hot summer evening!
- Start with a large bowl, sweetened condensed milk, and half of the Biscoff spread. Stir everything together until it’s nice and smooth, then set it aside for later.
- Microwave the remaining Biscoff spread until it’s slightly melted and smooth. It should only take about 30 seconds! Set it aside to cool a bit.
- Now get your mixer out! With the whisk attachment, beat the heavy cream and vanilla until stiff peaks form. It should hold the shape when you pull the whisk out!
- Fold the whipped cream into the sweetened condensed milk mixture, then stir in a cup of chopped Biscoff cookies.
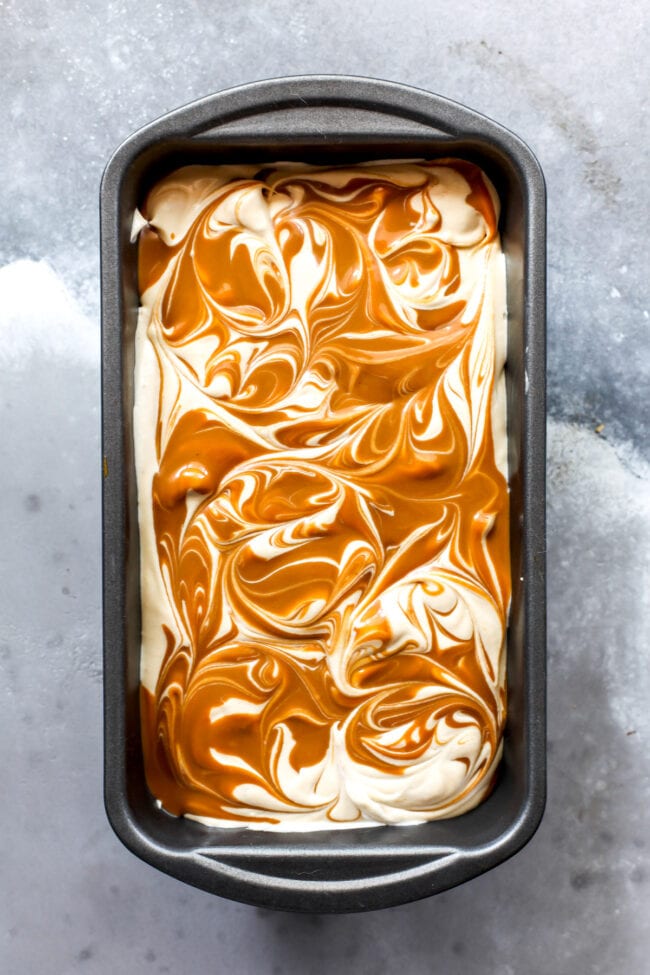
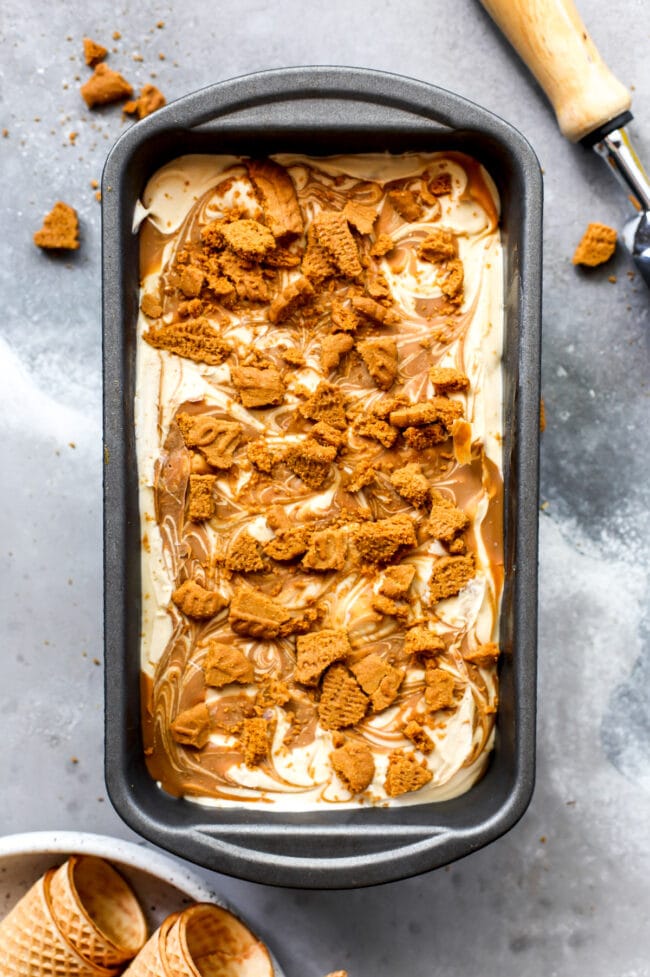
- Let’s layer! Get a 9×5-inch loaf pan (or a freezer-safe container of similar size). Put ⅓ of the creamy mixture, then dollops of the melty Biscoff spread. Add another ⅓ of the cream, then more Biscoff spread, then the rest of the cream. Use a knife to swirl everything together. Top it off with some more chopped Biscoff cookies!
- Cover it tightly with plastic wrap or a lid. Freeze for 6-8 hours, or until the ice cream is firm. Now you have delicious homemade ice cream ready in your freezer!
How Long Does Homemade Ice Cream Last?
You can store this homemade ice cream in the freezer for up to one month. Note, ours never lasts that long:) Make sure it is kept in a tightly sealed container or cover the pan tightly to keep it from getting freezer burnt.
Let the ice cream sit out for a couple of minutes on the counter before scooping for the best texture. This will also make it easier to scoop.
More Ice Cream Recipes

- 14 oz sweetened condensed milk
- 1 cup Biscoff spread, divided
- 2 cups heavy whipping cream
- ½ teaspoon vanilla extract
- 1 cup chopped Biscoff cookies
- Garnish: additional chopped Biscoff cookies
-
In a large bowl, combine the sweetened condensed milk and 1/2 cup of the Biscoff spread. Stir until smooth. Set aside.
-
Place the remaining 1/2 cup of Biscoff spread in a microwave safe bowl and microwave for 30 seconds, or until slightly melted and smooth. Set aside to cool slightly.
-
In the bowl of an electric mixer fitted with the whisk attachment, beat the heavy cream and vanilla on high speed until stiff peaks form.
-
Fold the whipped cream into the Biscoff and sweetened condensed milk mixture until combined. Gently stir in 1 cup of the chopped Biscoff cookies.
-
Layer the ice cream in a 9×5-inch loaf pan or freezer-safe container. Start with about 1/3 of the mixture and then add dollops of the melted Biscoff spread. Top with more of the ice cream mixture and more dollops of Biscoff and so on until all of the ice cream and Biscoff is in the container. Use a knife to gently swirl the mixture. Top with additional chopped Biscoff cookies.
-
Cover the pan tightly with plastic wrap. If your container has a lid, you can also put the lid on. Freeze for 6 to 8 hours, or until the ice cream is firm. Scoop and enjoy!
Nutrition Facts
No-Churn Biscoff Ice Cream
Amount Per Serving
Calories 412 Calories from Fat 252
% Daily Value*
Fat 28g43%
Saturated Fat 14g70%
Cholesterol 68mg23%
Sodium 107mg4%
Potassium 172mg5%
Carbohydrates 42g14%
Fiber 1g4%
Sugar 28g31%
Protein 5g10%
Vitamin A 688IU14%
Vitamin C 1mg1%
Calcium 127mg13%
Iron 1mg6%
* Percent Daily Values are based on a 2000 calorie diet.
Photos by Dishing Out Health
Thanks for Sharing!
If you make this recipe, please leave a star rating and comment below! You can also share a picture on Instagram! Tag @twopeasandpod and use the hashtag #twopeasandtheirpod.

