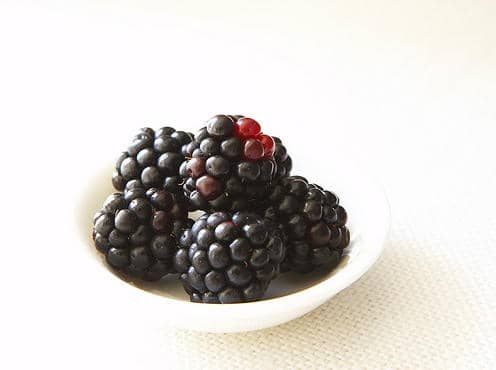
Learn how to make blackberry jelly the old-fashioned way with this vintage recipe.

This image courtesy of Joseph DeLeo
Editor’s Note: Learning how to make jelly can be incredibly useful when spring and summer roll around — not to mention delicious. This Old-Fashioned Blackberry Jelly tastes best when using wild blackberries and gathering them is perfect excuse to spend some time outdoors. This particular blackberry jelly recipe also calls for lemon juice, resulting in a tart, fresh flavor. An old-fashioned recipe like this is a great activity to do with kids — they’ll especially love helping to gather the blackberries! If you’re looking for a way to use up your fresh berries before they go bad, then this blackberry recipe’s for you. In addition to learning how to make blackberry jelly, this recipe includes instructions from the author on canning.
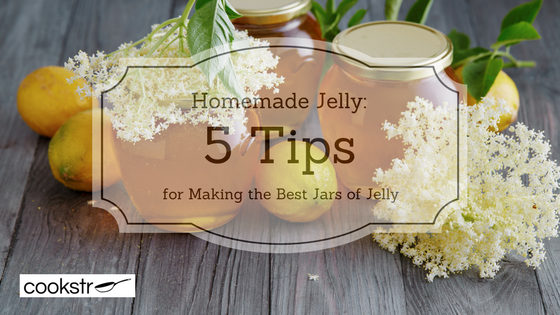
Be sure to scroll down for more jam and jelly recipes!
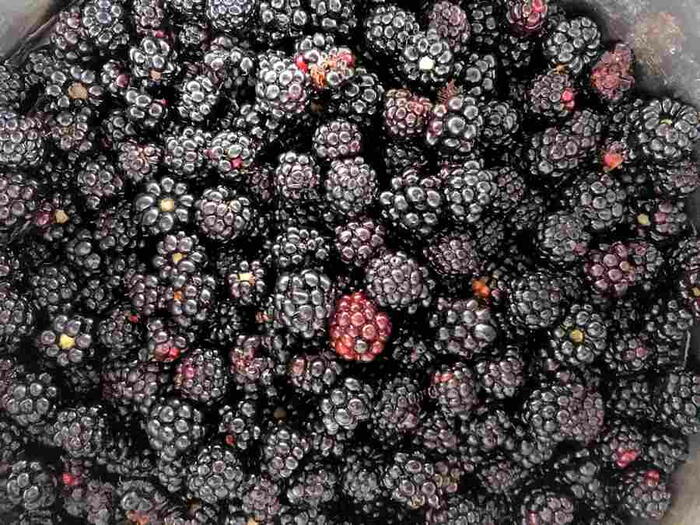
One of the most compelling reasons to pick your own blackberries is that you can snag a few tart, just-underripe berries for making jelly without added commercial pectin. Store-bought or even prepicked produce is likely to be all ripe, sweet, and not as good for jelly making. The jelly’s even better made with wild berries, whose seeds add a touch of bitterness to the juice that I think pleasantly offsets the sweetness.
Cooking MethodCanning, Preserving
Five Ingredients or LessYes
Taste and TextureFruity, Sweet, Tart
Type of DishCondiments, Fruit
Ingredients
- 4 pounds blackberries, preferably wild, some of them tart and not quite ripe, gently rinsed
- About 3 cups sugar
- 3 tablespoons strained fresh lemon juice
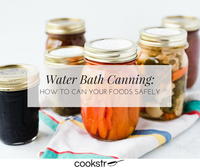
Curious about water bath canning? Check out our complete guide to Water Bath Canning: How to Can Your Foods Safely
Instructions
-
Put the blackberries in a wide, 6- to a-quart preserving pan and crush them with your hands. Add ½ cup water and bring to a boil; boil until the berries are tender and have released their juices, about 5 minutes.
-
Set a large, very-fine-mesh sieve (or jelly bag) over a deep bowl or pot. Pour the blackberries into the sieve and let drain for 30 minutes, stirring occasionally but not pressing down too hard on the solids; discard the solids. Measure the juice; you should have about 4 cups.
-
Prepare for water-bath canning: Sterilize the jars and keep them hot in the canning pot, put a small plate in the freezer, and put the flat lids in a heatproof bowl (see Notes for details).
-
Rinse the preserving pan and pour in the blackberry juice. Add ¾ cup sugar for each cup of juice, then add the lemon juice. Bring to a boil over high heat and cook, stirring occasionally, until the mixture registers about 220 degrees F on a candy thermometer or a small dab of it spooned onto the chilled plate and returned to the freezer for a minute wrinkles when you nudge it, about 20 minutes.
-
Ladle boiling water from the canning pot into the bowl with the lids. Using a jar lifter, remove the sterilized jars from the canning pot, carefully pouring the water from each one back into the pot, and place them upright on a folded towel. Drain the water off the jar lids.
-
Ladle the hot jelly into the jars, leaving ¼ inch headspace at the top. Use a damp paper towel to wipe the rims of the jars, then put a flat lid and ring on each jar, adjusting the ring so that it’s just finger-tight. Return the jars to the water in the canning pot, making sure the water covers the jars by at least 1 inch. Bring to a boil, and boil for 5 minutes to process. Remove the jars to a folded towel and do not disturb for 12 hours. After 1 hour, check that the lids have sealed by pressing down on the center of each; if it can be pushed down, it hasn’t sealed, and the jar should be refrigerated immediately. Label the sealed jars and store.
Canning Step by Step:
-
Prepare for water-bath canning: It will probably take half an hour or so to bring the water in your canning pot to a boil, so fill it up and put it on the heat well in advance (when the recipe says “Prepare for water-bath canning” is a good time). Wash the jars well, then submerge them in the water as it heats up. If the recipe says to sterilize the jars, make sure the water covering the jars has been at a full boil for at least 10 minutes before pulling them out and filling them. If the filled jars will be processed for 10 minutes or longer, there’s no need to sterilize them first, as they’ll be sterilized during processing.
Clear off some counter or table space by the stovetop and set two folded towels nearby: one to put hot empty jars on for filling, and one to put the filled jars on when they come out of the canning pot (the latter should be in an out-of-the-way spot, if possible, where the jars can remain undisturbed for 12 hours). The towels will absorb heat from the jars and protect the counter surfaces. I also put a hot pad near the stovetop to put the preserving pan on when I’m ladling preserves or hot vinegar brine into the jars.
Gather everything you’ll need:
* a jar lifter or tongs with rubber bands wrapped around the ends
* a small heatproof bowl or saucepan (put new, clean flat jar lids in it, and pile the clean metal jar rings next to it)
* a ladle or 1-cup measure for ladling preserves or brine into the jars
* a wide-mouth funnel for filling the jars (this is optional, but it helps prevent mishaps)
* a wooden or plastic chopstick or small, thin plastic spatula for removing air bubbles around the inside of each jar
* a clean paper towel for wiping the jar rims after filling -
Make the preserve or pickle as described in the recipe.
-
Fill the jars: When the preserve is ready or the pickle brine has come to a boil, remove it from the heat.
Use the jar lifter to lift the hot jars out of the boiling or simmering water, empty the water back into the pot, and set the jars upright on one of the folded towels. Ladle hot water from the canning pot into the bowl with the jar lids. (I usually just pour in the hot water from the first jar I remove from the canning pot.) This will soften the rubberized ring of sealing compound around the underside of each lid so that it adheres to the jars and seals properly. Make sure that the lids aren’t stacked tightly together, which can prevent water from coming into contact with the seal. You don’t have to actually simmer the lids on the stovetop, and you shouldn’t boil them (this could damage the sealing compound); as long as the water is about at a simmer when you ladle it in, they’ll be fine.
If filling with fruit preserves, put the funnel in the first hot jar and ladle in the hot preserves, keeping the ladle as low and close to the funnel as possible to prevent too many bubbles from forming in the jar. Fill to ¼ inch from the top. Repeat with the remaining jars, then put the lids on and process as below.If filling with uncooked room-temperature vegetables or fruit (what’s known as “raw pack”), just pack them in the jars, not too tightly unless the recipe says to pack tightly. There should be enough space between the solids for the brine or syrup to flow around them to heat them up evenly as they’re processed. Put the funnel in the mouth of the first jar and ladle in the syrup or brine. Repeat with the remaining jars, then put the lids on and process as below.
If filling with hot cooked solid fruit or vegetables, use a slotted spoon to transfer them from the cooking liquid to the jars, then ladle in the hot cooking liquid. Put the lids on and process as below.
-
Put the lids on and process the jars: Run the chopstick around the inside of each jar to pop any largeish bubbles (tiny ones are okay). Dip the paper towel in hot water and use it to wipe the rims and outside threads of the jars clean of any dripped preserves, syrup, or brine-these can prevent a seal from forming between the sealing compound and the jar. Put the flat lids on the jars, white side down, then put the rings on, tightening them just finger-tight-don’t force them at all. (I hold the flat lid down gently with one finger and screw on the rings with the fingertips of my other hand.) You don’t want the rings to be screwed too tight, because the air in the jar needs to escape as the contents are heated in the canning pot. When all the lids and rings are on, use the jar lifter to carefully return the jars to the hot water in the canning pot, making sure they’re standing upright on the rack and not touching one another or the sides of the pot and that the water covers them by at least 1 inch. Turn up the heat, cover the pot, and bring the water in the canning pot to a full boil. Boil for the time indicated in the recipe plus additional time if you live more than 1,000 feet above sea level (see right). Remove the jars to the second, out-of-the-way towel on the countertop to cool. It’s most important that jellies be allowed to cool for 12 hours before the jars are disturbed at all-moving them could break the gel.
-
Turn off the burner and pop open a cold beer, ’cause you’re done. Well, almost. Remember to check, after the jars have cooled for about an hour, that the lids have sealed properly. This is easy to do: Press down in the center of the flat lid. If it doesn’t move, the jar has sealed. If it pops down and then up again, it has not sealed; refrigerate the jar immediately and use the contents. Another way to check that a lid has sealed is to remove the ring, grip the lid with your thumb and middle finger, and slowly lift it straight up. If the lid comes off, obviously it hasn’t sealed. Label the cooled jars and store them in a cool dark spot. Then, for goodness sake, use them!
-
Adjusting for altitude: Because of lower atmospheric pressure at higher elevations, water boils at lower temperatures, and this means it will take longer to kill off spoilers. So find your approximate elevation, and make the following adjustments as necessary:
* To sterilize jars, boil for 10 minutes, plus 1 minute for every 1,000 feet above sea level you live.
* If the recipe specifies processing in boiling water for 20 minutes or less, increase the processing time by 1 minute for every 1,000 feet above sea level you live.
* If the recipe specifies processing in boiling water for more than 40 minutes increase the processing time by 2 minutes for every 1,000 feet above sea level you live.
Selecting Blackberries for Jelly: An Additional Note from the Editor
You have countless pints of fresh blackberries sitting on your kitchen counter and just waiting to be made into jelly. While you might be eager to get started — and we don’t blame you — you need to select the blackberries you will use in jelly with care, and remove those that don’t fit the bill. Here are a few tips to keep in mind.
*What should you look for when selecting blackberries to use in jelly? According to the National Center for Home Food Preservation (NCHFP), you should preserve and can berries that are ripe, sweet, and of uniform color, so discard any berries that are green. This advice extends to other types of berries, too, including blueberries, huckleberries, and currants.
*You should also be on the lookout for any berries with mold, too, as the Utah State University Cooperative Extension points out. That’s one ingredient you definitely don’t want in your jars of homemade jelly!
*Did you miss out on fresh blackberry season this summer? You can still make jelly. The NCHFP notes that you can use frozen blackberries with no added sugar to make jelly.
2010 Liana Krissoff
YOUR RECENTLY VIEWED RECIPES
Free recipes, giveaways, exclusive partner offers, and more straight to your inbox!
Thank you for signing up!
We were unable to sign you up – please try again.
We are adding your Comments. ![]()
Thank you! Your comment has been added.
We are sorry. There was an error tyring to post your rating and review.
Your comment will appear after our editors have had a chance to review it.