I never knew I wanted all the deliciousness of a classic, chewy bagel in bread form until now! This amazing bagel bread is life changing! {Step by step pictures below in the post.}
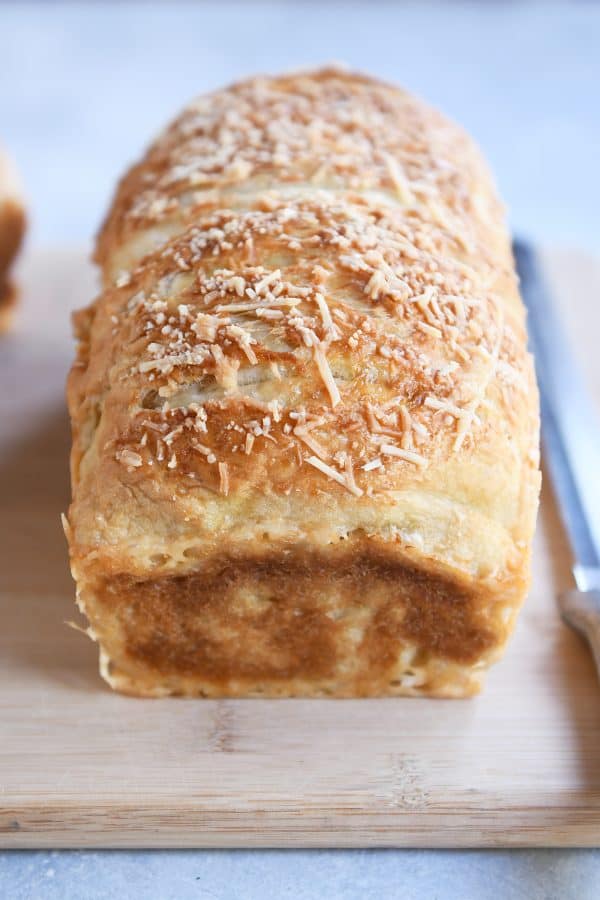
Do I ever have the most delicious weekend baking project for you ever. EVER!
I teased you about this amazing bagel bread on Instagram a few weeks ago, and I’m finally making good on my promise to share the recipe with you!
It took a few more times of making and testing the bread + bribing my 14-year old to help me take step-by-step pictures (it’s shockingly hard to flip a loaf of bread into boiling water with one hand whilst snapping photos with the other).
But it’s finally here. And it is worth the wait. Plus, my teenager did not complain about his payment for picture taking being a whole loaf of this bread to himself. He did not share. I did not blame him.
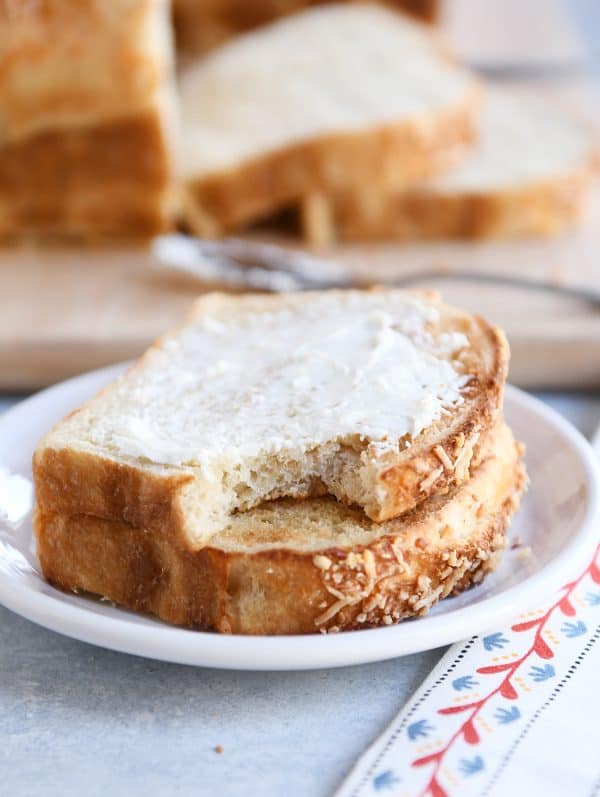
This bread has all the delight of a classic, chewy bagel tucked into a cute little loaf!
If my family is any judge of how good this bread is (i.e. can polish off two loaves in a day), I think you are going to love it. Delicious toasted, delicious untoasted. Fantastic with cream cheese, fantastic without.
Honestly, this is the bread dreams are made of. It is so, so good. Hard to resist, actually, and it will most likely be my ultimate carbohydrate undoing.
We are partial to Parmesan and Asiago bagels around here. All six of us prefer that variety, except for Brian who is the odd man out and goes for the cinnamon raisin or blueberry bagels (insert us all giving him the side eye). I mean, no judging…kind of.
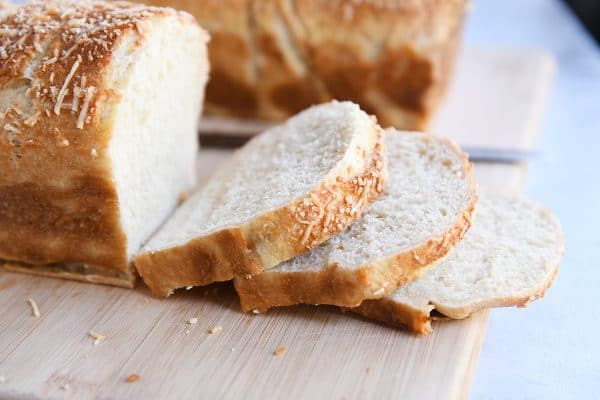
But rest assured that even though this recipe and tutorial is for cheesy bagel bread, you could alter and adapt that topping to your heart’s content.
Because this bread has a few unique steps, I want to walk through the step-by-step tutorial with you.
Feel free to ask any additional questions in the comments! This bagel bread may look and seem intimidating, but I promise the effort is worth it (and it’s actually kind of hard to mess up, trust me).
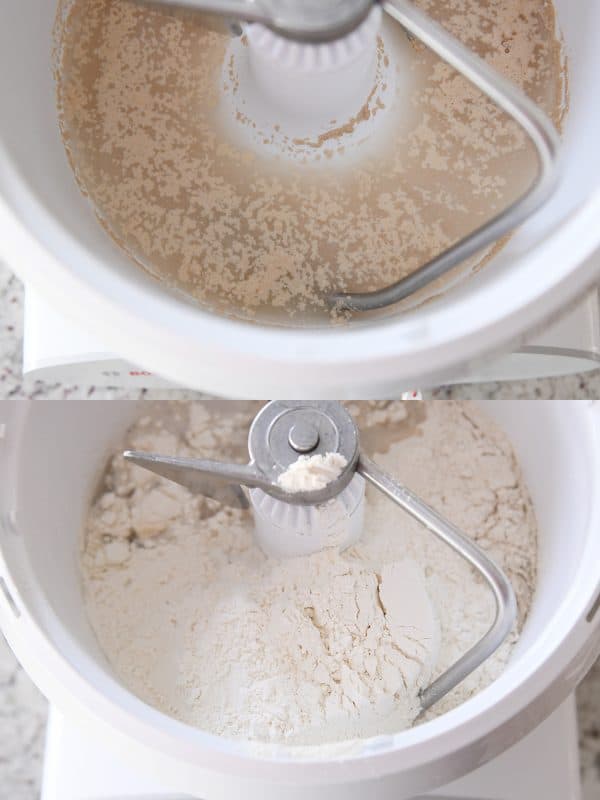
Start mixing up the dough in a stand mixer fitted with the dough hook. I use a Bosch mixer {aff. link} for 99% of my bread making, but this amount of dough *should* fare pretty well in a KitchenAid or other smaller stand mixer.
Usually I have the plastic ring-lid on the Bosch as well for mixing, but for better picture taking, I left it off for these pictures.
This dough is pretty straightforward: mix the water, honey, yeast, salt and a couple cups of flour together and then continue adding flour gradually while the mixer runs on low speed.
The recipe calls for bread flour, but you can use all-purpose flour + gluten for a bread flour sub (see the notes of the recipe below).
The dough is going to look shaggy and messy as it starts mixing but gradually it will form a smooth ball and clear the sides of the bowl. Resist the urge to add excess flour!
Only add additional flour if the dough is leaving a lot of sticky residue on your fingers and won’t come together in a soft, smooth ball.
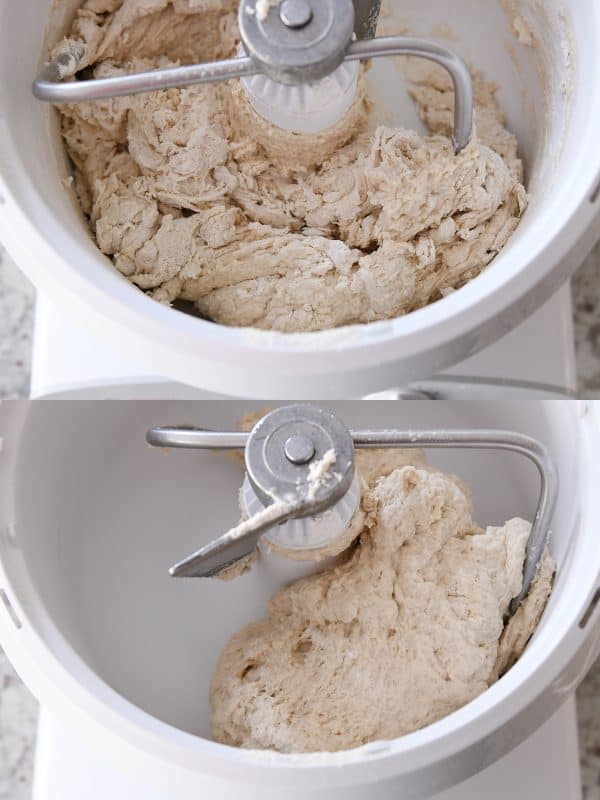
There we go. Bagel dough perfection.

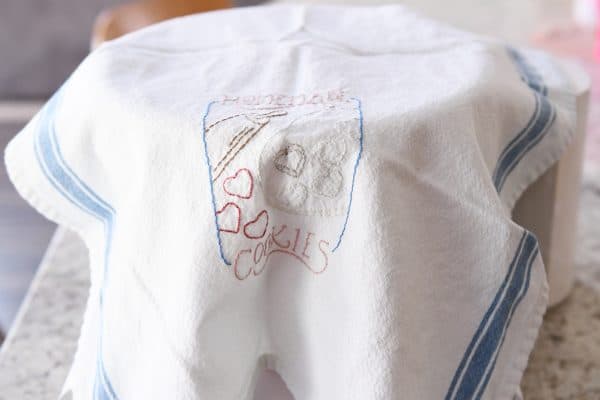
Now, cover the mixer with a clean kitchen towel and let the dough rest for 10-15 minutes. This is going to help relax the gluten and get the dough ready to be shaped into loaves.
I use flour sack kitchen towels for most of my dough rising ventures these days. The towel in these pictures was hand-embroidered for me by my talented cousin, Alex, for my birthday a few years back, but I also have tons of these thin, white towels {aff. link} and use them constantly in my kitchen.
After the dough rests, turn it out onto a lightly greased or floured counter and split into two equal halves. You can be a nerd like me and use a kitchen scale, or you can just eyeball it.
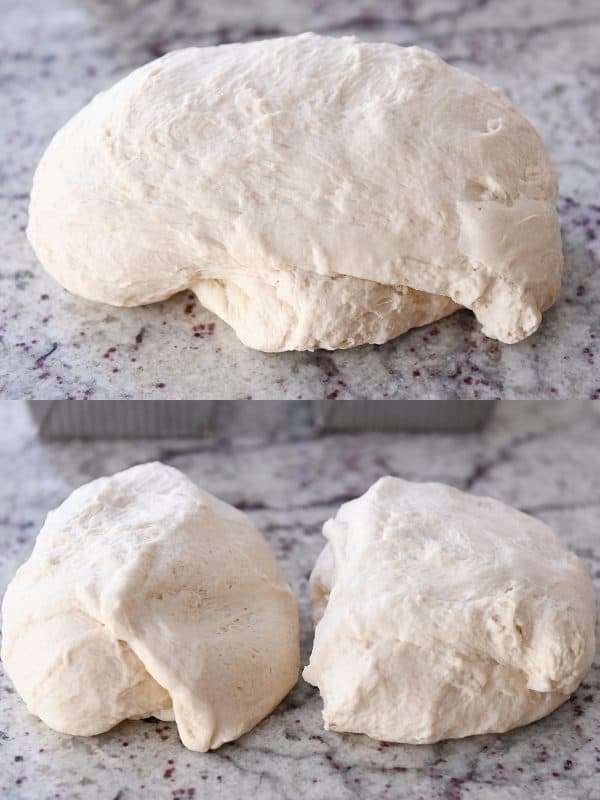
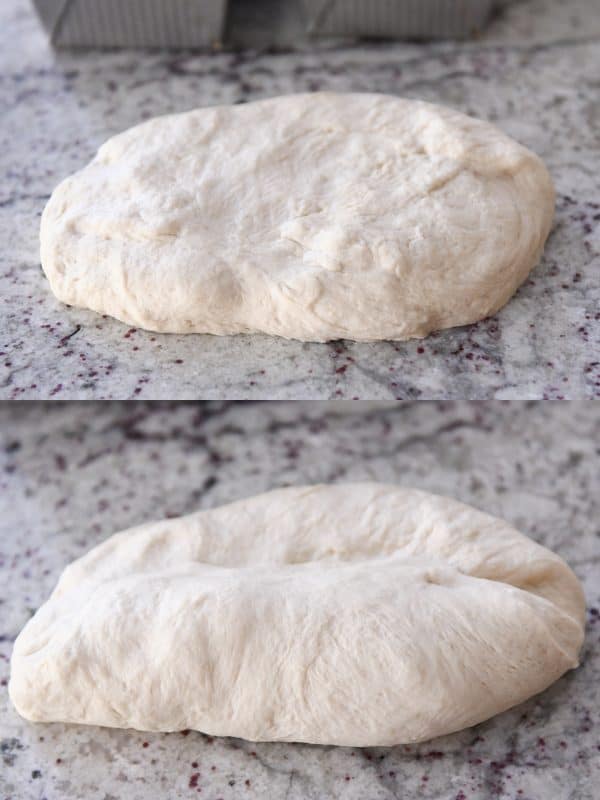
Press each half into a really thick oval. Or blob. However you’d like to refer to it is fine. This part is definitely not rocket science.
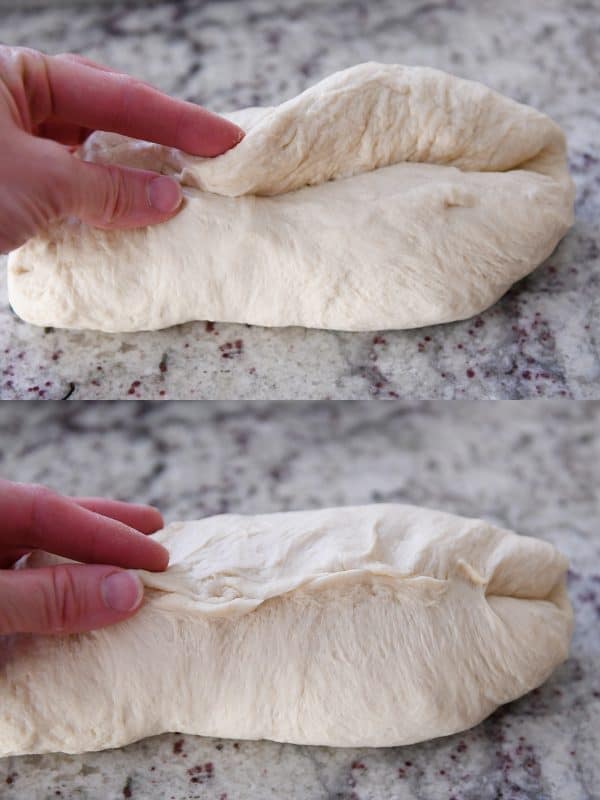
Take the lower edge and fold it up toward the middle.
Then grab the top edge and fold it down a little past that middle seam and pinch it closed.Flip the dough over seam side down and give it a good pat and a gentle roll to smooth out the edges, especially the two short ends.
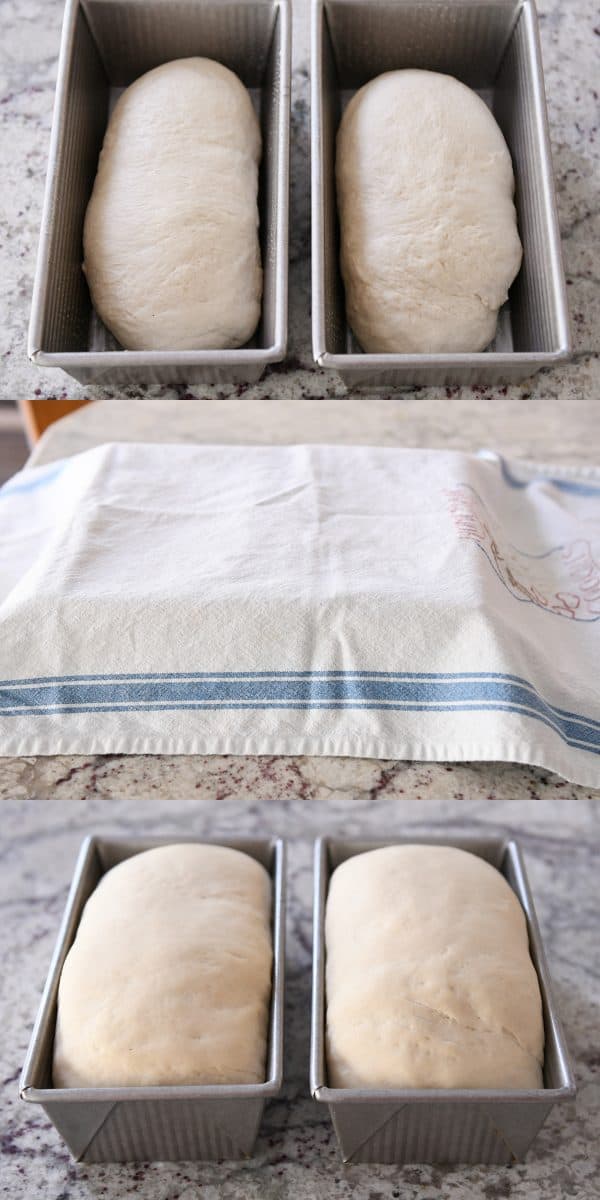
Place the loaves in lightly greased 8 1/2-by-4 1/2-inch baking pans. These USA bread pans {aff. link} are my all-time faves with the long-standing Chicago Metallic pans {aff. link} a close second.
I have not tested this recipe with glass or ceramic loaf pans.
Cover the loaves with a clean kitchen towel or greased plastic wrap and let them rise for about 45 minutes to an hour until the dough is noticeably puffy and has risen just above the edge of the pans.
Toward the end of the bread’s rising time, start a large pot of water boiling. You’ll want about 4 quarts of water…and the pot should be about 10 inches wide at least to fit the loaf of dough (it will expand a bit as it cooks in the water).
Once the water is boiling add the honey and baking soda and stir to dissolve.
Now, here’s the part that I understand may cause some of you a bit of stress. You’re going to do something that you’ve probably been told to never do in the history of ever! You are going to seriously mess with a perfectly risen loaf of bread and turn it out of the pan into your hand (to be placed into the boiling water).
Take a deep breath. You’ve got this.
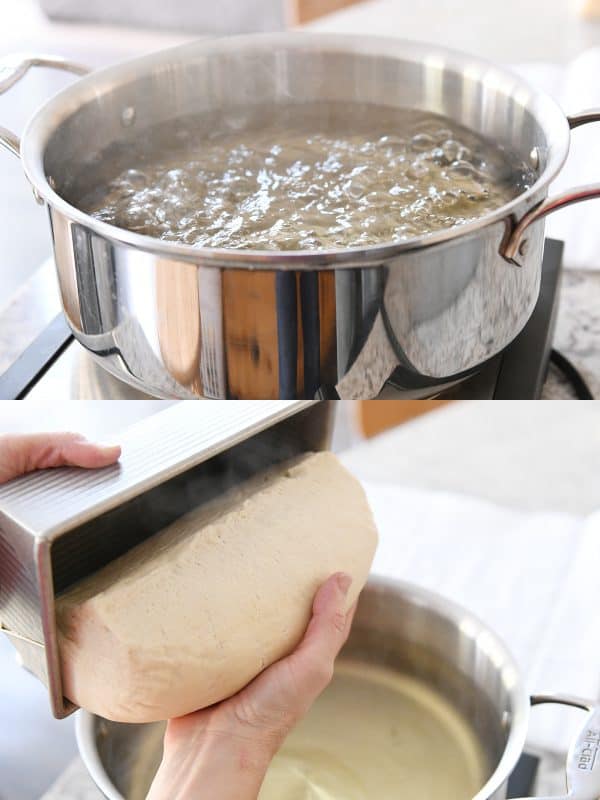 The loaf of bread is going to deflate (although try to be as careful as possible to minimize this deflation). It’s going to look misshapen and messy. And I know this is going to impact some of your stress levels in an elevating way.
But I promise that even if your bread dough looks like this (below!), if you can hang tight for just a bit longer and trust me with your dough, everything will work out in the end.
It’s kind of a miracle really.
So go ahead and place that loaf of bread dough in the boiling water and let it simmer away for about 60 seconds. Then, with a wide, flat spatula or other kitchen implement, flip the bread dough and cook it for another 45-60 seconds on the other side.
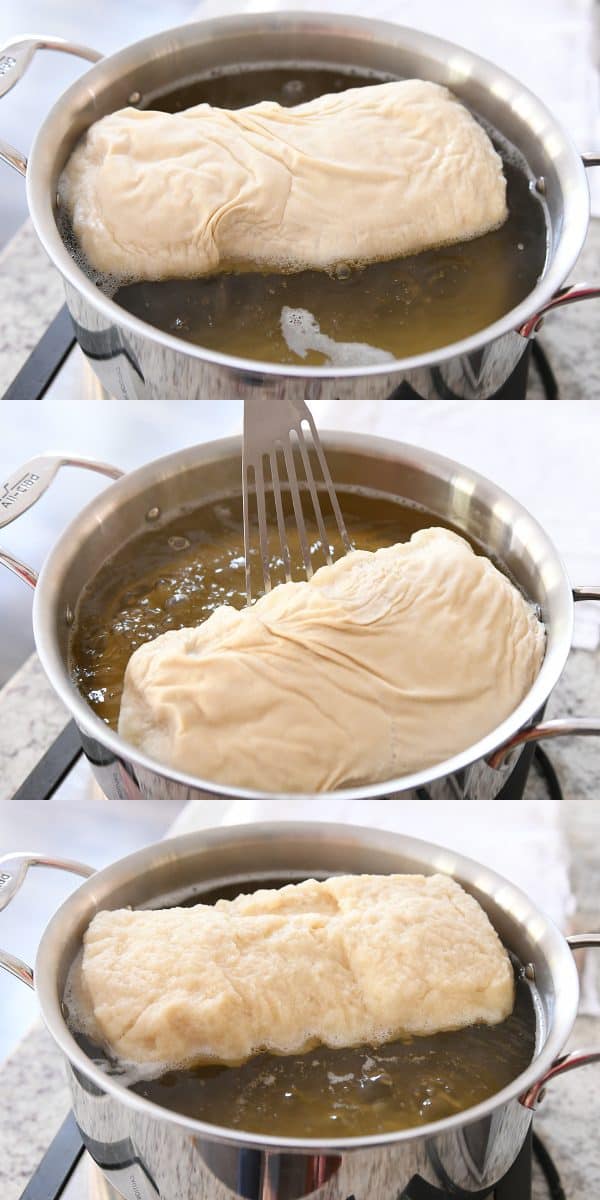
Now take a deep breath, and using all the wits and aptitude and coping skills you have, grab whatever spatulas or spoons or wide tools you have to hoist that loaf of bread out of the boiling water and onto a clean kitchen towel.
Alert! Don’t use paper towels. You’ll cry big, sad, fat tears when your dough is stuck horribly and irreparably to the paper towels. Use part of the towel to gently and quickly dab at the dough to get rid of excess water. The soft sticky dough is probably going to stick a bit to the towel and leave some dough residue there, but it shouldn’t be excessive and my towels washed up just fine (it helps to let any dough reside dry completely on the towel and then pick/flick it off before washing).
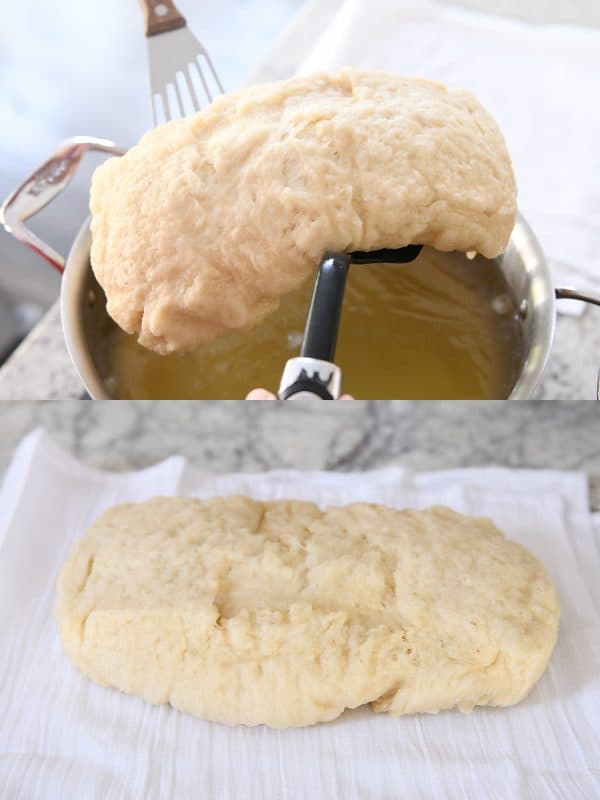
Lightly grease the same pan used for rising and sprinkle in a couple tablespoons Parmesan or Asiago cheese (or other topping of choice).
Then take the towel and flip the hot, boiled loaf into the pan.

It’s not going to go into the pan perfectly. The dough is really sticky at this point and it may look kind of a mess. If you are wondering right now at this point how something so hideous looking will ever bake into the most glorious loaf of bagel bread ever, you are not alone.
I feel ya. I thought the same thing. But after making this bread a dozen times over the last several weeks, I can assure you, my little chick, all will be well.
Tuck the dough evenly into the pan.
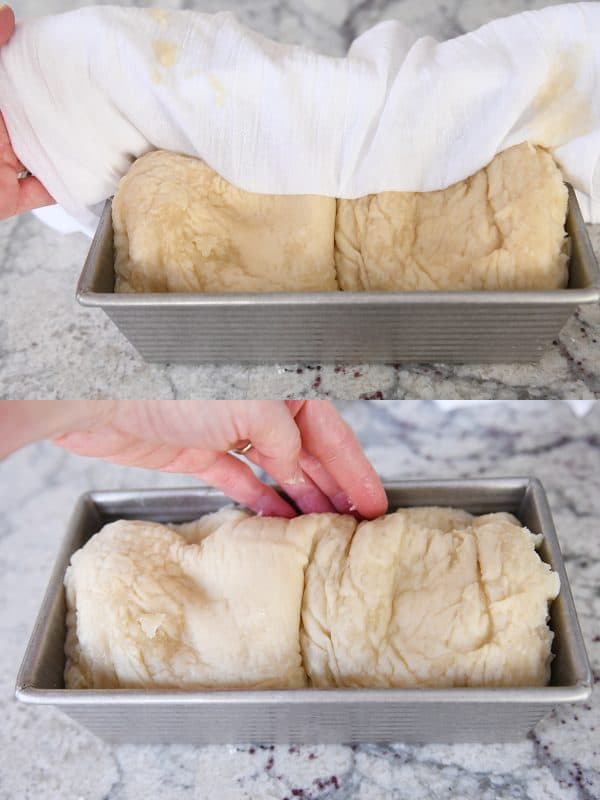
Go ahead and repeat that process with the second loaf. The first loaf can hang out and wait a few minutes.Take a sharp paring or serrated knife (this inexpensive knife, aff. link, is my fave and works perfectly for this) and cut slashes crosswise across the top of the loaf. This is not the time to get all your boiling bagel bread aggressions out on the bread. Don’t go slashing inches deep. A quarter inch will do just fine.
Then brush the top of the bread with a lightly beaten egg.
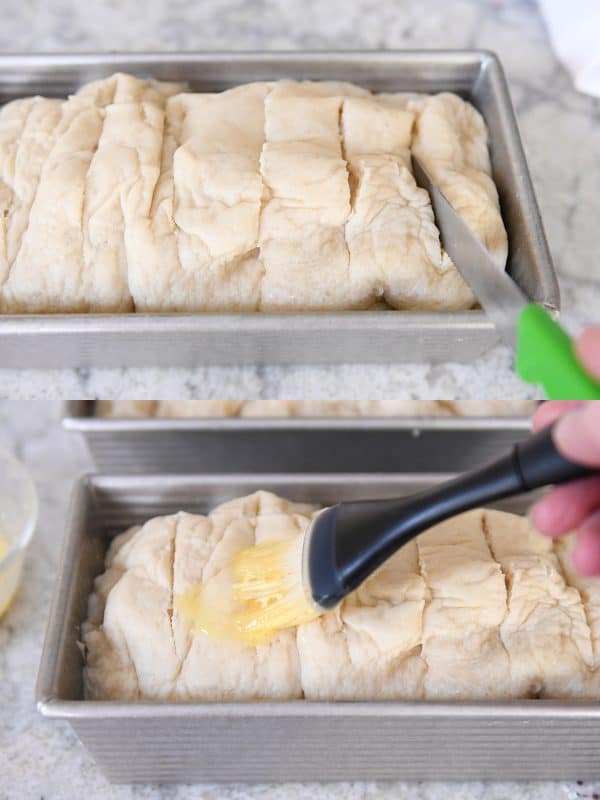
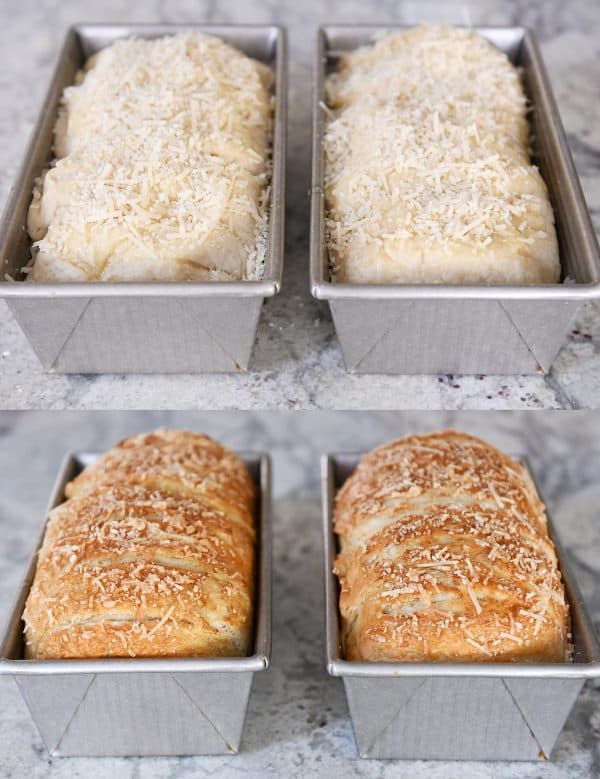
Sprinkle a little (ok, a lot!) more cheese on top and immediately pop that bread into a 350 degree preheated oven (no need to let it rise!).
In about 40-45 minutes you are going to have some of the most glorious bagel bread coming out of your oven, and I swear, you might even hear the faint but distinct notes of angels singing somewhere.
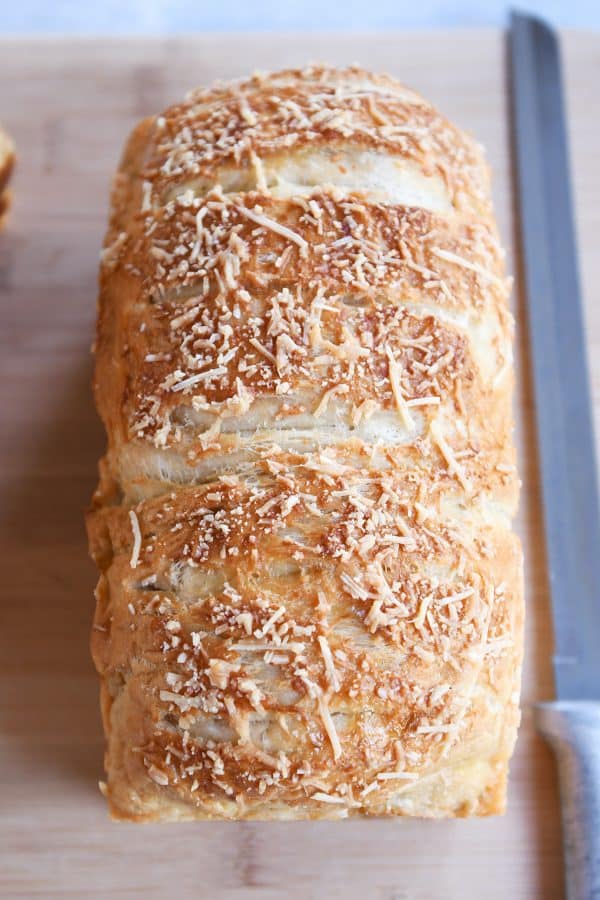
Let the bread rest in the pan for 15 minutes or so before turning out onto a cooling rack to cool completely.
While you may be tempted to cut right in, the texture and flavor of the bread is better once it has cooled.
But after that, go crazy. Seriously, don’t even try to hold yourself back.
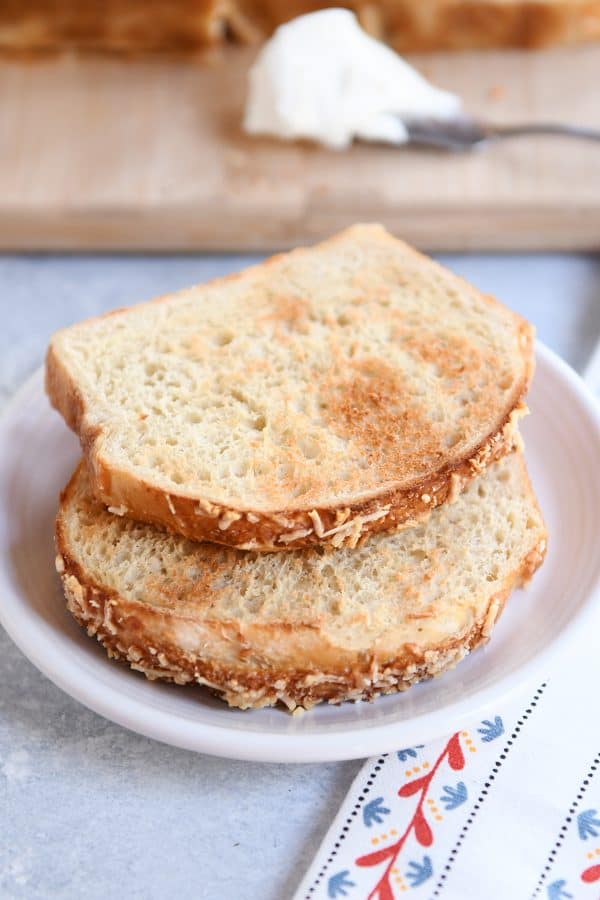
This bagel bread is ridiculously yummy sliced and toasted and slathered with cream cheese or butter. But it is equally tasty untoasted – chewy and soft and absolutely perfect.
I know this bagel bread may not be your average everyday baking project, but I hope you try it! There’s something so rewarding about combining the ever-simple ingredients for bread and watching how they transform into a loaf of golden deliciousness.In this case, bagel bread may have surpassed all the other bread loves in my life. We can’t get enough.
The baked loaves freeze great, but it also keeps well for several days (especially if using as toast).
Bagel bread! Who knew! Hope you love it as much as we do.
Yield: 2 loaves
Amazing Bagel Bread

Ingredients:
Bread:
- 2 1/2 cups warm water
- 4 tablespoons honey
- 1 1/2 tablespoons instant or rapid-rise yeast (see note for active dry yeast)
- 1 1/2 tablespoons coarse, kosher salt (use less for table salt)
- 5 to 5 1/2 cups (25 to 27.5 ounces) bread flour (see note for substitutions and notes about exact flour amount)
Topping:
- 1 egg, lightly beaten
- 1/2 cup freshly grated Parmesan or Asiago cheese (or other toppings of choice, like sesame seeds, poppy seeds, Trader Joe’s everything but the bagel seasoning, etc)
Water Bath:
- 4 quarts water
- 1/4 cup honey
- 1 tablespoon baking soda
Directions:
- For the bread, in the bowl of a stand mixer fitted with the dough hook, combine the water, honey, yeast, salt and 2 cups of the flour. Mix until combined. With the mixer on low speed, continue adding flour until the dough comes together and clears the sides of the bowl. The exact amount of flour doesn’t matter as much as the texture and feel of the dough. It should form a soft, smooth ball that is still a little tacky to the touch but doesn’t leave a lot of dough residue on your fingers. Knead the dough for 5 minutes.
- Cover the mixing bowl and let the dough rest for 10-15 minutes.
- Turn the dough out onto a lightly greased or floured counter and separate into two pieces.
- Shape each piece into a loaf by pressing into a thick rectangle, folding the bottom edge up to the middle and then grabbing the top edge and folding it down over the dough and pinching the seam to seal. Turn the loaf seam side down and pat and roll lightly to form an even 8-inch loaf.
- Grease two 8 1/2-X-4 1/2-inch loaf pans. Place the loaves seam side down in the prepared pans. Cover with a clean kitchen towel or greased plastic wrap and let rise in a warm, draft-free spot until the dough rises just over the edge of the pan, about 45 minutes to an hour.
- Toward the end of rising, prepare the water bath by bringing the water to a boil in a pot (that is at least 10-inches wide). Add the honey and baking soda and stir to dissolve. Also, fold a clean kitchen towel (like a thin flour sack towel without any texture or terry cloth fabric) in half and place next to the stove.
- Preheat the oven to 350 degrees F.
- One at a time, carefully turn the loaf of risen dough out into your hand and place the loaf into the boiling water. It’s ok if the bread loaf deflates and looks a bit wonky. It will all work out! Promise. Cook for 1 minute and then use a wide flat spatula or other tool/spoon to flip the dough and cook for another 45 seconds to 1 minute.
- Using a couple of wide spatulas, carefully transfer the loaf and place it on the folded towel, using extra towel length to quickly pat any water off the top and sides of the dough.
- Spray the same loaf pan with cooking spray and sprinkle a couple tablespoons of cheese evenly across the bottom of the pan. Transfer the dough (that’s been boiled) to the pan (using the towel to help transfer the hot loaf, if needed), tucking the dough down around the edges into the pan in an even shape.
- Repeat the boiling process with the other loaf of dough.
- With a sharp paring or serrated knife, cut five or six slashes about 1/4-inch deep crosswise on the top of each loaf of dough. Brush the top of with the beaten egg and sprinkle each loaf with a couple more tablespoons of cheese.
- Bake the bread in the preheated oven for 40-45 minutes until golden on top (an instant-read thermometer should read 200 degrees at the center of the loaf).
- Let the bread cool for 15-20 minutes in the pan before turning onto a cooling rack to cool completely. Slice, toast, slather with cream cheese, devour!
Notes:
If using active dry yeast instead of instant yeast, use the same amount of yeast but proof it in 1/4 cup water and a pinch of sugar or drop of honey until bubbly and foaming before adding to the other ingredients in the mixer. You can decrease the water in the recipe by 1/4 cup if doing so.
If you don’t have bread flour on hand, all purpose flour + vital wheat gluten makes a great substitute. Use about 4 1/2 cups all-purpose flour and 1/2 cup gluten. Because the exact amount of flour will depend on a variety of factors (how one measures flour, elevation, humidity, water temperature, etc), don’t rely on the measurements in the recipe as a hard fast rule. Instead focus on the texture and feel of the dough. If you have to add a bit less or a bit more flour, that’s ok.
All images and text ©.
Follow @melskitchencafe on Instagram and show me the recipes you are making from my blog using the hashtag #melskitchencafe. I love seeing all the goodness you are whipping up in your kitchens!
Recipe Source: inspired by a recipe in Oct/Nov Cook’s Country (I adapted and changed recipe for two loaves, used honey instead of corn syrup, changed the topping from seeds to cheese, etc)
Disclaimer: I am a participant in the Amazon Services LLC Associates Program, an affiliate advertising program designed to provide a means for me to earn fees by linking to Amazon.com and affiliated sites.

