


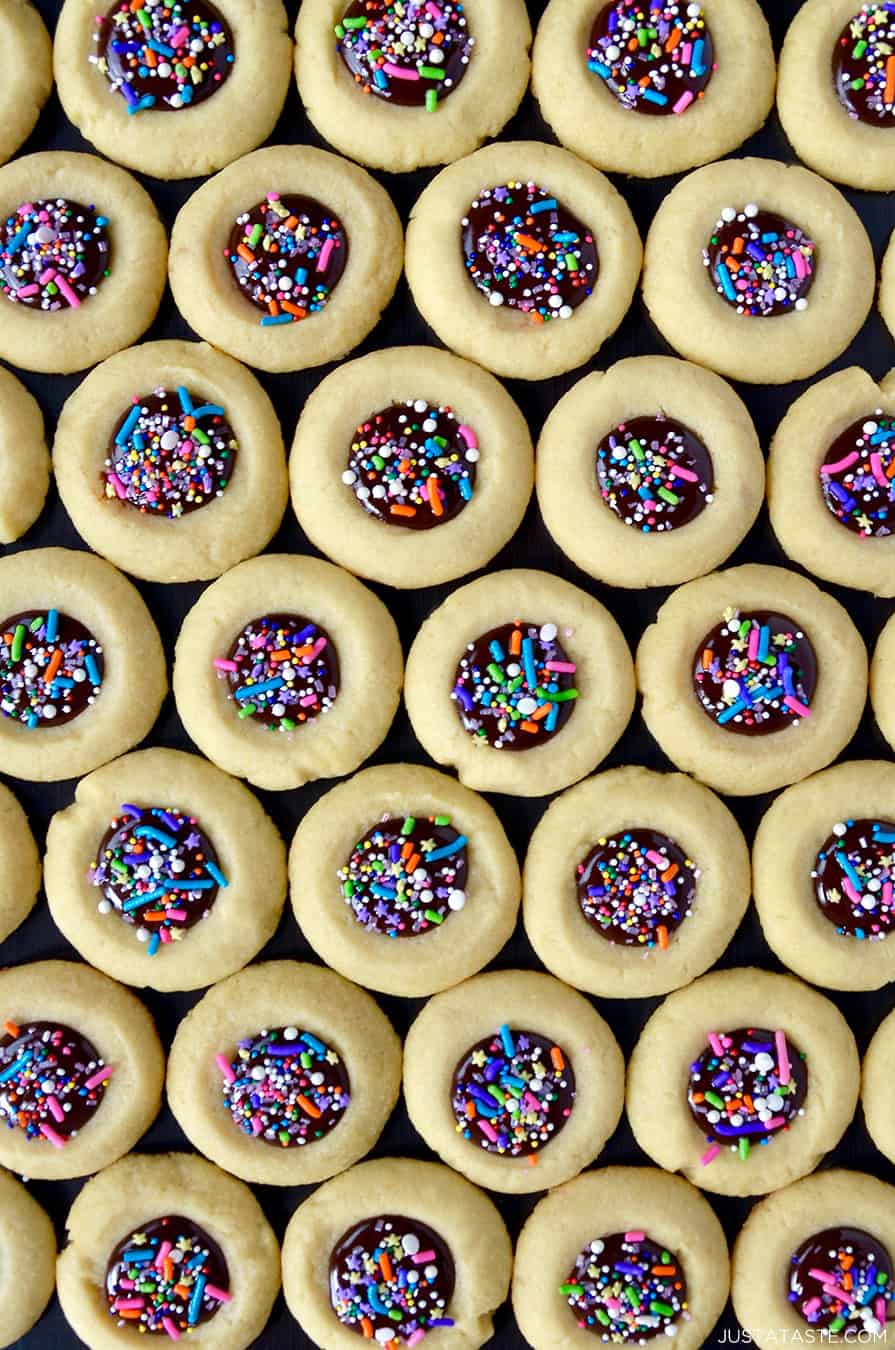
Buttery shortbread and velvety ganache join forces in this festive recipe for Chocolate Thumbprint Cookies.
The holiday cookie craze is picking up steam as we head into the final few weeks before Marshmallow Christmas Wreaths become a daily necessity in our house (and Reindeer Marshmallow Pops, too!).
I’ve had thumbprint cookies on my recipe development list for quite some time, but in all honesty, they never really reached the top of my priority list because they just seemed so… plain.
A cookie base with an indentation filled with chocolate, caramel, fruit preserves or candy. It’s a pretty simple setup.
But often times it’s the simplest creations that are the most striking, both in flavor and presentation.
A classic buttery shortbread cookie base leaves the door wide open for customizations, making that center well a blank canvas for anything you can imagine.
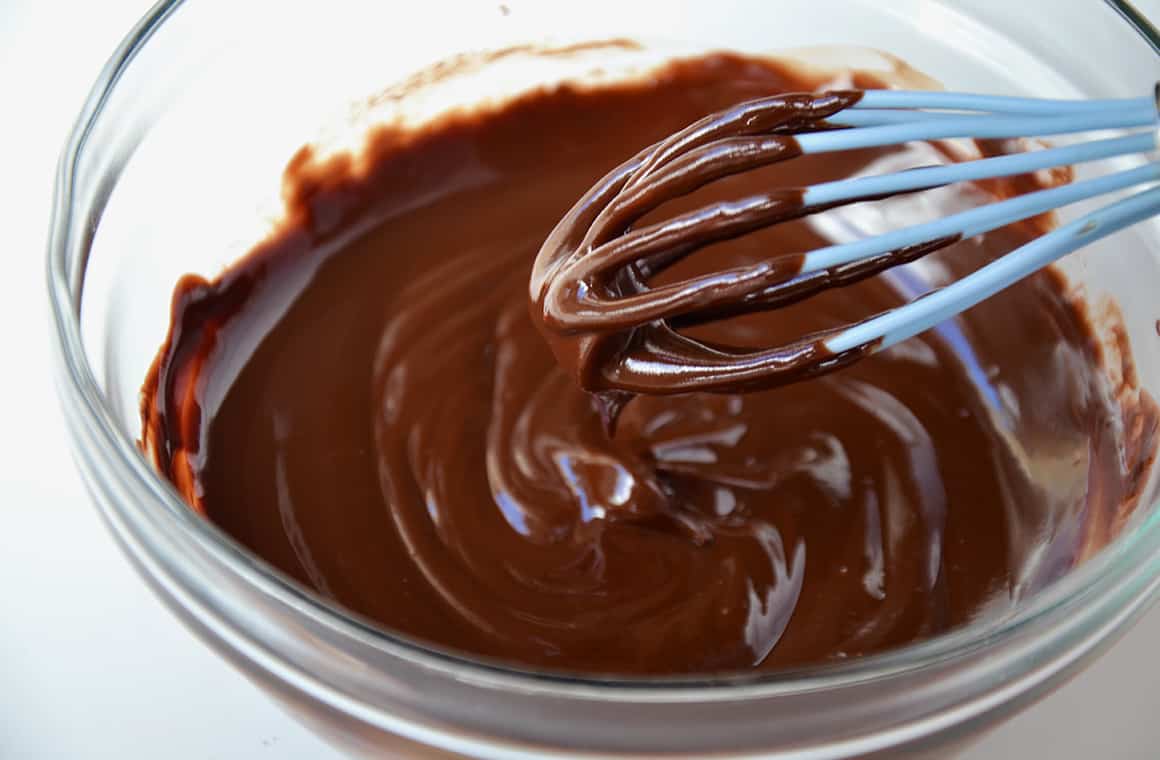
I’m a recent convert to the power of good ol’ ganache. You know, the kind that’s creamy and silky, yet firms up nicely with a lustrous shine?
I’ve continued the trend of simplicity by using semisweet chocolate chips, but you can swap in whatever chocolate chips or chunks you have on hand. A combo of semisweet and bittersweet (a lá the Chocolate Rugelach) would be the perfect balance of sweetness.
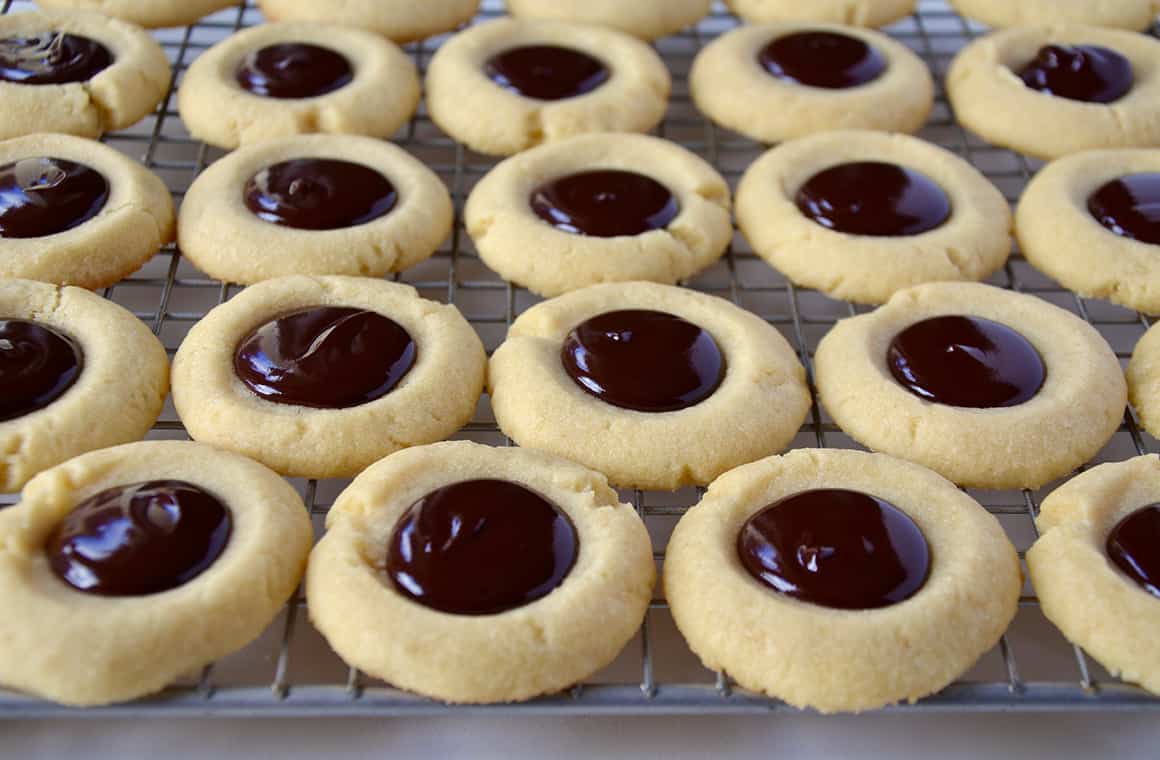
Just look at that shine! You can check your reflection in those chocolate dollops, and that’s how you know you’re golden.
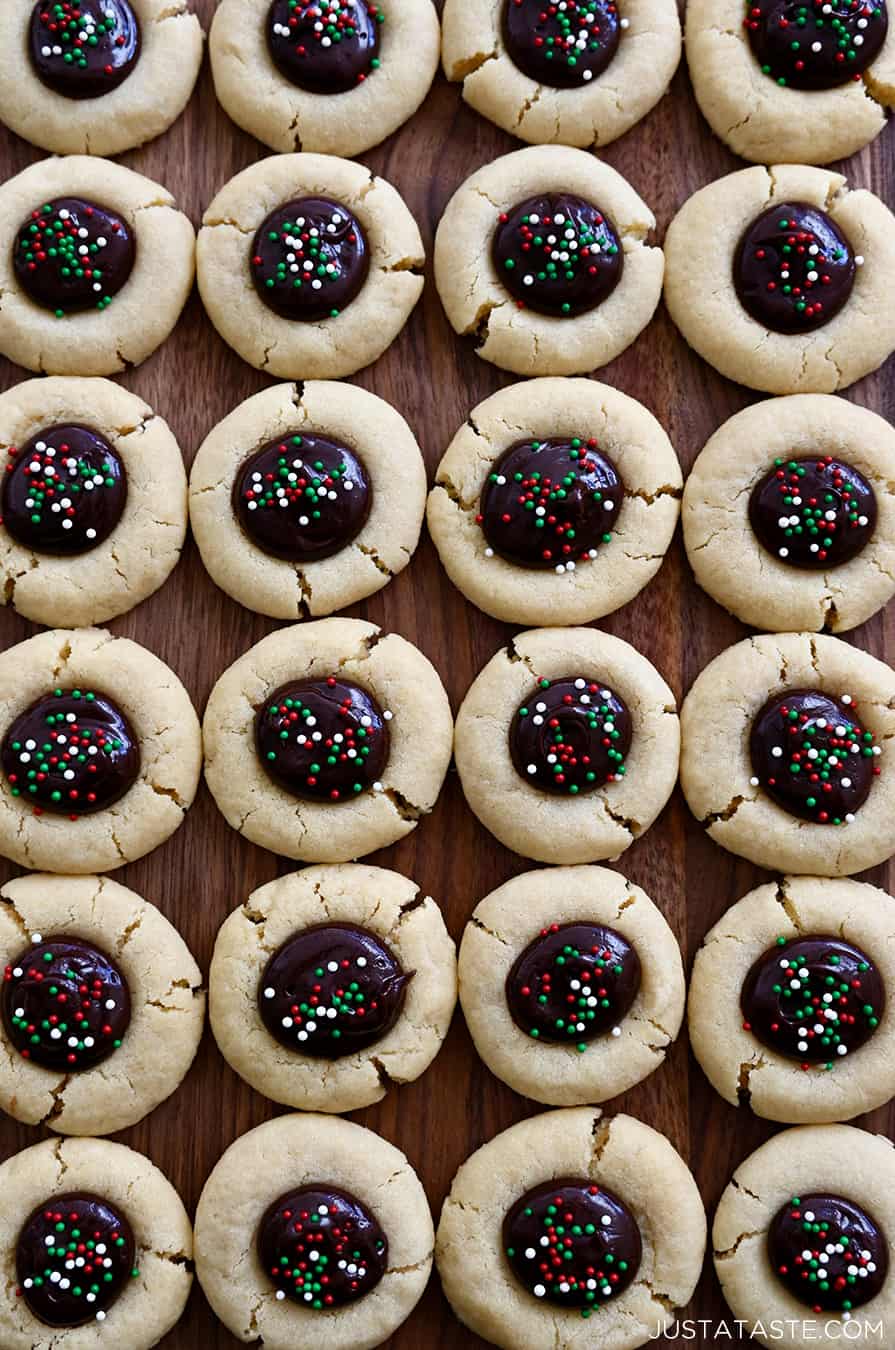
Top off these Chocolate Thumbprint Cookies with any sprinkles that suit the season—check out my Christmas spin on them below! Simple, sweet success.
Craving more? Subscribe to Just a Taste to get new recipes, meal plans and a newsletter delivered straight to your inbox! And stay in touch on Facebook, Twitter, Pinterest and Instagram for all of the latest updates.
For the chocolate filling:
Make the cookies:
-
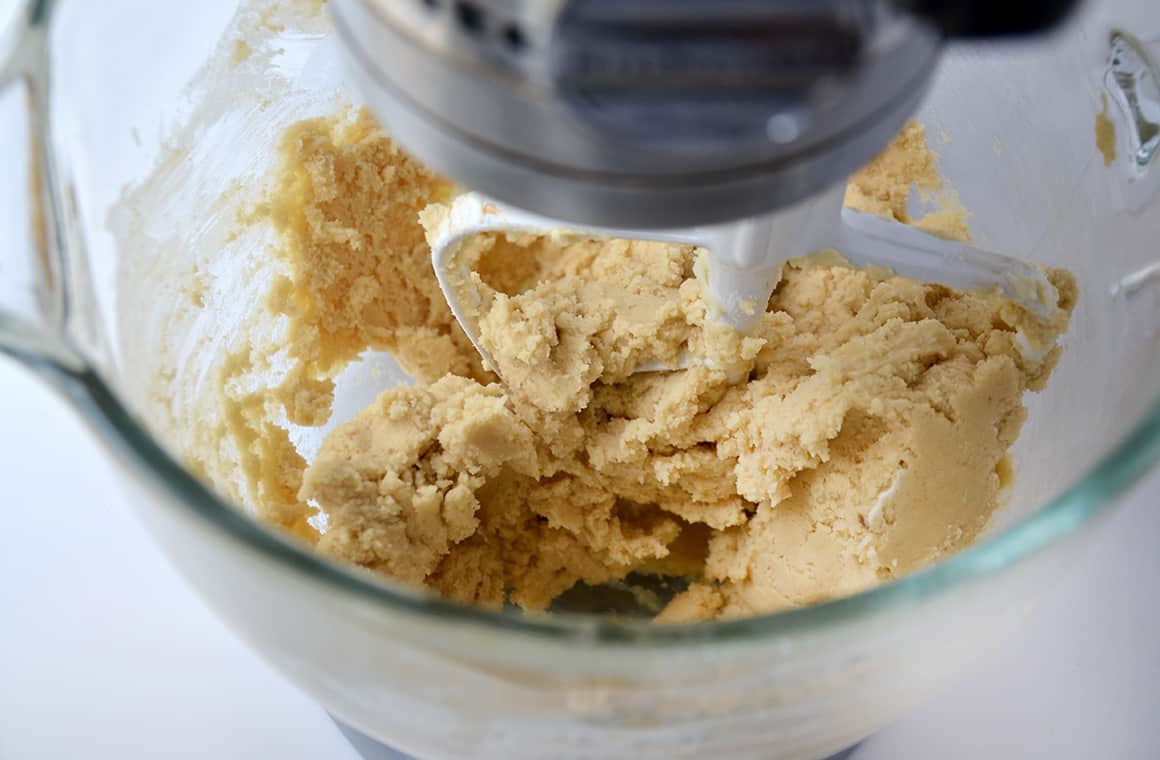
In the bowl of a stand mixer fitted with the paddle attachment, cream together the butter, sugar and brown sugar until light and fluffy.
-
Add the egg yolks, one at a time, beating between each addition, then add the vanilla extract.
-
In a separate small bowl, whisk together the flour, baking powder and salt.
-
Add the flour mixture to the stand mixer, beating just until the dough is combined. Cover the bowl with plastic wrap and refrigerate the dough for 30 minutes.
-
Preheat the oven to 325°F. Line two baking sheets with parchment paper or Silpat baking mats.
-
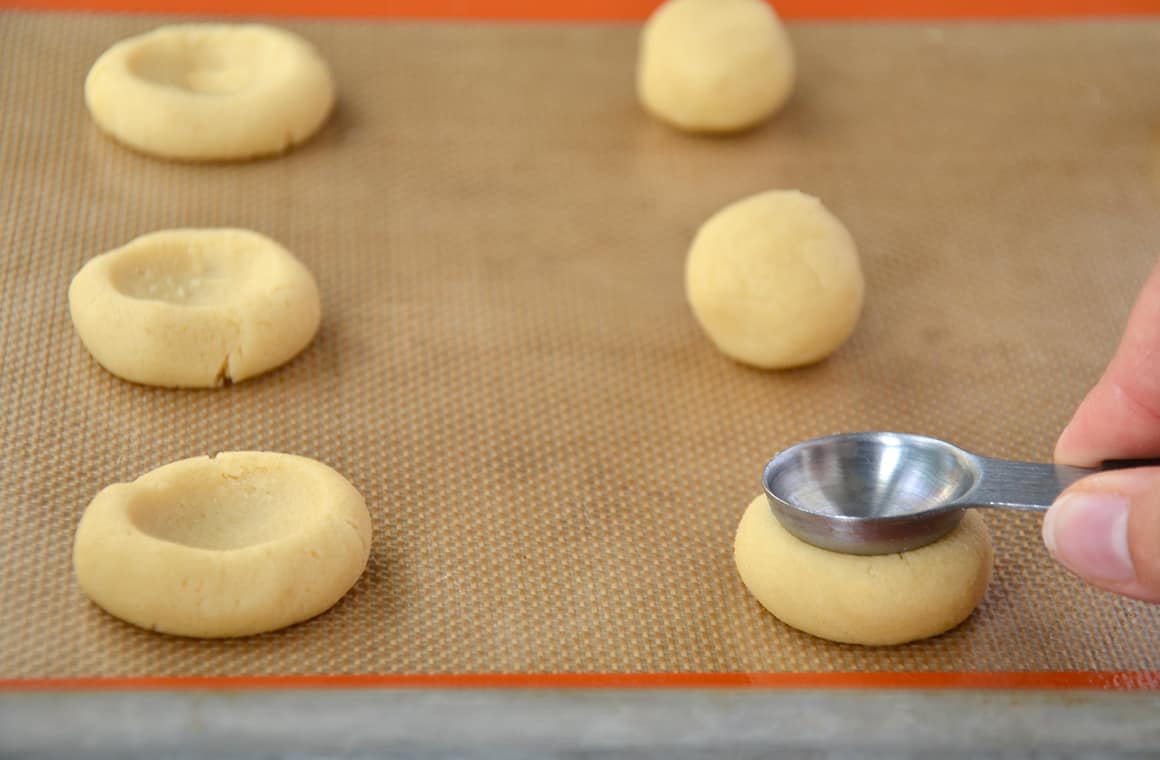
Scoop out portions of the dough and roll them into 1-inch balls. Space the balls 1 inch apart on the baking sheets, then using the back of a measuring spoon (or your thumb), make a deep indentation into each ball.
-
Bake the cookies for 10 to 12 minutes or until they are pale golden.
-
Remove them from the oven and allow them to cool for 5 minutes on the baking sheets before transferring them to a rack to cool completely. (If the indentations have disappeared, make them again while the cookies are still warm.)
-
While the cookies cool, make the chocolate filling.
Make the chocolate filling:
-
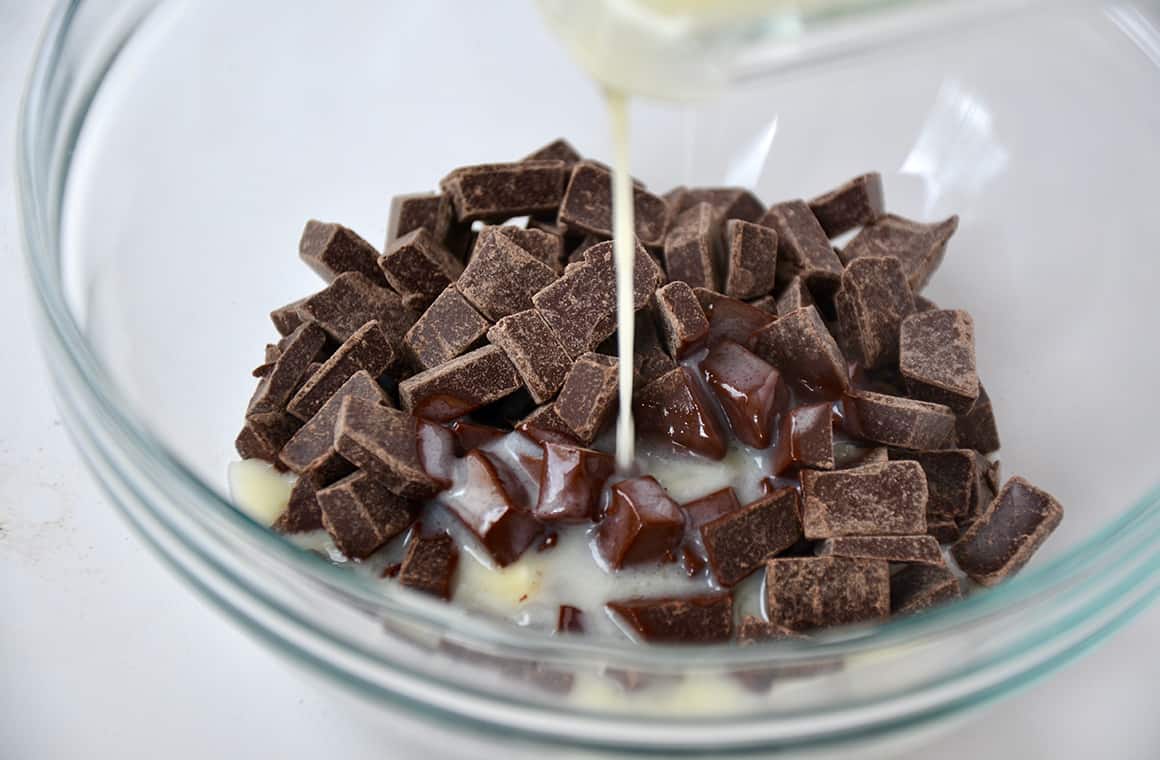
Add the chocolate chips to a medium bowl.
-
In a separate medium microwave-safe bowl, combine the heavy whipping cream, corn syrup and butter. Microwave the mixture until it is steaming, about 1 minute, then pour it over the chocolate chips and let it sit for 5 minutes (without stirring).
-
Whisk the chocolate mixture until it is smooth. (If there are any chocolate chunks remaining, microwave the mixture for 15-second increments until smooth.)
-
Spoon about 2 teaspoons of the chocolate into each indentation and immediately top it with sprinkles. Allow the chocolate to sit until firm and shiny.
-
★ Did you make this recipe? Don’t forget to give it a star rating below!
