
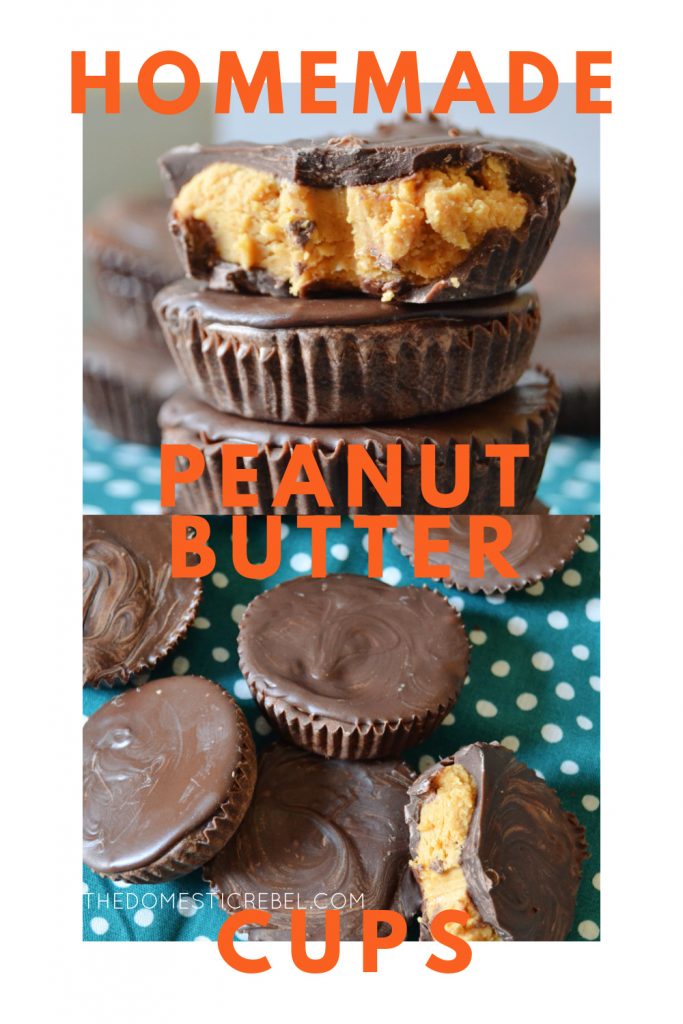
These Easy Homemade Peanut Butter Cups taste WAY better than store bought and are surprisingly simple to make with pantry ingredients you probably have on hand! Why not give them a try and surprise yourself?!
Happy October!
Tis the season for all things CANDY.
It seems fall is divided in sections. First in the pumpkin/apple section (September). Then it’s the candy section (October). Lastly, it’s the pie section (November). And then it’s all things Christmas. Don’t worry – I won’t mention that C-word again until a little later in the month (sorry!). Right now, my primary focus is on candy and some pie recipes so they’re up in plenty of time before Thanksgiving. You know how food bloggers work! We have to be prepared for you guys so the recipes are ready when you are!
But for right this second, we’re talking about PEANUT BUTTER CUPS.
I am going to get SO MUCH flak for this but, I really don’t care for peanut butter and chocolate together. I know, it’s absolutely horrible to say such fighting words as a dessert food blogger! But I can’t help it. However, these homemade ones hit different. There’s something about the homemade peanut butter filling that just takes these to the next level and beyond.
The Candy
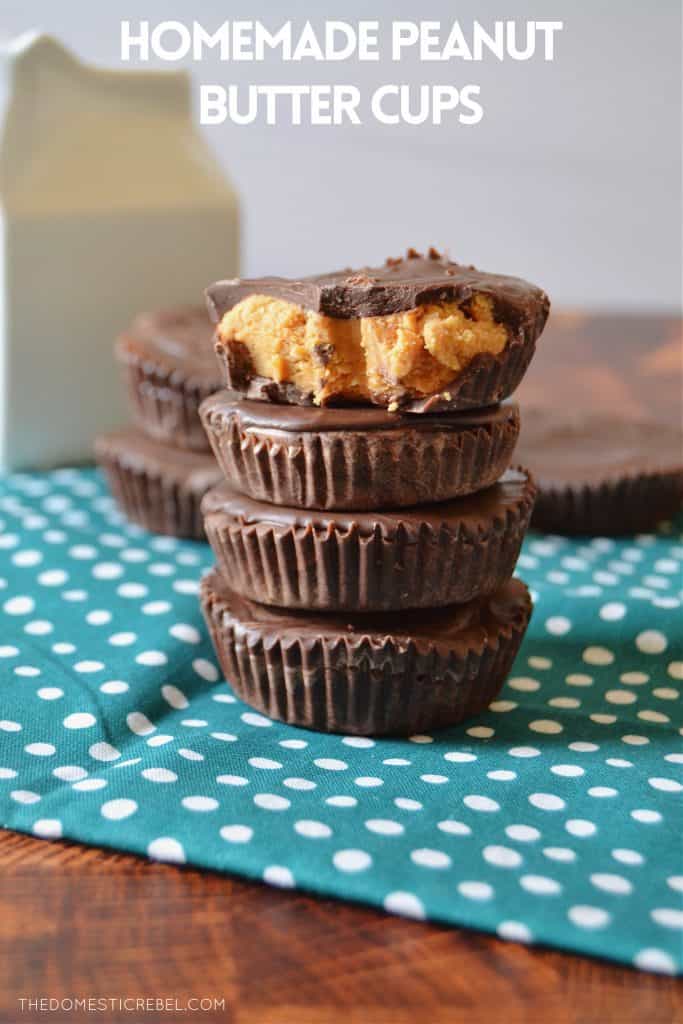
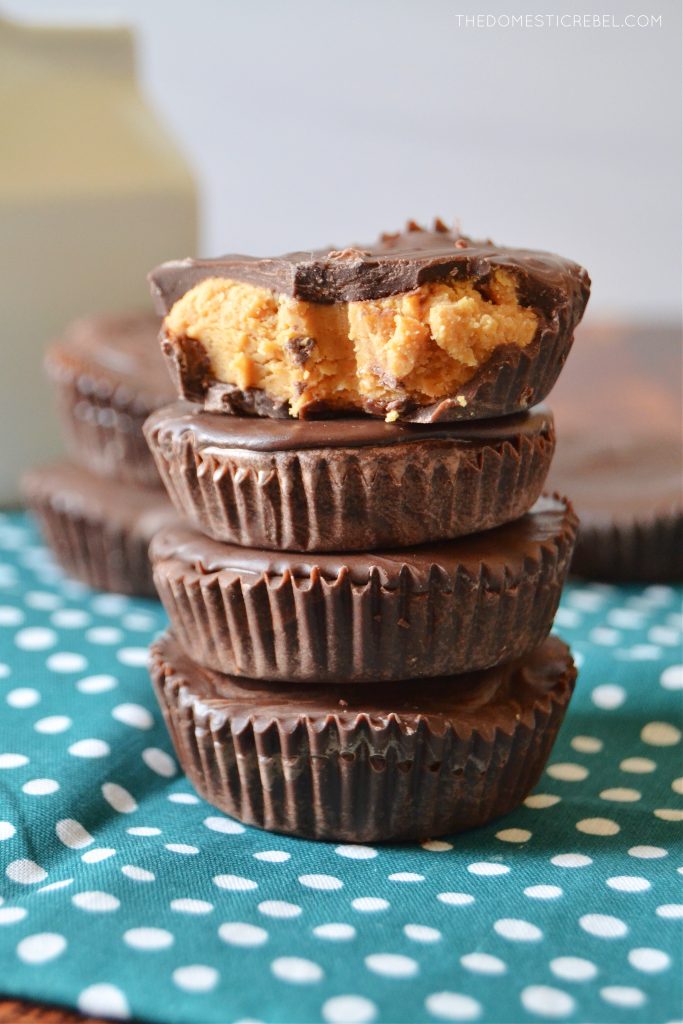
The candy consists of two parts: the filling and the outer shell. The outer shell is made with chocolate candy coating which I find is the easiest chocolate to work with when making chocolate-dipped or chocolate coated treats. You can find it by many brands: CandiQuik, Log House Foods, even Ghirardelli makes chocolate melting “wafers” which will work fine. This chocolate is formulated to melt better, more consistently and is less prone to seizing than finicky chocolate chips which is why I recommend it.
The filling consists of peanut butter (creamy regular ol’ Jif or Skippy is great – skip the natural one for this recipe as its prone to separation), some confectioners’ sugar for sweetness and stability, butter as flavor and a binder, vanilla extract for flavor, and some brown sugar, which I think adds a lovely depth of flavor to the filling. I also like a pinch of salt to offset some of the sweetness added to the filling. You’ll beat this together and the mixture will become kind of thick and doughy. I like to then form it into small patties and drop the patties onto the chocolate in the baking cups for the filling. Super simple.
Can these be made ahead of time?
Yes, definitely! You can make these a day or two ahead of when you need them and keep them at room temperature or in the fridge or freezer.
Can these be frozen?
Of course! Place them in an airtight container and freeze for a few months. Thaw to room temperature or serve slightly cold.
Can I use natural peanut butter?
No, I do not recommend using natural peanut butter for this recipe as it is prone to separation and is quite oily. I recommend a classic peanut butter, such as JIF or Skippy brand.
You’re going to LOVE how easy and delicious these Homemade Peanut Butter Cups are!!
Homemade Peanut Butter Cups
These Easy Homemade Peanut Butter Cups are seriously easy and amazing! They taste SO much better than store-bought and use pantry ingredients you probably have on hand!
Servings: 16 cups
Ingredients
- 16 oz (1 package) chocolate candy coating such as Candiquik
- 3 Tbsp unsalted butter, softened
- 2 Tbsp light brown sugar
- 1 cup creamy peanut butter (not natural)
- 1/2 tsp pure vanilla extract
- 1 cup confectioners’ sugar
- Pinch salt
Instructions
-
First, make the filling: In a medium bowl, combine the softened butter, light brown sugar, peanut butter, pure vanilla extract, confectioners’ sugar, and salt and use a handheld electric mixer to cream the mixture together. The mixture will be thick and doughy, like a cookie dough. Set aside. Meanwhile, line 2 muffin tins with about 16 paper liners.
-
Melt the chocolate candy coating according to package directions, or until melted and smooth. Spoon about 1 Tablespoon of the melted chocolate into the bottom of each paper liner and use the back of the spoon to kind of brush it slightly up the sides of the paper liner.
-
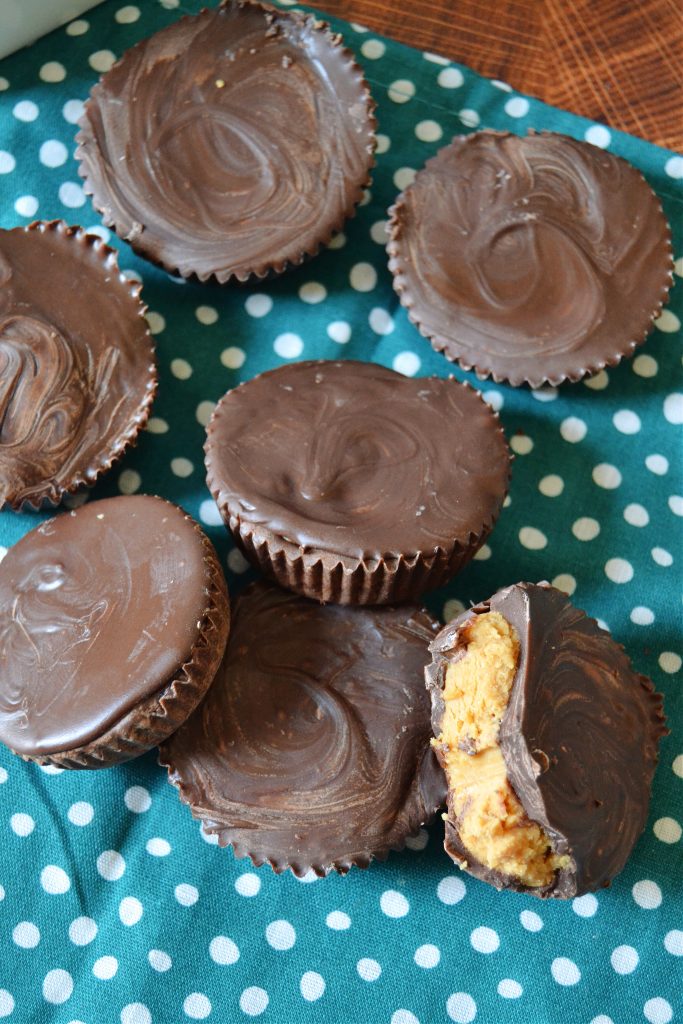
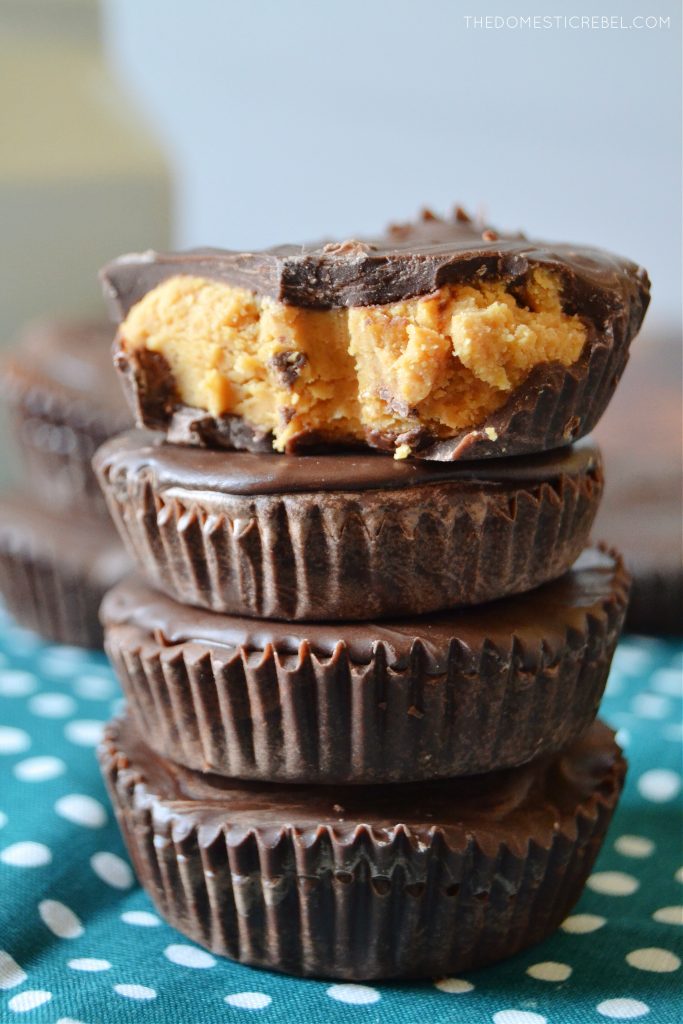
Take a heaping Tablespoonful of the peanut butter filling and form it into a little disc. Place the disc into the bottom of the chocolate cup. Top the peanut butter disc with another Tablespoon of the melted chocolate and smooth it over the top of the disc in an even layer.
-
Allow the peanut butter cups to set and firm up, about 30 minutes at room temperature, or expedite the process by placing the peanut butter cups in the fridge. Store any leftovers at room temperature or in the fridge or freezer.
Notes
You can find chocolate candy coating at most grocery stores, Target, Walmart, etc. by many brands like CandiQuik, Ghirardelli, Loghouse Foods, etc. These melt better than chocolate chips as they have a higher melting temperature and are less prone to seizing.
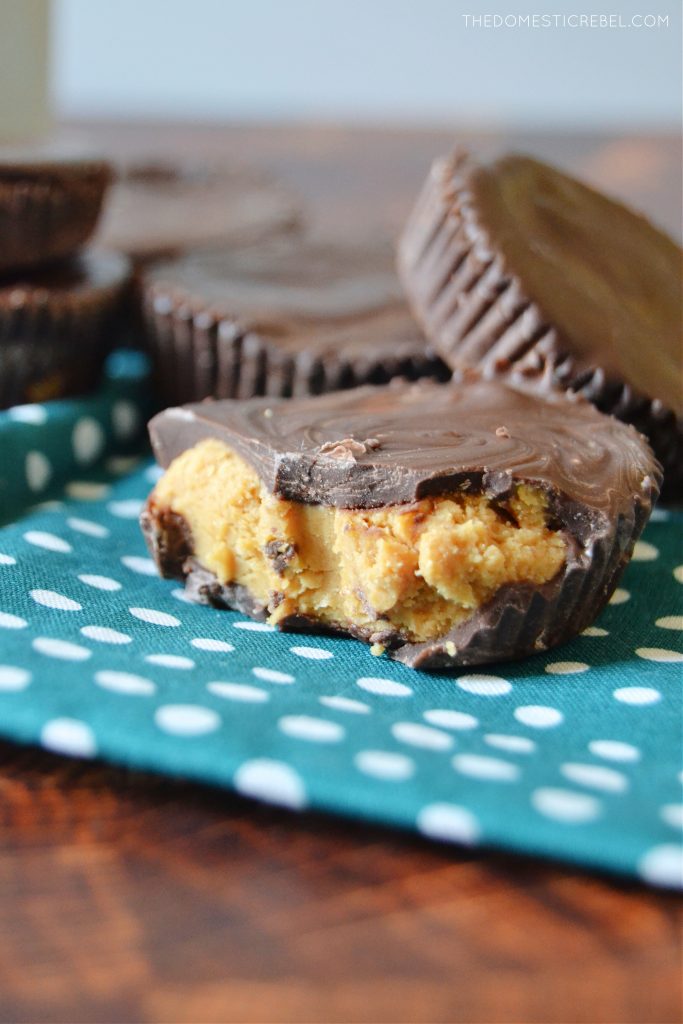 Ultra creamy, rich and peanut buttery with a delicious chocolate shell. Nothing will beat these!
Have a super sweet day!
xo, Hayley
