All of your questions answered about baking with yeast at home! This comprehensive guide to baking with yeast can help anyone tackle the world of bread and roll making at home with confidence.

This fall, I have some super amazing yeast recipes coming your way (like, they’re going to knock your socks off), and in preparation for that, I felt it was high time to update my working with yeast tutorial so that anyone who feels like they want to tackle the world of baking with yeast can do so with confidence and success.
If you feel intimidated at the thought of baking with yeast, you aren’t alone! That is a very, very common feeling and a sentiment I hear a lot through comments and emails here on the blog. However, because I also hear so many ridiculously awesome success stories from those of you who have tried making bread or cinnamon rolls for the first (or second) time and come out feeling like a rock star, it’s my mission in life to make working and baking with yeast accessible to anyone and everyone.
Knowing a bit about yeast and how to work with it can make all the difference. This simple guide takes a look at how yeast works and how to bake with it at home! It’s amazingly simple (and fun) once you learn a few little tricks.
Hopefully this guide to baking with yeast will answer many common questions and help you feel confident about working with yeast!
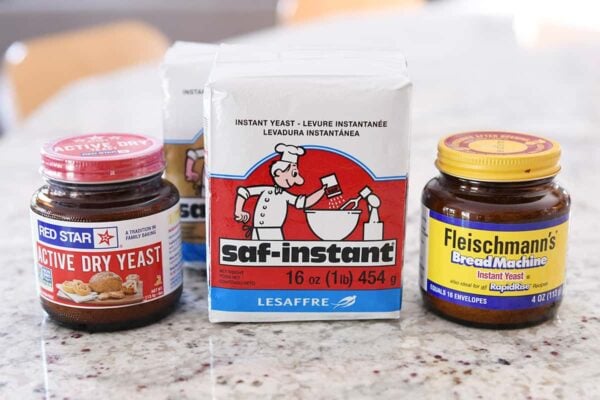
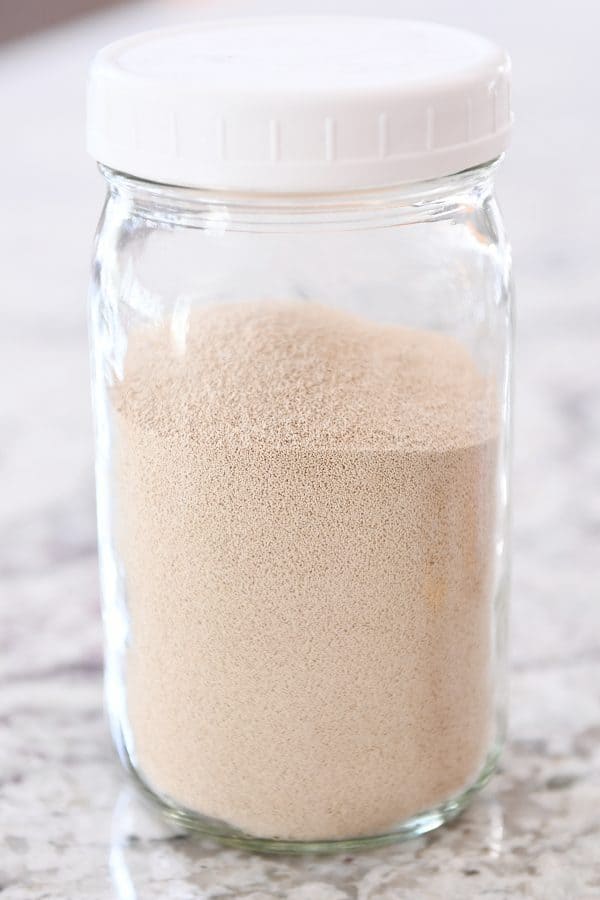
There are several different types of dry yeast offered at the store. {Sidenote: There is also such thing as fresh yeast, sometimes called cake yeast, but we aren’t even going to address that type of yeast today because all of the recipes I post here – and most my-style yeast recipes online – call for dry yeast.}
When it comes to dry yeast, there are two main types: active dry and instant. Yeast labeled rapid rise yeast or bread machine yeast is the same as instant yeast and can be used interchangeably .
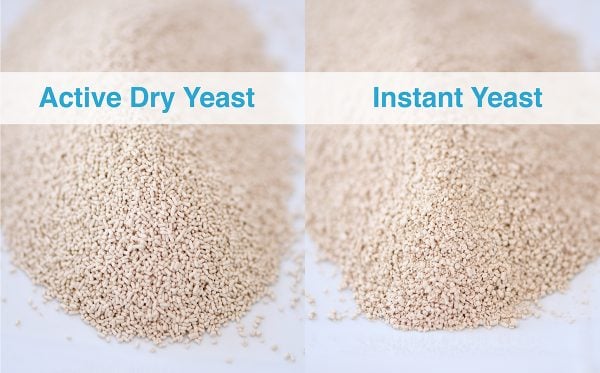
Active dry yeast has slightly larger granules than instant yeast as you can see in the picture below.
But besides the size of the granules, what’s the difference? The biggest difference between active dry yeast and instant yeast is that active dry yeast needs to be proofed/dissolved in water before using in a recipe whereas instant yeast can be added into the dry or wet ingredients of a recipe without being proofed first. We’ll talk more about proofing in a sec.
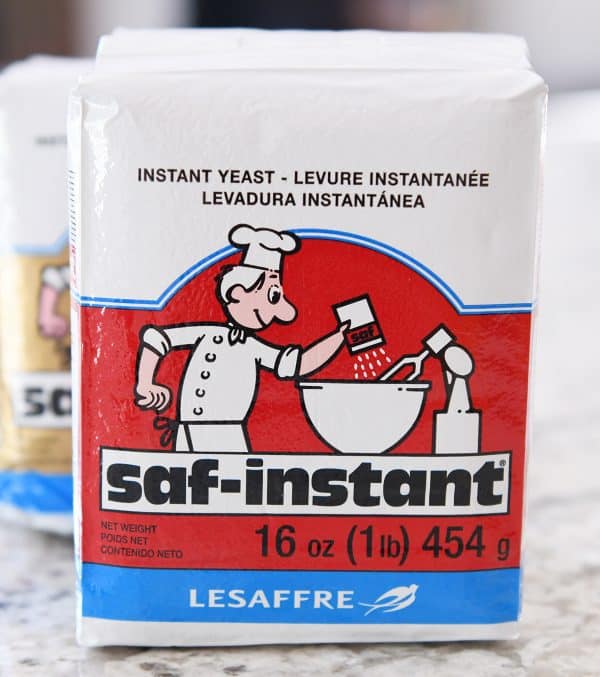
I use instant yeast 99.9% of the time. It’s gotten me through a lot of tough bread baking times. I love that I can add it directly to a recipe without proofing first. Saf instant yeast is my preferred brand (either the red or gold packages); I buy it on Amazon {aff. link} since my Costco stopped carrying it (rude). I’ve used other brands like Red Star and Fleischmanns with good results, too.
Yes! You sure can.
The method is simple:
If a recipe calls for instant yeast, use slightly more active dry yeast and dissolve the active dry yeast in warm water (and a pinch of sugar, optional) until it is bubbly and foamy. This usually takes a minute or so.
For instance, for a recipe using 1 tablespoon instant yeast, use 1 1/4 tablespoons active dry yeast and about 3-4 tablespoons water. For 2 teaspoons instant yeast, use 2 1/2 teaspoons active dry yeast.
If you want to use instant yeast instead of active dry yeast, use the same amount (technically you can decrease the instant yeast by 25% but I never do), and add the instant yeast in with the other ingredients in the recipe.
Any type of yeast can be proofed in water, but as noted above, instant yeast doesn’t have to be proofed in order to work in a recipe, whereas active dry yeast always needs to be proofed first.
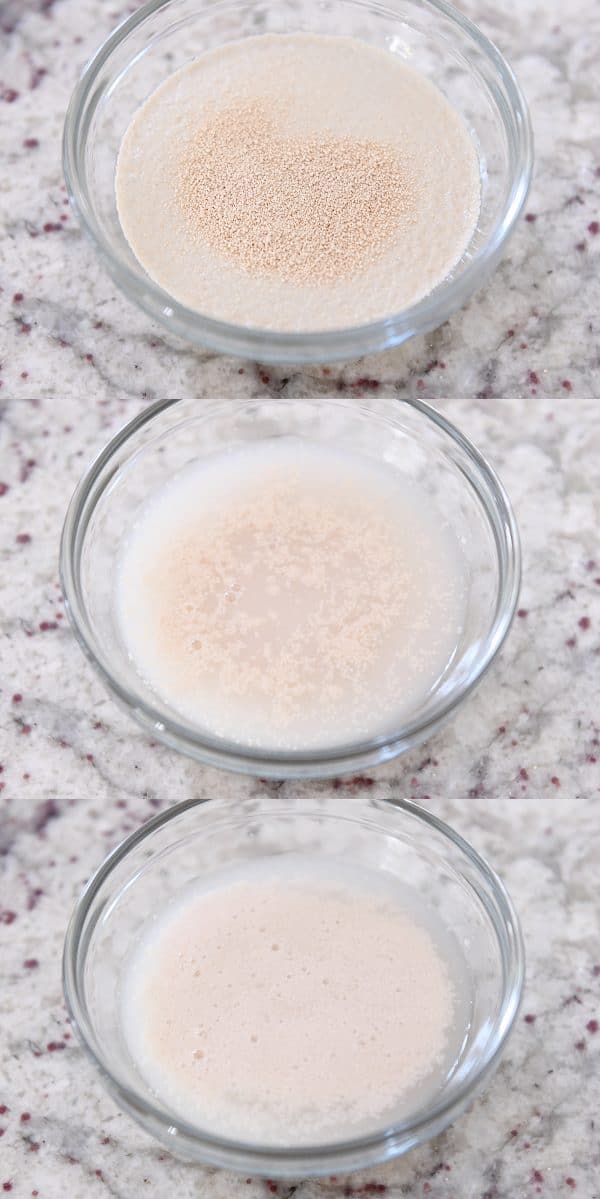
Sprinkle yeast over warm water and stir to dissolve. Then, leave it alone for a few minutes. After a few minutes, the yeast will rise and pop to the surface, and the texture will go from granular to foamy and bubbly. When it looks like that, you can use it in the recipe!
Some yeast recipes will call for hot water. Others lukewarm or just warm water. And slow-rise yeast recipes may even call for room temperature water.
There is a sweet spot for optimal yeast activity – too hot, and the water may kill the yeast and your bread won’t rise. If the water/liquid is too cold, it may not activate the yeast OR it may take much, much longer for the dough to rise.
Try for water/liquid that is right around 110 degrees F. You can use an instant-read thermometer {aff. link} to check the temperature. Or, be like me and just kind of “eyeball” it (I never use a thermometer). I let the water run and then pop my hand in the stream coming from the tap, and if it feels like a really warm bath (for my fingers), it’s good to go.
In my experience it takes extremely hot-to-the-touch water to kill yeast, so don’t stress too much about the temp if you don’t have a thermometer. Just go for really warm water, and you’ll be fine.
I store opened packages of yeast in a mason jar in the freezer. When I use the yeast in a recipe, I pull it directly from the freezer and use it in the recipe (no need to let it come to room temperature or anything like that).
Yeast can also be stored in the refrigerator, although it will last longer if stored in the freezer. It is important to always check the expiration date on yeast; if you can’t remember if the yeast is expired or not (and you’ve tossed the packaging), the easiest way to find out is to proof a teaspoon or so yeast in warm water. If it foams and bubbles, you can still use it!
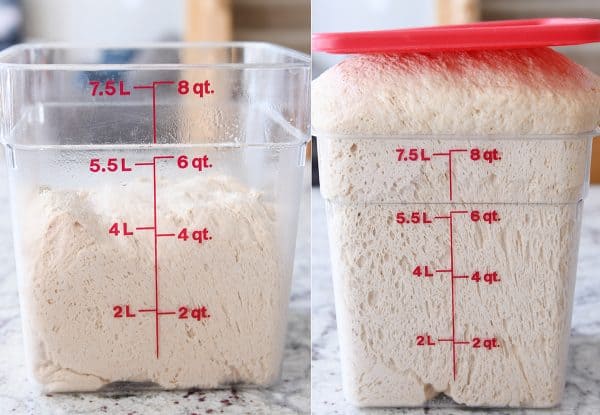
I can’t reiterate this enough. The amount of flour called for in most yeast dough recipes (especially the recipes on my site) is a guideline. The exact amount of flour you will need to add for traditional yeast doughs will vary based on humidity (even little variances like if it is raining or not can make a difference), elevation, how we each measure flour, etc. I know this is a difficult concept to wrap your brain around when most baked good recipes are an exact science. I mean, you’d never want to throw an extra 1/2 cup flour into a cake recipe because the batter looks too wet, right? But yeast doughs are different.
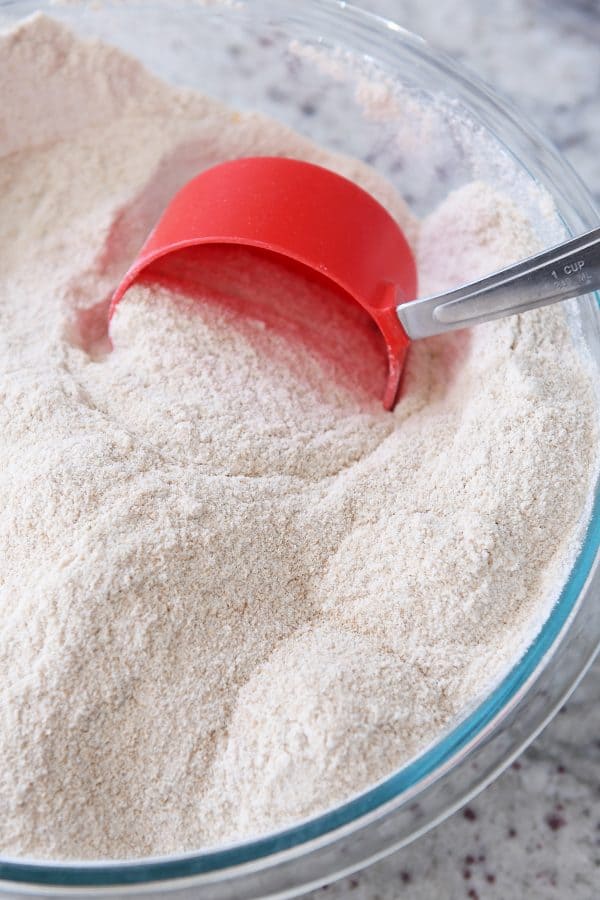
Take this white sandwich bread recipe, for instance. The ingredient list calls for 6 1/2 to 7 1/2 cups flour. I usually end up adding right around 7 cups, give or take a little. But many people in the comments say they stop adding flour right around 6 1/2 cups and others indicated they have to add upwards of 8 cups. All of these people are ending up with amazing bread.
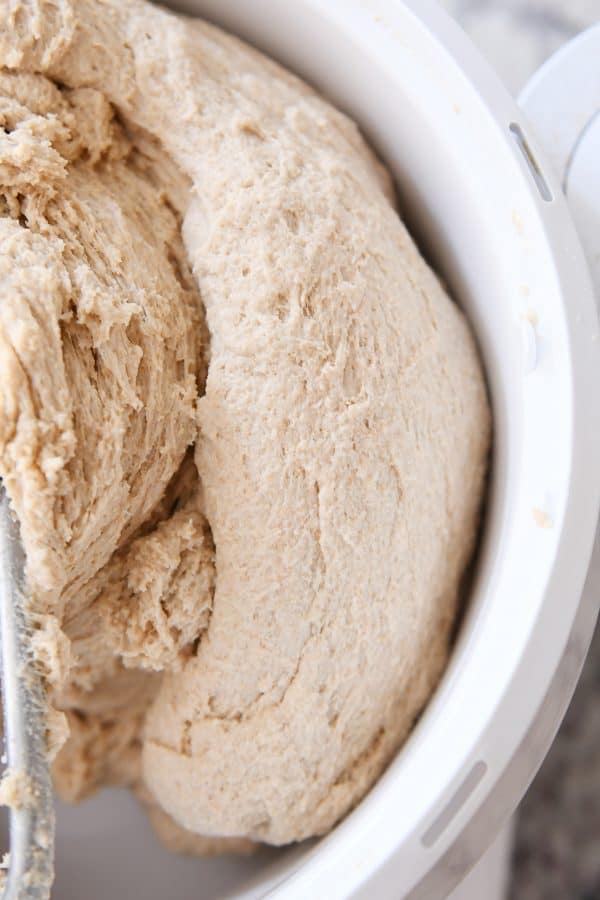
To be honest, I don’t really even keep track of the amount of flour I’m adding to most yeast doughs that I’ve made a lot of times. I just hover around the mixer and continue to add flour until the dough forms a soft, slightly sticky ball that cleans the sides and center (if using a Bosch) of the bowl.
Be careful not to over flour. Too much flour is death to a good bread or roll. But too little flour will leave a sticky mess (and prevent a good rise). The dough in the picture below has cleared the sides and center of my bowl and has kneaded for several minutes. When I grab a piece, it leaves a sticky residue on my fingers. Resist the urge to panic!
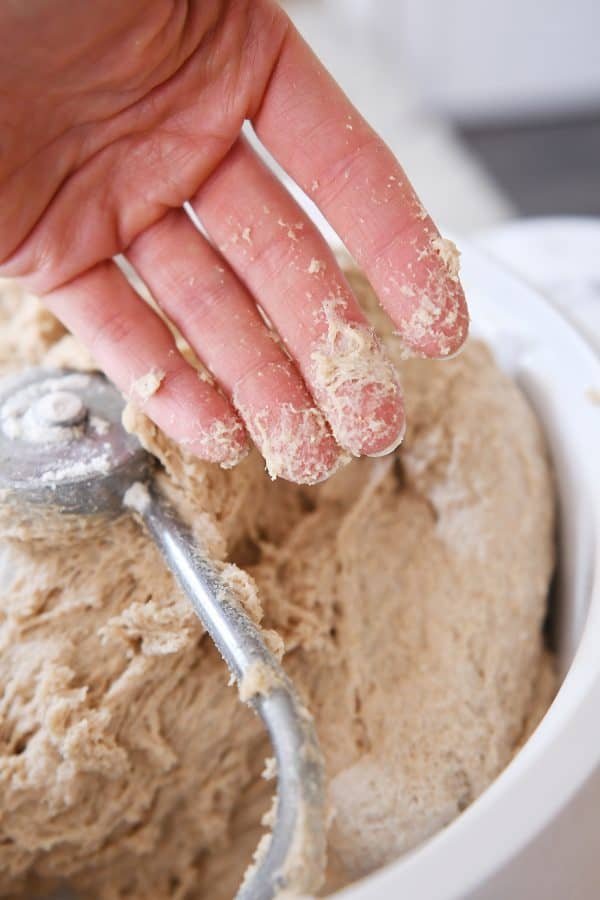
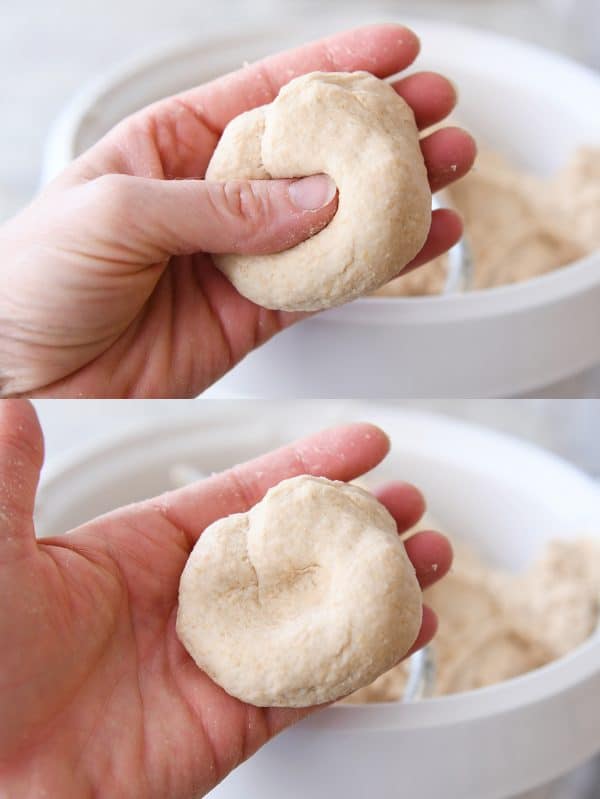
It may seem like the dough needs more flour at this point, but if I grab a small piece of dough and roll it in my hands, it forms a ball without becoming a gummy, sticky mess. The little dough ball is tacky to the touch and slightly sticky, but it holds its shape with minimal residue (the dough you see on the sides of my hand is when I grabbed a chunk out of the bowl).
If the dough can roll into a soft ball like this, don’t add more flour.
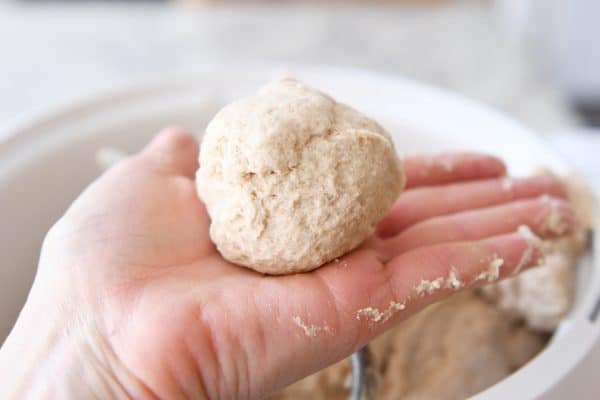
Another quick test is to press a finger into the ball of dough. You should be able to pull your finger away without any sticky dough coming with, and the indentation should stay where you left it. When you get used to the feel of a perfectly floured bread dough, it’s like magic. So soft, deliciously squishy, and extremely loveable.
Most yeast doughs aside from super wet doughs (like ciabatta bread dough or English muffin bread and others) can be made in a mixer or by hand. I almost always use my Bosch Universal stand mixer {aff. link} to make yeast doughs, because it makes bread making so easy. But other stand mixers can work, too. I’ve given a super detailed (unsponsored) look at comparing the Bosch to the KitchenAid here if you are interested in learning more about each mixer (comment thread is golden on that post – wow).
Making yeast dough by hand takes a little bit more practice – it’s easy to over flour when making by hand because dealing with the sticky dough is harder than letting a mixer do all the work, but it can definitely be done!
First of all, the purpose of kneading is to develop the gluten in the dough which in turn creates light and fluffy bread. If the gluten isn’t developed well enough the finished product maybe crumbly and tough (and may not rise well). Kneading is really, really, really important. Really. Important.
The best guideline to follow for kneading time is the one written in the recipe. But generally speaking, sweet doughs (like cinnamon rolls) often don’t require as much kneading as whole wheat bread. Some whole wheat bread recipes, like this one and this one, call for kneading the dough upwards of 6-9 minutes.
Also, if the recipe is written for a stand mixer and you are making it by hand instead, you’ll want to double the kneading time.
Dough rising problems can stem from a variety of reasons:
- Expired yeast
- Really hot water/liquid that kills the yeast (we talked about this above) OR cold water/liquid can cause dough to rise slow or not at all
- Added ingredients like butter, milk, and eggs can cause dough to rise more slowly
- Not enough kneading
- Cold temperatures in your kitchen – dough rises best in a gently warm (but not hot) environment
- The dough is over floured
- The dough is under floured (often when this happens, the dough rises out instead of up because there isn’t enough flour to keep the structure of the dough intact)
Also, as a side note, it can also be a problem if dough rises too long or too much. It’ll continue to rise a bit more in the oven, so if it has risen too long on the counter, it can deflate when baking.
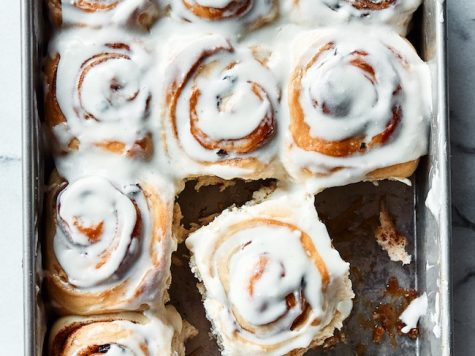
Ready to jump in to baking with yeast? Here are 5 of the easiest recipes to start with. (Even if you’re an expert, these recipes are crazy good.)
And a quick shout out to a few of my favorite no-knead, no mixer required bread recipes!
There are a multitude of other things we could touch on here: using whole wheat flour or other whole grains in bread dough, sourdough starters and using them in yeast doughs (!!), and many other ideas related to baking with yeast.
But I’ll leave this post at mostly the basics to help those of us that need a refresher and any beginner yeast bakers! Ultimately, the whole goal of this post and every yeast bread recipe on my site is to help you feel like you can conquer bread making at home like a champ. I know you can!
If you still have a question or baking with yeast tip of your own, feel free to chime in below in the comments!
Disclaimer: I am a participant in the Amazon Services LLC Associates Program, an affiliate advertising program designed to provide a means for me to earn fees by linking to Amazon.com and affiliated sites.