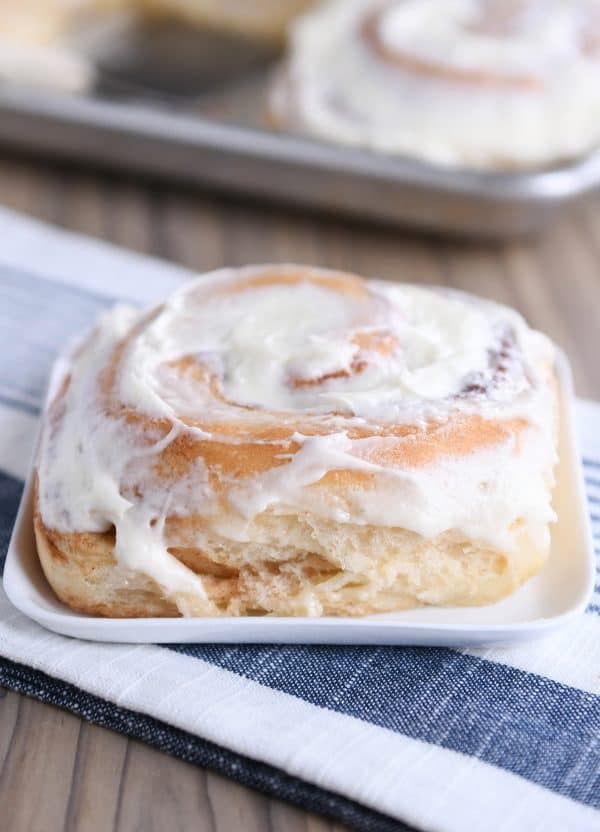
This recipe for the best cinnamon rolls EVER will make you rethink who you are and every cinnamon roll recipe you’ve ever made! They are so light, so fluffy, and so amazing!
Well, today is a big, BIG day.
Several weeks ago, I quickly mentioned (in this Friday Thoughts post) that I had found “the cinnamon roll recipe to end all cinnamon roll recipes” and I asked if you had room in your heart for one more cinnamon roll recipe? Haha. Hundreds of you responded saying: uh, hello, are you crazy, BRING IT ON! While the other two of you said: don’t need another cinnamon roll recipe, thankyouverymuch.
I’ve been buried under requests for this recipe ever since. You’ve emailed. You’ve commented. You’ve found my personal Instagram account and stalked me there to ask for it. You’ve begged. You’ve pleaded. You’ve called. You’ve emailed and commented and asked again. ?
Although I had already made the recipe several times when I mentioned it that Friday, I wanted to make it several more times and take lots and lots of pictures in order to make sure I could provide the most foolproof recipe and preempt any troubleshooting. In total, I’ve made this best-ever cinnamon roll recipe at least nine times since my friend, Cheryl, gave it to me mid-December.
Speaking of Cheryl, I gotta give this lady all the credit. She’s the source of the greatest cinnamon roll recipe of all time! And she’s adorable (and so nice).
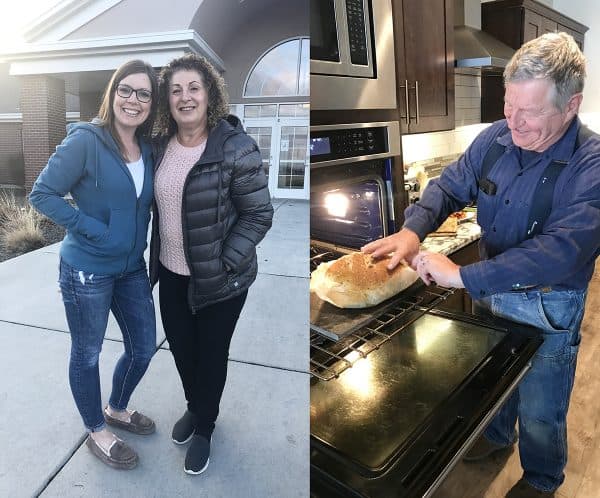
So is her husband. That’s him, Jean (pronounced John), making his other-worldly artisan bread. He’s a master bread baker. And Cheryl is one of the most accomplished, gourmet cooks and home bakers I’ve ever met. Like, she takes everything totally next level (they had us over for a Mediterranean-inspired dinner and I could barely eat, I was so in awe at the amazing spread). And these cinnamon rolls are no exception. Thank you, Cheryl! And thanks for letting me share the love with everybody about this recipe!
One of the most common phrases I’ve heard over the last couple weeks as you’ve requested this recipe is: I don’t know how they can be better than Gloria’s cinnamon rolls*, but I’m willing to try! (*Or these vanilla pudding cinnamon rolls or these Yukon gold cinnamon rolls.)
And trust me, I thought the same thing! The backstory is important here. So let me explain really quickly. At a church activity mid-December, I won an innocent-looking disposable square pan of cinnamon rolls as a Bunco prize. I’m wired to never turn down a pan of cinnamon rolls. When I found out Cheryl had made them, I was even more excited. I had no choice but to dig in right then and there even though the dice were still rolling.
I was stunned. How could a cinnamon roll be this light and fluffy? This amazing? I mean, I don’t want to brag, but I already make a ridiculously great cinnamon roll, but these were totally beyond deliciousness, and I began to doubt everything I thought I knew about cinnamon rolls.
I cornered Cheryl in the hallway to ask if she’d be willing to share the recipe after several of us women basically ate the whole pan and unanimously agreed: these cinnamon rolls = lifechanging. I had to whip my phone out faster than an old western gunslinger because Cheryl started rattling off the recipe by memory and I wanted to type in every detail. In my mind, I had already decided that if the ingredient lineup and method was basically the same as the other beloved cinnamon roll recipes on my site, I’d just chalk it up to the fact that Cheryl had a magic cinnamon roll touch. I’d be sad for a minute that I was missing this magical cinnamon roll making gene, but I probably wouldn’t need or use a recipe that was a similar variation to others I make all the time.
But. That wasn’t the case at all. As she gave me the recipe, I realized this was a cinnamon roll game changer and unlike any cinnamon roll recipe I’d made before. Because the amount of variation was so great, I knew I could (and needed to) post it to stand alongside the other great cinnamon roll recipes in my archives.
And because the ingredients and mixing method and dough texture are unlike other cinnamon roll doughs I’ve made, the resulting cinnamon rolls are lighter in texture and much fluffier. You don’t have to take just my word for it either. I’ve already said before that Brian is the resident cinnamon roll snob. He doesn’t like it when I mess with a good thing, and he already loved the cinnamon roll recipes I’ve posted before. But even he agrees 100% that these are the best cinnamon rolls I’ve ever made.
I even dared make them for my Aunt Marilyn (who introduced me to Gloria’s recipe years ago!), Uncle Dan and cousin Lydia, who take “cinnamon roll snob” to a whole new level. Dan almost didn’t try them because he’s so loyal to Gloria’s recipe. After eating, analyzing, eating, and analyzing (that’s what I make you do if you come to my house), Lydia said they were “way better than any other recipe,” Marilyn admitted they were “absolutely incredible,” and Dan conceded that although he’d never say they were better than Gloria’s recipe, they were “definitely on the same level.” I’ve given so many of these cinnamon rolls away as I’ve tested the recipe; every single person has honestly raved over them (and I don’t think they are just saying that, because I’ve instructed all my friends that we can’t be friends unless they give me honest feedback on food I shove in their face.)
Phew! So there’s the background. I know some of you may not care about all that. But for those of you that have been loyal MKC readers and have fallen in love with any other cinnamon roll recipe on my site, you know that it is important to me to give you an explanation for why I’m posting yet another recipe for something I’ve already declared the best!
Here’s my ultimate disclaimer though:
If you have a cinnamon roll recipe that you love and have already deemed BEST EVER, stick with it! No need to change things now! I already know that this recipe may not be for everyone; the world was meant to be a cinnamon roll diverse place. However, if you love to try new recipes, have been looking for the cinnamon roll to end all cinnamon rolls, or you just want to expand your baking horizons, I think you are going to love this one.
Let’s get into the nitty gritty!
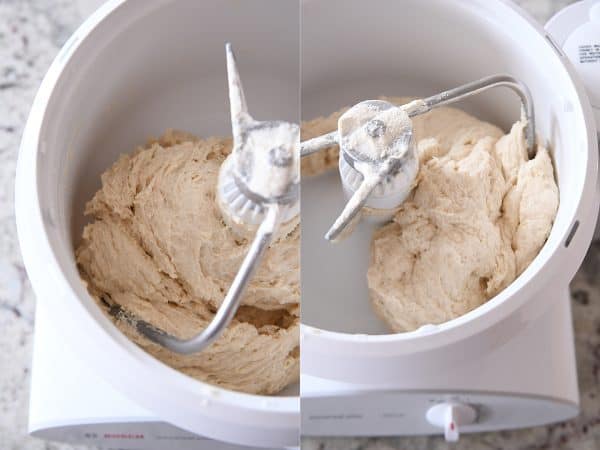
For this recipe, you can use a stand mixer or mix it by hand because it doesn’t require much kneading and the dough is not super stiff and hard to work with. I have recently been using this Danish dough hook aff. link (that one of you recommended!) for hand-mixed yeast doughs and it is a game changer.
I’ve made this cinnamon roll recipe in my Bosch Universal mixer {aff. link} and my KitchenAid stand mixer {aff. link} for testing purposes; I’ll always choose my Bosch for bread making because it’s superior at that kind of task, but a Kitchen Aid will do the job, too. Here’s a quick look at the comparison between these two stand mixers, if you are interested. This recipe doubles GREAT in the Bosch (haven’t tried a double batch in the KitchenAid).
Add 1/2 cup granulated sugar and 1/2 cup neutral-flavored oil to the mixer and pour in the 2 cups scalded milk.
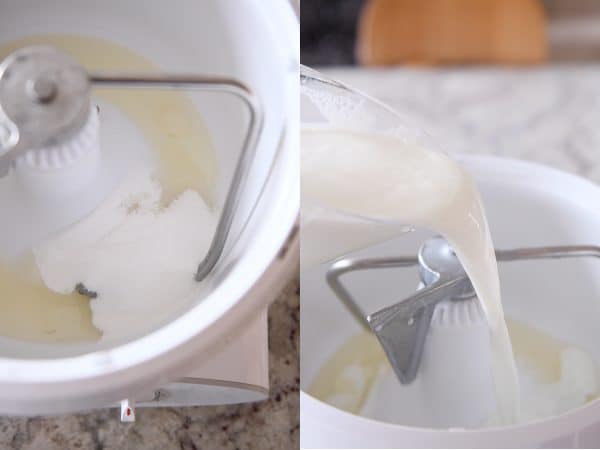
What is scalded milk? It’s basically milk that’s been heated to just below a boil – doing so changes the protein structure in the milk (none of which I really understand). But what I do know is that the reason many yeast dough recipes calls for scalded milk is because it makes the bread/rolls lighter and fluffier! So do it!
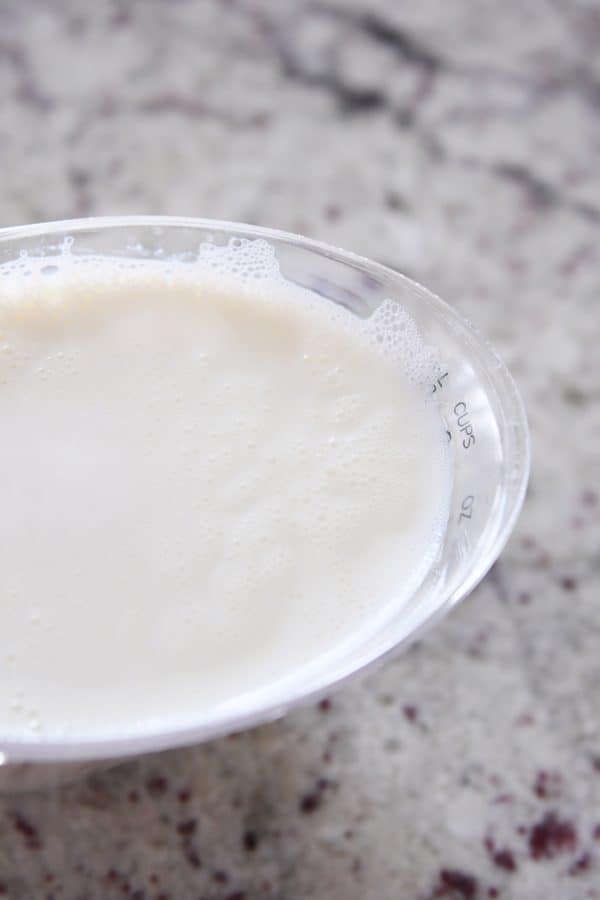
I take the easy way out and microwave the milk for this recipe in a microwave-safe liquid measuring cup. Every microwave will vary, but I heat it for 2-minute increments until little bubbles start to form around the edges and it is steaming. You can do this on the stovetop, too. And yes, I’ve let it go too long and it actually boils, and no, I don’t start over, and yes, the rolls still turn out great (just be aware that boiling milk will foam and rise and most likely spill over so if it does, you’ll want to make sure you have a full 2 cups of hot milk to work with).
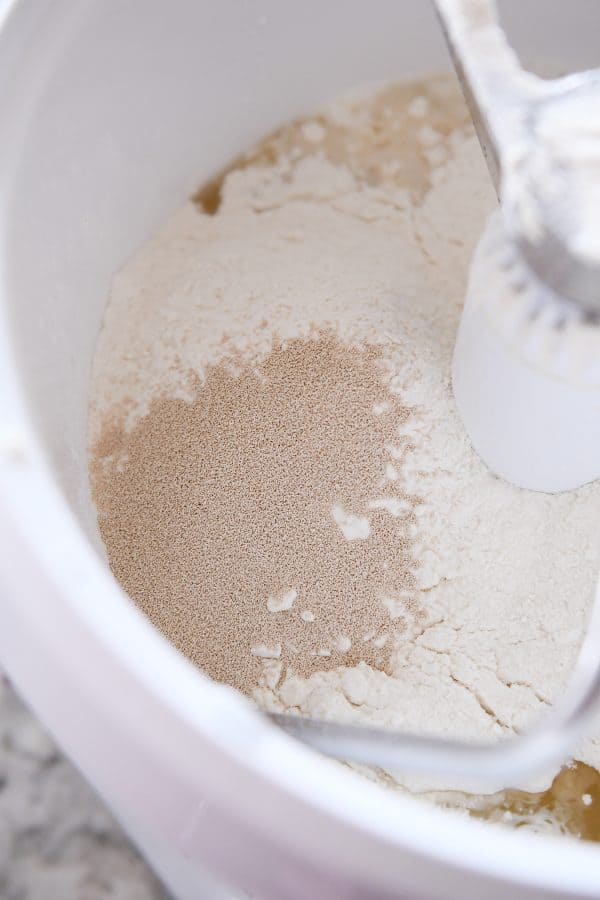
Let the milk/oil/sugar mixture rest for 15 minutes or so until the mixture is warm and not blistery hot. Add in the 4 cups all-purpose flour (I always use unbleached all-purpose) and then sprinkle the 1 tablespoon instant yeast on top of the flour. See the recipe below for how to substitute active dry yeast for the instant yeast.
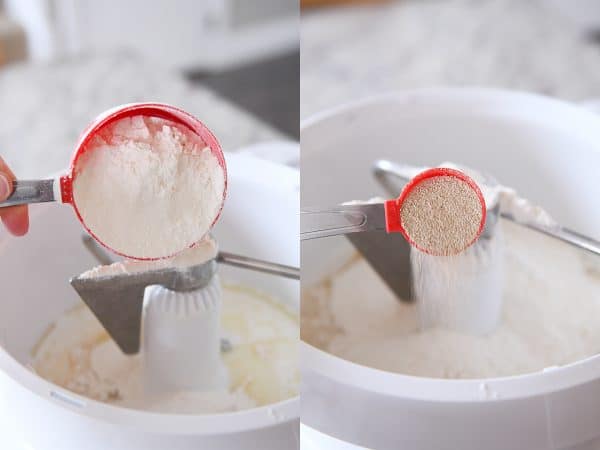
If you’ve been a tad bit impatient like me and maybe, possibly, perhaps didn’t let the milk mixture cool off for the full 15 minutes, make sure the yeast is added on top of the flour so it isn’t incorporated straight into the hot milk.
Start mixing! The dough will be much wetter than a normal cinnamon roll dough. Don’t panic. Things will come together, I promise.
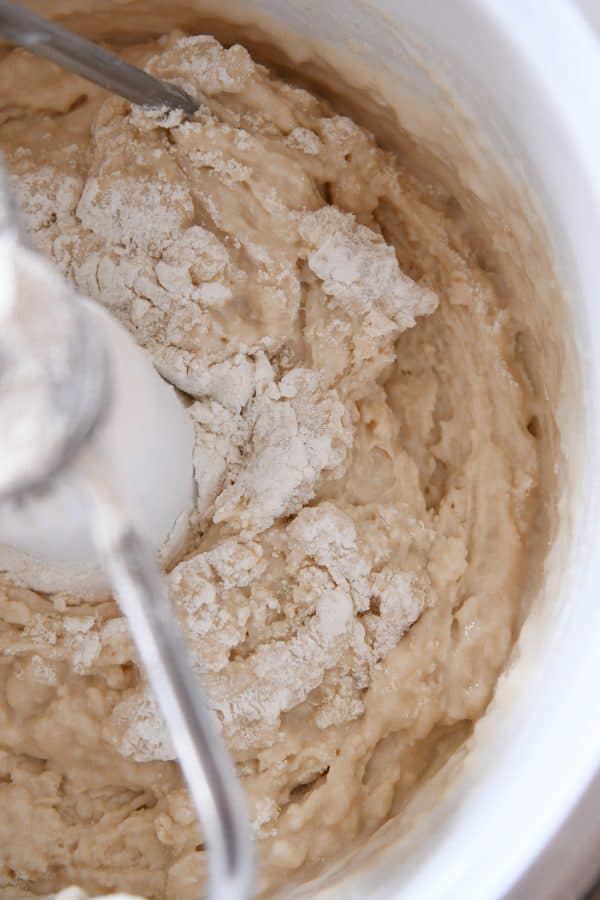
Mix until no dry streaks remain, scraping down the sides of the bowl if needed.
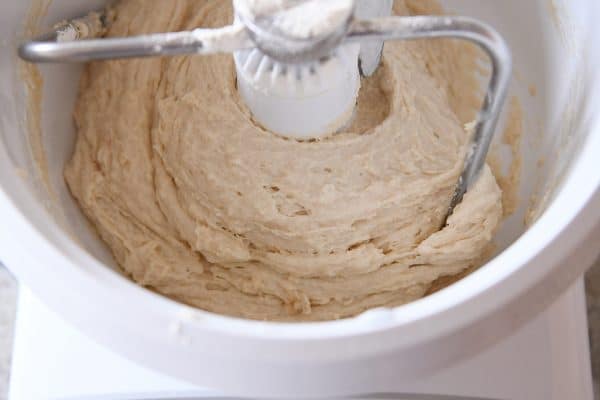
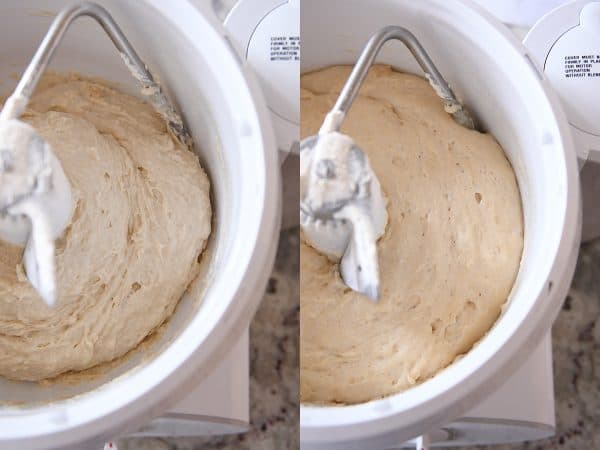
Now cover the bowl and let the wet dough (we’ll call it a sponge) rise until puffy and a little bubbly. This takes about 45 minutes to an hour in my kitchen. You can see a noticeable difference as the sponge has had time to rest and rise.
To the sponge, add 3/4 cup flour, 1/2 teaspoon baking powder, 1/2 teaspoon baking soda, and 1 1/2 teaspoons salt.
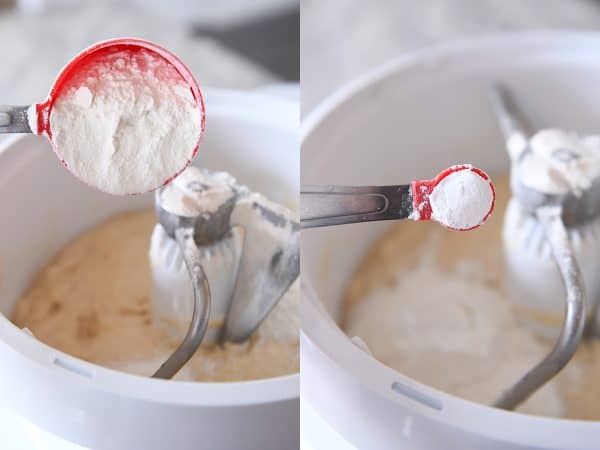
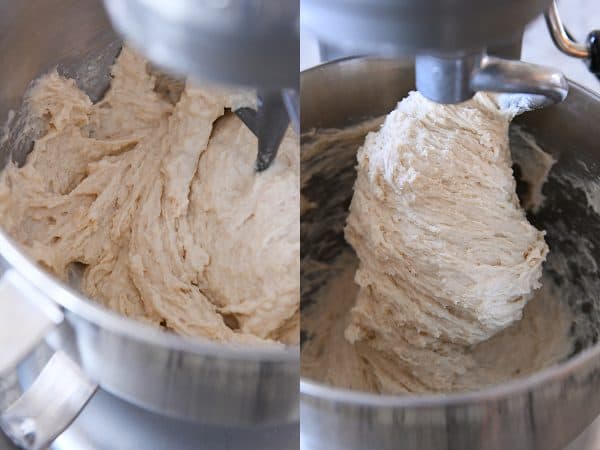
Start mixing again. The dough doesn’t need to be kneaded, necessarily, but you definitely want to let it mix to fully incorporate all the dry ingredients. It will start out rough and shaggy looking but it will come together.

After about a minute of mixing, it should form a mass of dough that has smoothed out a bit (doesn’t look as rough and spiky). This dough is very soft! Resist the urge to add more flour. As long as it isn’t leaving lots of wet dough residue on the sides of the bowl, it should be ok.
If you are making the dough in a KitchenAid mixer, I suggest starting with the paddle attachment and moving to the dough hook after adding the last addition of flour, baking powder and baking soda. I find it’s harder to get clean sides of the bowl with this recipe when using the KitchenAid based on the shape of the dough hook and bowl, just try to avoid adding more flour unless it is just so sticky it is impossible to work with. Grease your hands with cooking spray and gather it into a smooth ball before deciding whether to add more flour.
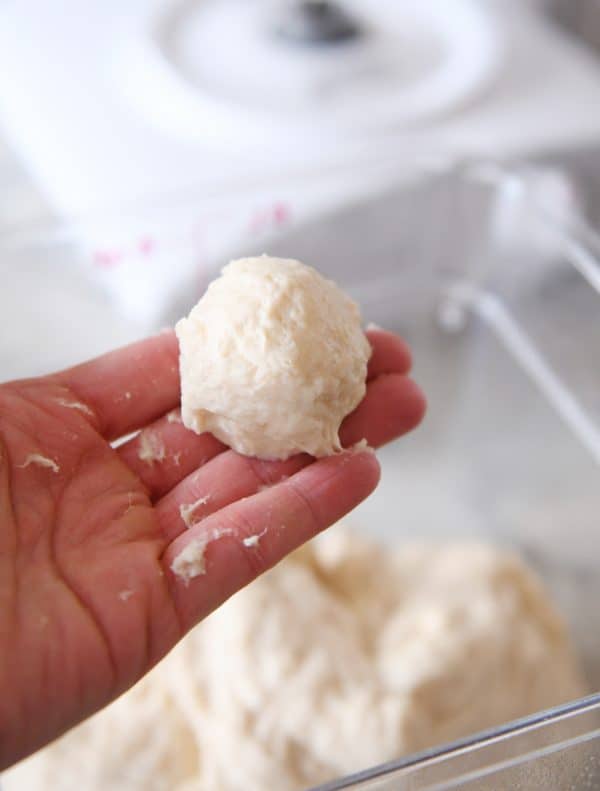
The dough may leave some doughy bits of residue on your fingers or hands, but if you grab a small piece, you should be able to roll it into a somewhat sticky ball. Over flouring this dough will be the death of a great cinnamon roll, so persevere through a bit of stickiness if you can!
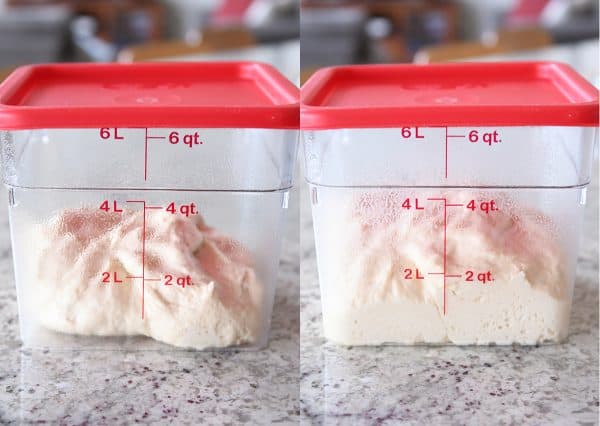
Pile the dough into a lightly greased bowl or container. You can see how soft and stretchy the dough is below.
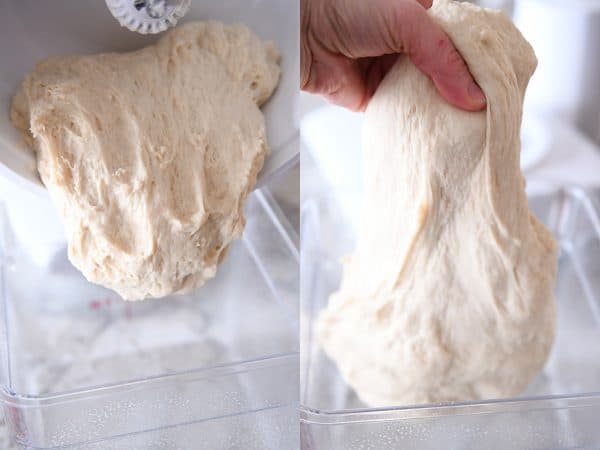
Let the dough rise until doubled. The exact time will depend on the warmth of your kitchen, but it takes right about an hour to an hour and a half in my kitchen. I use these handy measured food storage containers for dough rising and about a million other things {aff. link}. If you live near a Standard Restaurant Supply store (or other restaurant supply store), you can pick them up in various sizes for less than the price on Amazon, FYI.
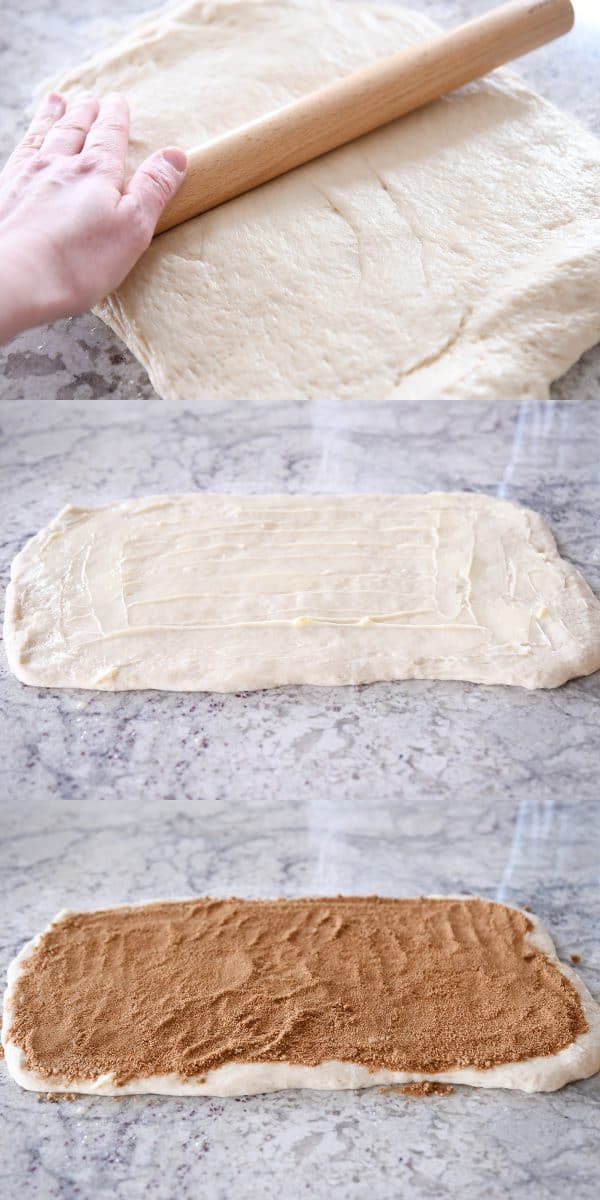
Turn the dough out onto a lightly floured counter (I use about 2-3 tablespoons flour) and roll out to about 12X18-inches. Pictured below is my favorite inexpensive and super awesome rolling pin – I have the 13 2/5-inch one {aff. link}. The size of the rectangle doesn’t have to be exact. I go for this size because it gives several spirals in the cinnamon roll, but if you like your cinnamon rolls puffier, roll the dough into a smaller rectangle so it is thicker. Spread the dough evenly with 8-12 tablespoons butter and sprinkle with cinnamon and brown sugar (I use about 3/4 cup brown sugar + 1 tablespoon cinnamon – Cheryl recommends adding cardamom to the sugar, too, which is delicious).
Favorite cinnamon = Penzey’s signature cinnamon blend (totally unsponsored but the only cinnamon I use)
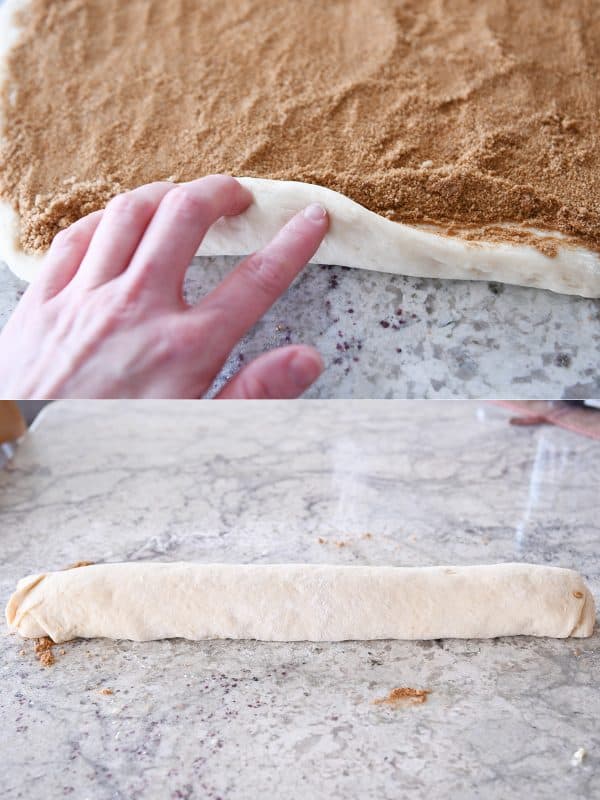
Start rolling these bad boys up! Roll tightly without lifting and stretching the dough up and over. If the dough is stretched while rolling, the rolls may have a tendency to shrink while baking. Once rolled, pinch the edge lightly to seal and pat the roll into an even thickness. My rolled up cinnamon roll log usually ends up being about 20 inches long.
As a quick sidenote, I get this question a lot:
Why do cinnamon rolls shrink and gap while baking?
That is a great question. And one that has kept me up many a night. In my intense cinnamon roll research, I’ve found it can be due to a variety of things. 1) Stretching and pulling on the dough while rolling into a log (like I mentioned above). When I’ve stretched too much during this part of the process, I’ve noticed that the cinnamon rolls can shrink and gap while baking. 2) Too much butter and/or cinnamon and sugar filling. While baking, the sugar and butter melt (into that glorious buttery/sugary gooeyness), and if the sugar filling is really thick, that leaves a lot more opportunity for gapping after the rolls bake and cool. 3) Rolling the dough too thin. While this may mean less cinnamony spirals, a thicker cinnamon roll rectangle is going to gap less while baking. 4) Letting the cinnamon rolls rise too long before baking. Doing this can cause the cinnamon rolls to deflate slightly in the oven and shrink as they cool. 5) Cramming too many cinnamon rolls into a pan that is too small. When I’ve done this, the rolls press together too much while rising and then fall back and shrink while baking/cooling.
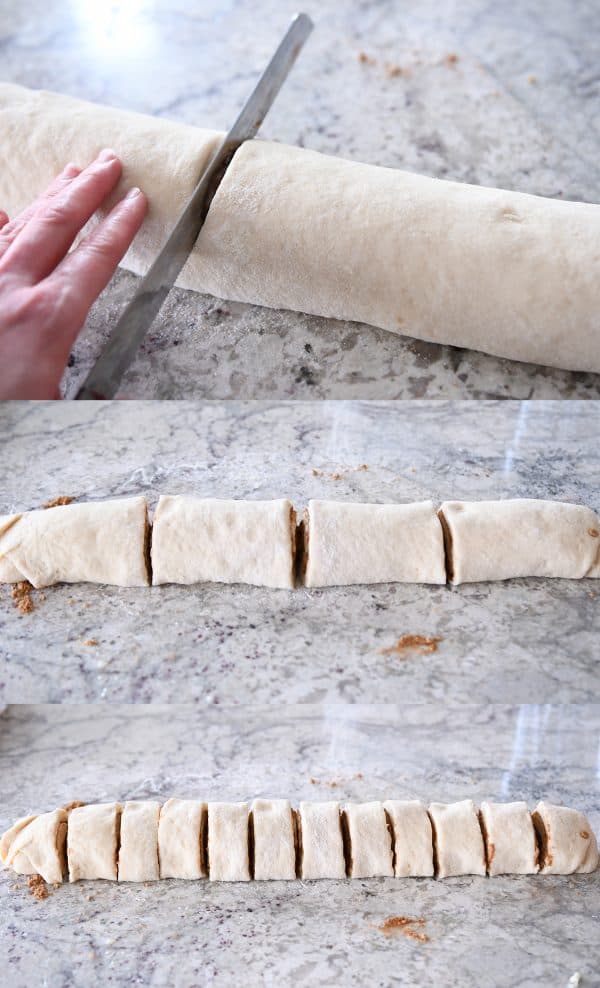
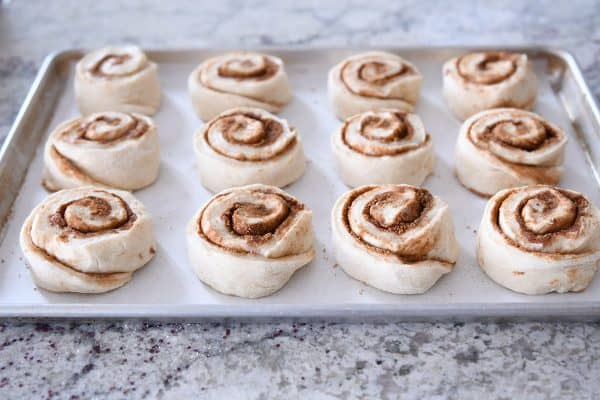
Ok, moving on. Now it’s time to cut the log into rolls! I cut the log in half first. And then I cut each half in half again. And lastly, I cut each of those fourths into thirds. Confused? Haha. It’s easier than it sounds. This inexpensive serrated knife {aff. link} is my go-to for cutting cinnamon rolls because it doesn’t crush the dough while cutting, but you can use unflavored dental floss or thread.
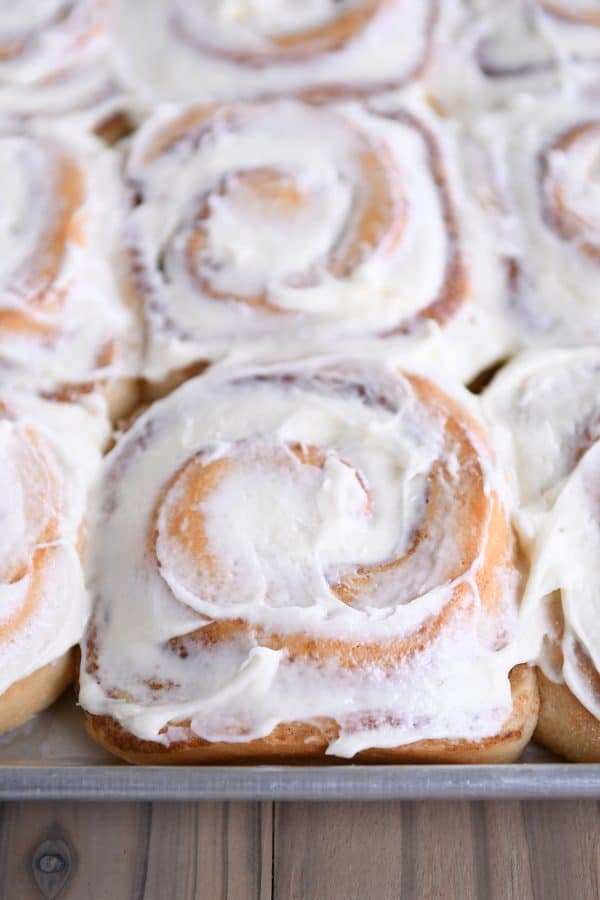
My preference is to use a half sheet pan for these rolls (the recipe makes 12 large cinnamon rolls).
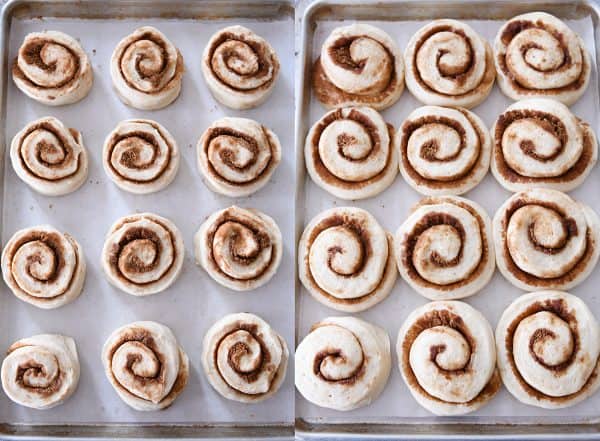
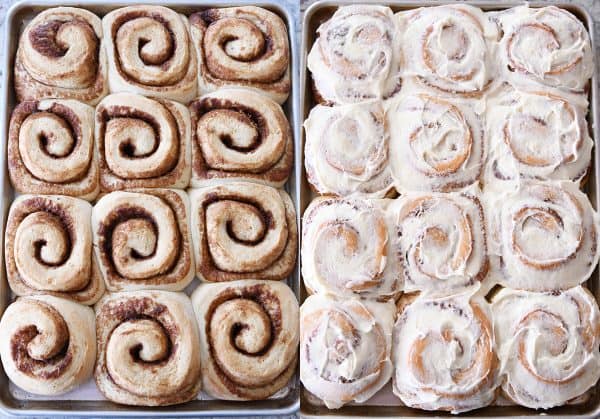
These rolls need room to rise and I’ve learned the hard way that putting them in too small of a pan means they won’t be nearly as fluffy and delicious. Below is a picture of this same recipe (all 12 rolls) baking in a 9X13-inch pan. You can see how close they are together before they’ve even risen. And on the right, after baking, they’ve gapped a lot in the middle and the sides are burned/middles are doughy.
So make sure you give the rolls at least an inch in between so they can breathe and have room to live. You can certainly roll the dough into a large rectangle and make 15-16 rolls out of the batch, instead of 12. If they are smaller, they’ll probably fit in a 9X13-inch pan + an 8X8-inch pan just fine.

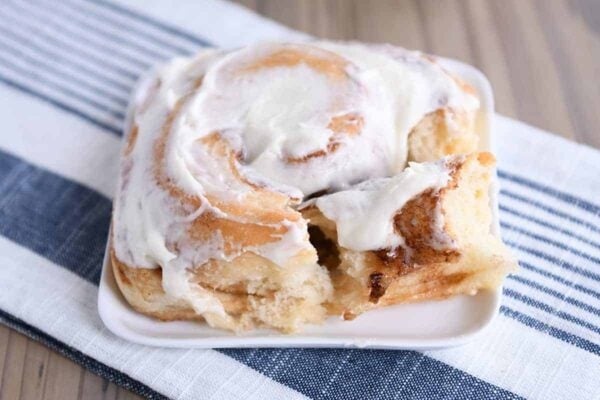
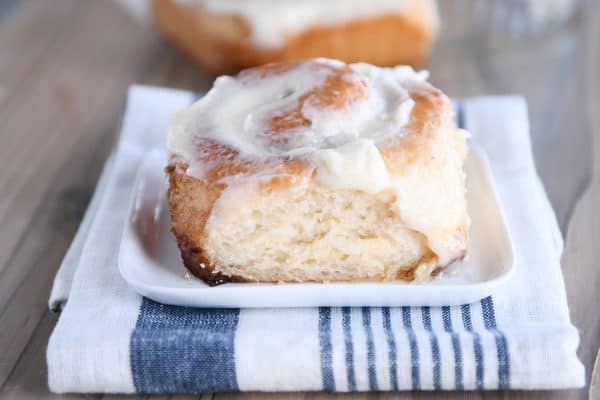
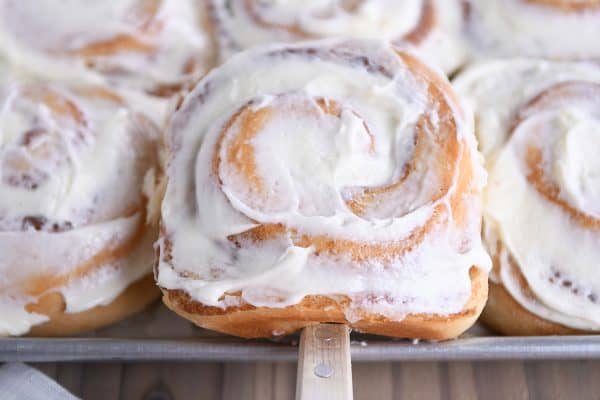
If you are making these to give away, I’ve found rolling them per the recipe (and getting 12 rolls out of the batch) and putting four rolls into an 8X8-inch pan is about perfect for baking smaller batches. Just the right amount of space to bake up fluffy and perfect. Here’s an example of a cinnamon roll baked in a square pan with three other rolls. Get a load of that fluffiness! It’s the perfect size of cinnamon roll if you ask me.
Once the rolls are placed on the baking pan, let them rise until very puffy and touching lightly on most sides (they may not be double in size, but close).
Bake the rolls at 350 degrees for 18-22 minutes (add time if needed). If you have convection bake, using that setting will help the rolls bake through to the center more quickly, but standard bake is fine, too.
While the rolls bake, make the frosting. You can frost them warm, or let the rolls cool a bit. I like to hit middle ground and frost while they are still just slightly warm so some of the frosting melts down into all the nooks and crannies but still stays a bit solidly soft on top.
Speaking of frosting, I’ve made a lot of cinnamon roll frostings over the years, and the icing I posted with these Yukon gold cinnamon rolls is hands down my favorite. It is the cinnamon roll icing I’ve been searching for my whole life. The delicate, creamy flavor (without an overpowering cream cheese presence) is the best, best, best. You can use various extracts to flavor it – maple, if that’s your thing (yum) or vanilla.
Lately, with the price of pure vanilla sky high, I’ve been experimenting more with emulsions (scary word that in this case just means flavoring). And wow, this butter vanilla emulsion {aff. link} adds the most insane yumminess to the cinnamon roll frosting. Kind of gives it a buttery sugar cookie vibe. In.the.frosting. It’s crazy good. And it’s only six bucks a bottle.
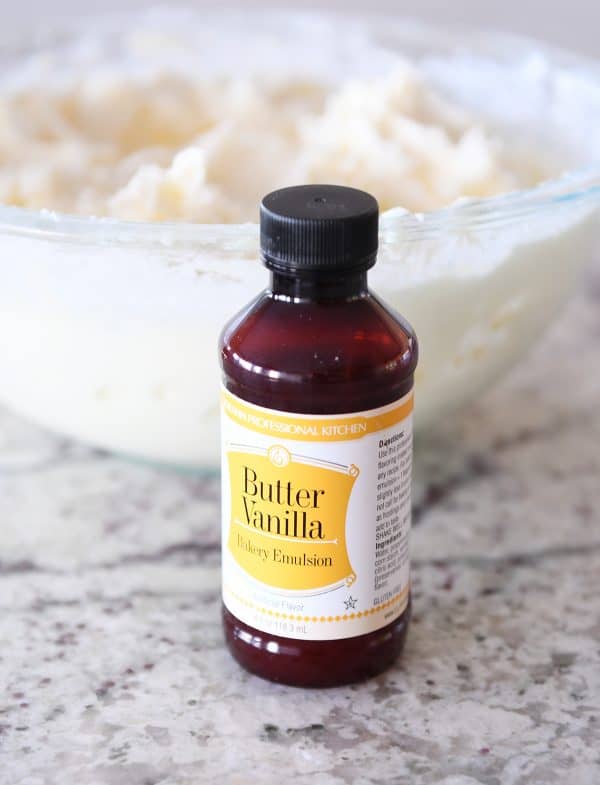
Incidentally as a sidenote, my 14-year old made these super soft chocolate chip cookies for a youth activity last week and used that butter vanilla emulsion in place of the vanilla extract and people were apparently saying they’d never had a cookie that tasted so amazing and wanted to know the secret. Emulsions! Haha.
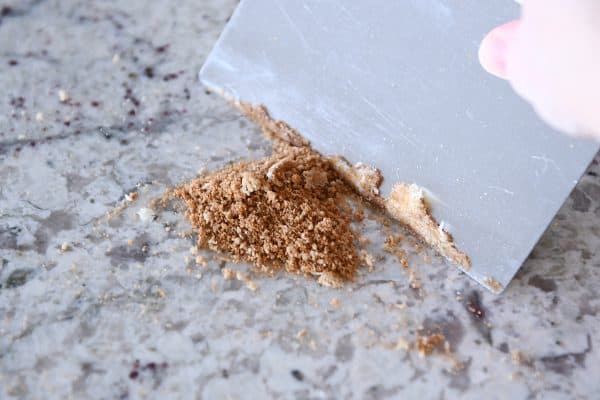
And since we’re talking random bits of knowledge here, rolling things out on a lightly floured counter is one of my least favorite things to do in the history of ever because of the gummy mess it can leave while wiping up. That is, until I figured out my handy dandy bench knife/scraper {aff. link} could eliminate the hassle. I use this scraper for so many things, but scraping up floury, cinnamon roll gunk off my counter is one of the reasons it has earned its way into favorite tool status.
So there you have it! Have we covered everything? I think so! If you’ve made it this far (without skimming), you deserve a major award.
If you have any additional questions, ask away in the comments and I’ll respond as quickly as I can. I am SO excited for you to get your hands on this recipe and let me know what you think! Enough talking, go make some cinnamon rolls!
One Year Ago: Healthy Yogurt Oat Blueberry {or Chocolate Chip!} Muffins
Two Years Ago: 7-Minute Spaghetti Squash {Instant Pot/Pressure Cooker}
Three Years Ago: Perfect Roasted Vegetables {5 Simple Tips}
Four Years Ago: White Chocolate Oatmeal Craisin Coconut Cookies
Five Years Ago: Light Lemon and Spinach Spaghetti
Yield:
12 large cinnamon rolls
Prep Time:
25 minutes
Cook Time:
20 minutes
Additional Time:
3 hours
Total Time:
3 hours 45 minutes

Ingredients
Sponge:
- 1/2 cup (3.75 ounces) granulated sugar
- 1/2 cup neutral-flavored oil
- 2 cups milk, scalded (heat to just below a boil)
- 4 cups (20 ounces) all-purpose flour (I use unbleached)
- 1 tablespoon instant yeast (see note for active dry yeast)
Dough:
- 3/4 cup (3.75 ounces) all-purpose flour
- 1/2 teaspoon baking powder
- 1/2 teaspoon baking soda
- 1 1/2 teaspoons salt
Filling:
- 8-12 tablespoons butter, softened
- 3/4 cup (5.5 ounces) packed light brown sugar
- 1 tablespoon cinnamon
- 1/4 teaspoon cardamom (optional but delicious)
Icing:
- 2 ounces cream cheese, softened
- 8 tablespoons (1 stick, 4 ounces) butter, softened
- Pinch salt
- 2 tablespoons milk or heavy cream
- 1/2 teaspoon vanilla extract
- 1 3/4 cups (7 ounces) powdered sugar
Instructions
- In the bowl of a stand mixer (or in a bowl to mix by hand), add the sugar and oil. Pour in the scalded milk and mix. Let the mixture sit for 15 minutes or so until it is warm but not blazing hot.
- Add the 4 cups flour and sprinkle the yeast on top of the flour. Mix until no dry streaks remain and scrape down the sides of the bowl if needed. The dough will be loose and wet-looking. Cover the bowl and let the sponge rest until puffy and doubled, 45 minutes to 1 hour, depending on the warmth of your kitchen.
- Add the remaining 3/4 cup flour, baking powder, baking soda and salt. Mix until the flour is completely incorporated and the dough looks smooth instead of rough and shaggy. It may not necessarily clean the sides of the bowl but it should for a pretty cohesive mass. Add additional flour only if it is too sticky to handle or a small piece of dough won’t form a ball in your hands (it’s ok if it leaves some doughy residue on your fingers).
- Scrape the dough into a lightly greased bowl or container, cover, and let rise until doubled, about an hour.
- On a lightly floured counter (I use about 2-3 tablespoons flour), roll or pat the dough into about a 18X12-inch rectangle. Spread the softened butter evenly across the top. Combine the brown sugar and cinnamon (and cardamom, if using) in a bowl and sprinkle evenly across the top of the butter. Pat down very lightly.
- Starting with one long end, start rolling the rectangle into a log without pulling and stretching on the dough (but still rolling as tightly as possible). Roll the seam to the bottom and pat the log into an even thickness – it should be about 20 inches long or so at this point.
- Cut the log into 12 even pieces. Place the rolls on a parchment-lined half sheet pan, tucking the loose end of the roll underneath, if you want. The rolls should be about an inch apart so they have room to rise. Cover with lightly greased plastic wrap and let rise until noticeably puffy and almost doubled, about an hour.
- Bake at 350 degrees F for 18-25 minutes until lightly golden and baked through. Let cool until warm before frosting.
- For the frosting, add the cream cheese and butter to a medium bowl. Whip with a handheld (or stand) mixer until creamy. Add the salt, milk or cream, and vanilla. Mix again. Add the powdered sugar and whip until light and creamy.
- Spread the slightly warm rolls evenly with the icing. Serve immediately or let cool completely and serve at room temperature (or warm lightly before serving).
Notes
If you only have active dry yeast, proof the same amount of yeast in a couple tablespoons of warm water and a pinch of sugar until the mixture bubbles and foams, 3-4 minutes. Add it to the recipe per the instructions (when the instant yeast is added).
This recipe doubles great (I’ve only doubled it in my Bosch mixer, not the KitchenAid).
Usually with a yeast dough recipe, I give a big ol’ lecture about going by the texture and feel of the dough vs the exact flour amount. With this recipe, the flour amount is important – the dough will probably be softer and slightly stickier than you may be used to – try not to add additional flour. Use the pictures and details in the post to get an idea of how the dough should look and feel. Add additional flour a little at a time only if the dough is too sticky to work with.
Just like Gloria’s recipe, these baked cinnamon rolls freeze amazingly well. After they’ve been frosted and cooled, I’ll scoop the rolls one by one into a quart-size ziploc bag, seal and freeze. It gets a little messy with the frosting, but once they are lightly warmed, no one notices – they taste as fresh as the day they were made! It helps to take them out of the bag still frozen and then microwave for a minute or so on 50% power until warm and gooey.
Recipe Source: adapted slightly from a recipe from my friend, Cheryl R (cut the recipe down to smaller size, changed up the mixing method just a little)
Disclaimer: I am a participant in the Amazon Services LLC Associates Program, an affiliate advertising program designed to provide a means for me to earn fees by linking to Amazon.com and affiliated sites.
