Childhood Monique is jumping for joy at this super nostalgic dinner. I’m not sure how I waited this long to publish my own recipe for fish sticks but here we are. And we are EXCITED.
If you’re like me and grew up on bags of frozen fish sticks with a side of tartar sauce and tater tots, get ready for a brand new homemade version that’s 1000x more delicious. These homemade baked fish sticks use fresh cod, simple ingredients, and an easy method to make them perfectly crispy on the outside.
Not only are these healthy fish sticks so simple to make but they’re also such a great dinner for kids and toddlers. I created this recipe for Sidney once we introduced him to fish, and he is beyond obsessed. They’re a wonderful source of protein and healthy fats for kiddos and bonus, they’re fun for them to eat! We loved watching Sidney practice his grips and learn how to eat these yummy fish sticks.
Serve them with your fav dipping sauces (yes, we linked a bunch of options) and a few delicious sides and have yourself the best weeknight dinner ever.

Everything you’ll need to make healthy baked fish sticks
These homemade fish sticks are so easy to make and have the perfect spice mixture. Keep them kid and toddler-friendly by omitting the spicy cayenne pepper! Here’s everything you’ll need to make them:
- Breadcrumbs: I like to use panko breadcrumbs because they provide the perfect, crispy texture.
- Seasonings: to give the fish sticks flavor you’ll need onion powder, paprika, garlic powder and plenty of salt and pepper. Feel free to add some cayenne pepper, too, if you like heat (and aren’t serving kiddos!)
- Eggs & milk: an egg and milk mixture helps the breadcrumbs stick to the cod filets. You can use any milk you’d like! We typically use unsweetened almond milk to keep this recipe dairy free.
- Fish: we’re using fresh cod filets in this recipe because they’re super versatile, firm and have a neutral flavor.

What fish is best for homemade fish sticks?
Typically a firmer white fish like cod, halibut or tilapia makes the best fish sticks because they hold up well and take on any flavor that you add to them. Salmon can work well, too!
If you can, try to get cod filets that are at least 1/2 to 3/4 inches thick.

The key to crispy baked fish sticks
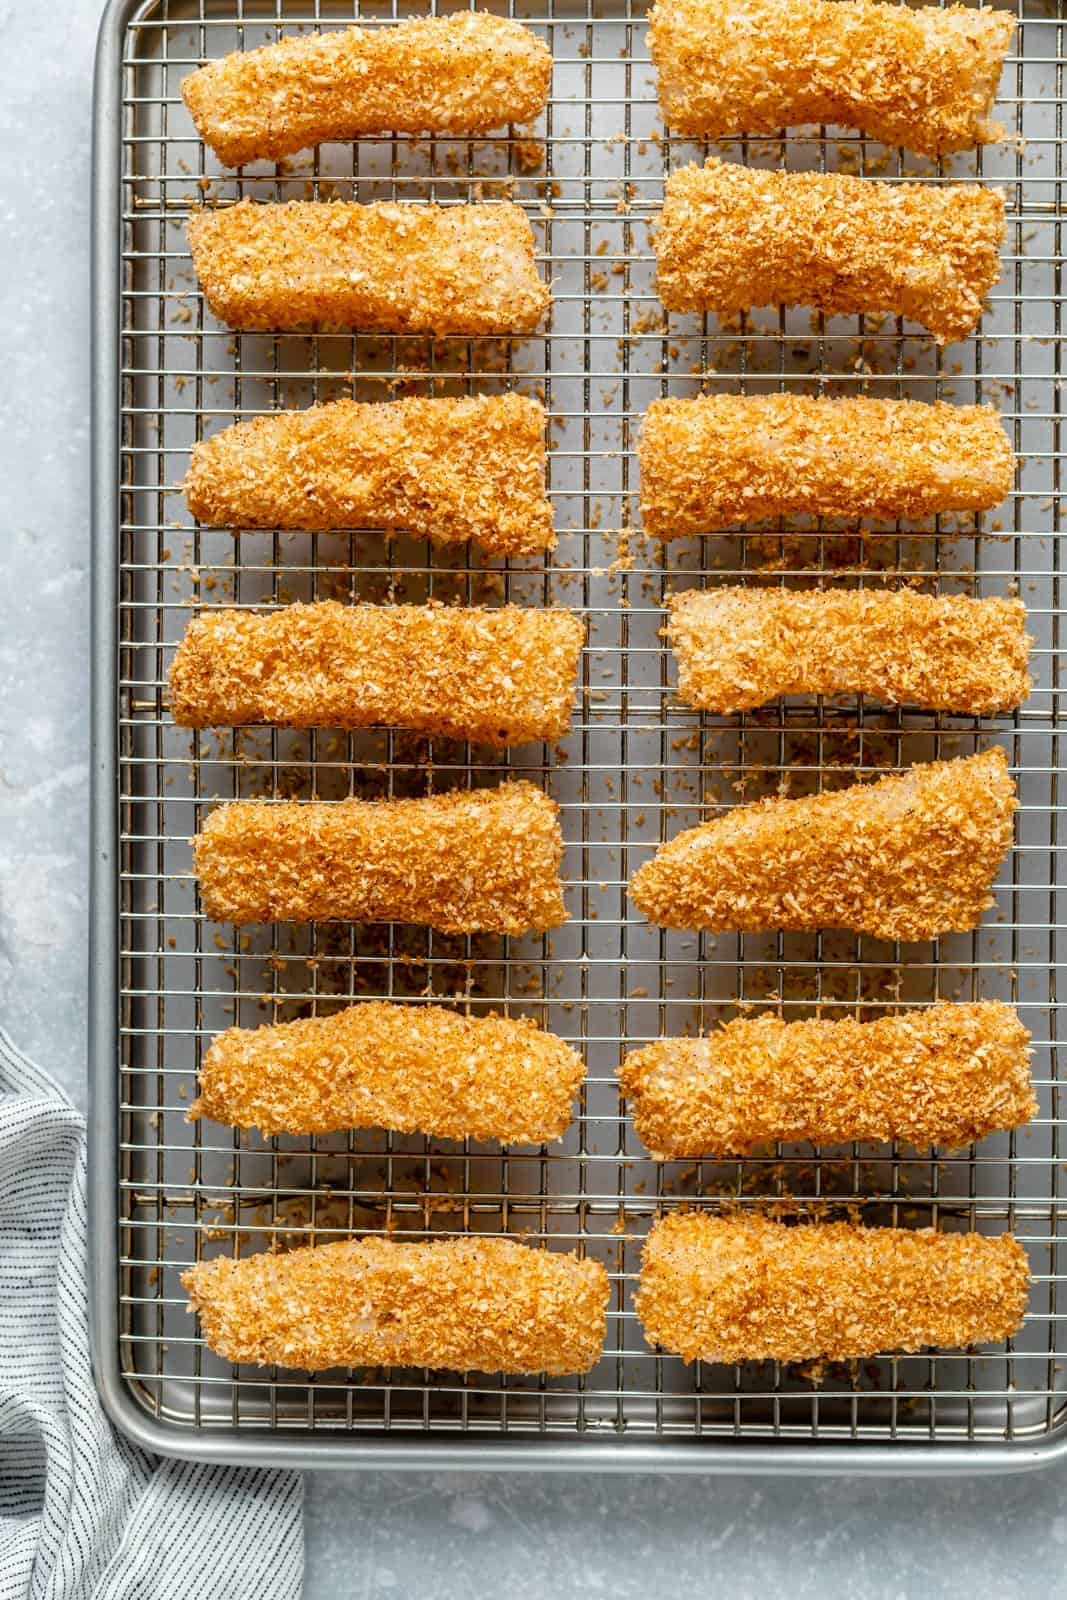
- Toast your breadcrumbs. This step is essential for getting a nice crispy coating on your baked cod fish sticks. You’ll simply spray the breadcrumbs with nonstick cooking spray and toast them in the oven for about 5 minutes before dipping your cod into them. It’s so much better than the fried version!
- Use a wire rack. When baking the fish sticks you’ll also want to use a wire rack instead of baking them directly on the parchment paper. The wire rack allows the fish sticks to get crispy on all sides and prevents sticking. If you don’t have one, simply flip the fish sticks halfway through baking.

How to make the best fish sticks in the oven
- Prep your oven & fish. Start by preheating your oven to 400 degrees F and patting the cod filet dry on both sides. You’ll then want to cut the filet into 1 inch thick sticks that are about 3 inches long (depending on the size of your fish filet).
- Bake your breadcrumbs. Like we discussed, you’ll then want to toast your breadcrumbs in the oven. Spread them out on a baking sheet, spray with nonstick cooking spray, bake for 2 minutes, and then stir them around and bake for 2-3 minutes more until golden.
- Spice your breadcrumbs. Add your toasted breadcrumbs to a bowl with all of your spices.
- Make your egg mixture. In a separate bowl whisk together the eggs and milk of choice.
- Prep your pan. Line your baking sheet with parchment paper, add your metal rack and give that a spray with nonstick cooking spray.
- Make the fish sticks. Dip each piece of cod into the egg mixture, then use tongs to grab and toss it into the breadcrumb mixture. Roll it around to coat it and use tongs to transfer each fish stick to the wire rack.
- Bake & serve. Once you’ve repeated with all of your fish sticks, spray them with nonstick cooking spray and bake until cooked through, about 15-20 minutes. Serve with your fav sauces and enjoy!

Let’s talk dipping sauces
If you grew up on fish sticks (likely from the freezer) I’m sure you’ve eaten them with tartar sauce. Yes, these homemade, kid-friendly fish sticks are perfect for dipping in beloved tartar sauce, but they’re also amazing in one of these delicious, slightly more nutritious dips:
Also, no shame in dunking these in ketchup! Get all of our fresh & delicious dip recipes here.

How to store leftovers
Store any leftover fish sticks in an airtight container in the fridge for 3-4 days. To reheat, place the fish sticks on a baking sheet and broil them on high for a couple of minutes until heated through and crispy on the outside.
Freezer-friendly fish sticks
Skip the packaged, frozen fish sticks and freeze a batch of these homemade ones instead!
- Let the fish sticks cool completely before transferring them to a baking sheet.
- Freeze them on the baking sheet to ensure that they don’t stick together, then transfer the frozen fish sticks to a freezer-safe bag or container and place in the freezer for up to 2-3 months.
- To reheat, I’d recommend heating them in the oven so that they’re nice and crispy.

What to serve with homemade fish sticks
The options are endless! Serve these crispy baked fish stick with a side of veggies, maybe some fries, or some of our fav side dishes:
I hope you love these homemade crispy baked fish sticks! If you make the be sure to leave a comment and a rating so I know how you liked them. Enjoy, xo!
Homemade Crispy Baked Fish Sticks
Homemade baked fish sticks that are deliciously crispy, easy to make and packed with protein. These healthy baked fish sticks make a wonderful dinner for kids, toddlers and adults alike because they’re super nutritious and fun to eat. Serve with your fav sides and dipping sauces!
-
2
cups
panko breadcrumbs - Nonstick olive oil cooking spray
-
3/4
teaspoon
salt -
1
teaspoon
black pepper -
1
teaspoon
onion powder -
1
teaspoon
paprika -
½
teaspoon
garlic powder -
1/4
teaspoon
cayenne pepper, only if you like a little bit of heat -
2
large eggs -
2
tablespoons
milk of choice -
1 ¼
pound
cod filet
-
Preheat the oven to 400 degrees F.
-
Pat the fish fillet dry on both sides with a paper towel. Cut the fish into 1 inch thick sticks/strips. They should be about 3 inches long, but this will vary based on your fish filet.
-
Add panko breadcrumbs to a large baking sheet and spread out in an even layer. Spray breadcrumbs with nonstick olive oil cooking spray. Bake for 2 minutes, then stir breadcrumbs (or just give the pan a shake) and then bake for 2-3 minutes or until breadcrumbs are golden brown. Keep heat in the oven.
-
Transfer breadcrumbs to a medium bowl. Whisk in spices: salt, black pepper, onion powder, paprika, garlic powder and cayenne pepper. Set aside.
-
In a separate medium bowl, whisk together the eggs and almond milk. Set aside.
-
Line the large baking sheet with an oven safe wire metal rack. Spray with nonstick cooking spray.
-
Dip each fish piece into the egg mixture, then use a tong to grab and toss into the breadcrumb mixture and roll it in completely coat with breadcrumbs. Use tongs to transfer each fish stick to the wire rack, placing about 1 inch apart.
-
Generously spray the tops of the fish sticks with nonstick spray. Bake in the oven for 15-20 minutes until cooked through. Serves 4. Serve with tartar sauce, my feta sauce, tahini sauce, tzatziki, ketchup or whatever sauce you’d like! Makes 12-16 fish sticks.
Try to get cod filets that are at least ½-3/4 inch thick.
To freeze: transfer your cooked, cooled fish sticks to a baking sheet. Freeze them on the baking sheet to ensure that they don’t stick together, then transfer the frozen fish sticks to a freezer-safe bag or container and place in the freezer for up to 2-3 months.
To reheat from frozen: I’d recommend heating them in the oven so that they’re nice and crispy.
Nutrition
Servings: 4 servings
Serving size: 4 fish sticks
Calories: 255kcal
Fat: 3.5g
Saturated fat: 0.9g
Carbohydrates: 21.9g
Fiber: 1.4g
Sugar: 1.2g
Protein: 32g
Recipe by: Monique Volz // Ambitious Kitchen | Photography by: Eat Love Eats

