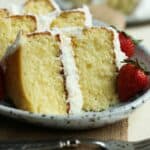
This Perfect Vanilla Cake Recipe is very easy, with just a few important tricks to make it buttery, and soft and moist!
I have partnered on with Challenge Dairy on this recipe. I have used Challenge Butter for years and I love their products. All opinions are my own.
Can you even believe that in all the year (almost 10!) that I have been blogging, I have never posted a recipe for my favorite vanilla cake! I have shared my favorite vanilla cupcakes, which is very similar, but I have made a few adjustments to make the recipe perfect in cake form.
And what’s fantastic about this recipe, is that it’s absolutely easy…there are just a few things that I insist you do to make it perfect!
AND I’ve made this cute little video to show you just how simple it is.
So we’re going back to basics today, and like I said, I have a few steps that will ensure the best result.
Tip #1
The trick to this cake is making sure you use Cake Flour. It always produces a more tender crumb. Certainly you CAN use all purpose flour, and I used to think it wouldn’t matter too much, but it does. Oh friends, it does. I even went as far (like with the cupcake recipe) where you use a combo of all purpose and cake flour, which I think is totally fine for cupcakes. But for a cake, I truly feel that 100% cake flour is the way to go. Cake flour has less protein content, and forms less gluten when you mix it.
Tip #2
Another non-negotiable is buttermilk. The acid in the buttermilk combined with the baking powder produces the most tender crumb by breaking down the long strands of gluten. If you catch yourself in a pinch and don’t have buttermilk in your fridge, here’s a simple trick…
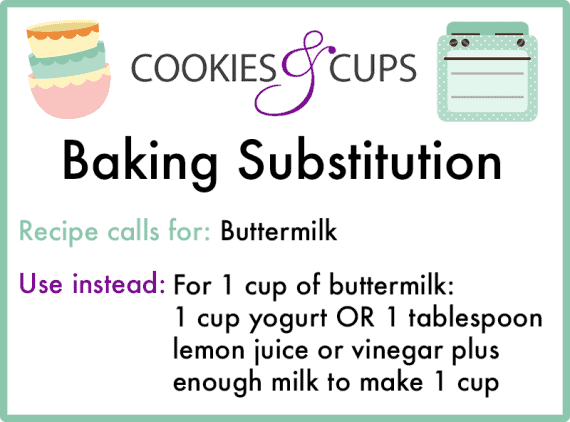
I do recommend first to sub in milk with lemon juice or vinegar for the buttermilk…and if you don’t have either of those, you can sub in plain yogurt as a last resort.
Tip #3
I am not a huge stickler for sifting the dry ingredients together. What I do, is add the baking powder and salt in with the eggs and vanilla. I find this gives them plenty of time to get evenly mixed into the batter. I love baking, but I really try and cut down on steps that I feel are unnecessary. It also saves me from washing another bowl. Some might argue this, I have never had an issue!
Tip #4
Make sure you scrape the sides of the bowl! I have a “scraper blade” on my KitchenAid mixer, but I do not rely on this 100% to mix my batter. It’s so easy to stop your mixer and use a rubber spatula to ensure everything is getting mixed in properly. Scrape the sides, and the bottom of the mixing bowl to get any butter or flour that hasn’t gotten incorporated. If you don’t do this, you will have clumps of butter in your batter and it won’t bake evenly. It’s such an easy thing to do, to make sure your results are perfect.
Tip #5
DON’T OVER MIX THE BATTER! Once you add the flour and buttermilk in alternating portions you want your batter to be smooth and creamy, but you don’t want to overdo it. This will make your cake tough, and not as tender. The more you mix, the more gluten forms, which you don’t want for a light, fluffy cake. You want to want everything to be combined, but that’s it! It will take less than 30 seconds after the last portion of flour is added. And again, SCRAPE THE SIDES OF THE BOWL!
Tip #6
Don’t skip using parchment rounds in the bottom of the pan. I know this might be another step you might want to skip. DON’T DO IT. Use baking spray, coat the pan, cut circles of parchment paper out that fits in the bottom of the pans. Place the parchment in the sprayed pan, and spray it again! There is NOTHING worse than going to all the trouble of baking a cake and having it stick. You might swear that you greased or coated the pan enough…but please, just add the parchment paper for insurance. This cake has a high sugar content and will easily stick to the pan if not properly prepared.
Tip #7
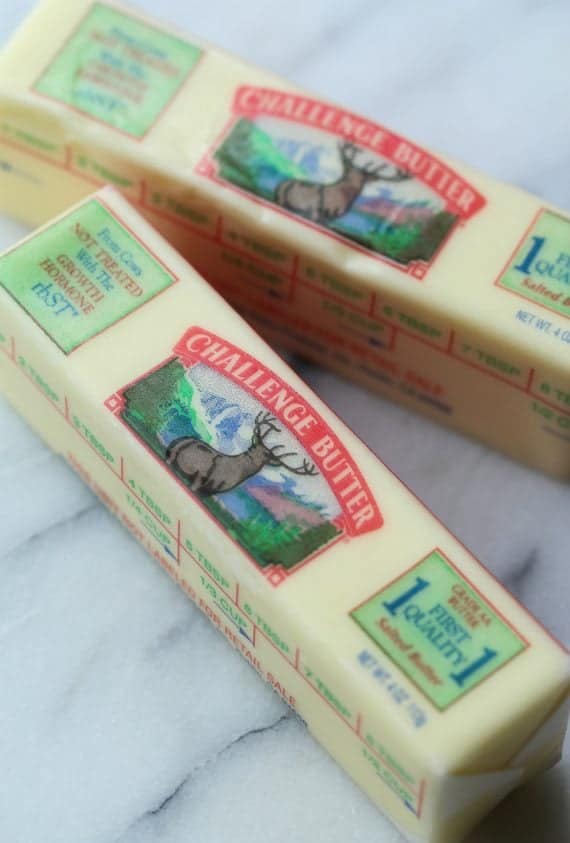
Use the best ingredients. This is something I feel very strongly about when baking “basics”. Ingredients can make the difference between good and AMAZING. That’s why I use Challenge Butter in all my recipes really, but this one specifically. The butter flavor in this cake really shines, and Challenge Butter is so fresh, you can taste the difference. They are the only dairy company that controls the whole process from milking the cows, to transporting milk, to packaging the product. And they use milk that has not been treated with the growth hormone rbST, which is very important to my family and me.
*I use salted butter in this recipe, (as I do in most of my recipes) which is completely personal preference. If you have a salt sensitivity, feel free to use unsalted.
Quality ingredients also include using real vanilla, not imitation. Again, there aren’t a lot of flavors in this cake, so the butter and vanilla are the shining stars!
Tip #8
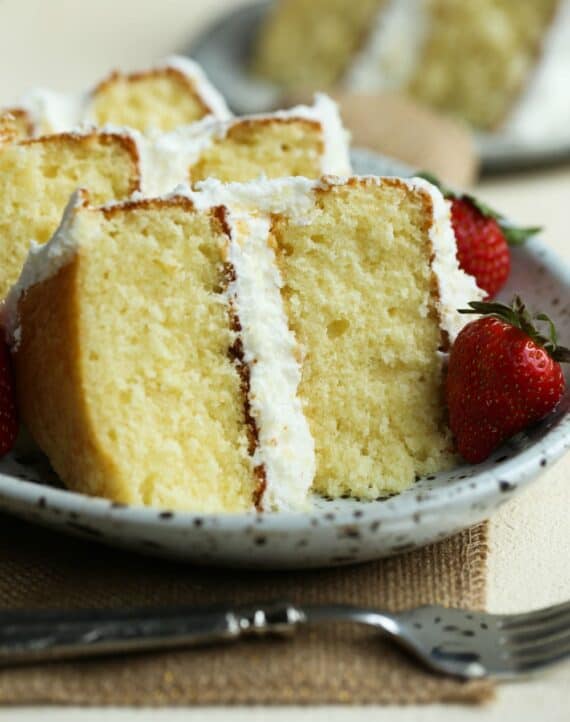
When the cakes are baked, and cooled, you might need to trim it a little bit to get flat tops, so it will be perfect for layering. To do this, just use a serrated knife, and carefully trip off any dome at the top, so the cakes will stack evenly. Sometimes I trim the sides a little bit if something isn’t perfect. Just know, the more you trim, the more crumbs you will get in your frosting, which is why a crumb coat is very important to get a perfect finish! Which leads me to the next tip…
Tip #9
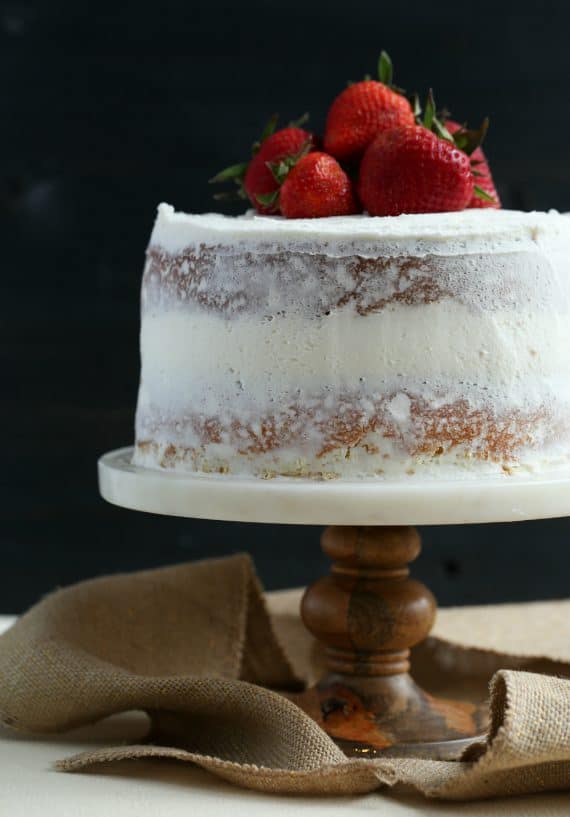
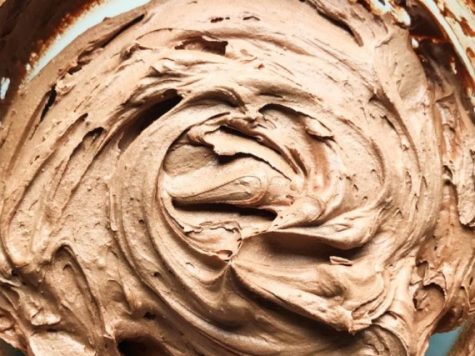
This cake is the perfect vehicle for frosting. Whether it be Creamy Chocolate Frosting, Perfect Party Frosting, or any of the long list of favorites I have, you can really mix and match. Even the decorating of this cake is a place for you to get creative. You can do a “naked style”, where you add a layer of frosting in the middle and lightly coat the sides, or go all the way. You can even slice each layer in half and create a fabulous 4 layer cake! If you choose to do this, increase the frosting amount by at least 50% so you have enough!
In these pictures and in the video I used my Perfect Buttercream Frosting. I love it so much!
I hope these tips have helped! Vanilla cake seems so simple, but can often give varied results. So, I hope these tips and recipe will be your go-to recipe from now on!
Perfect Vanilla Cake
 Prep Time: 10 minutes
- Cook Time: 25 minutes
- Total Time: 35 minutes
 Yield: serves 10
Ingredients
- 1 cup salted butter, room temperature (I used Challenge Butter)
- 2 cups granulated sugar
- 1/4 cup vegetable oil
- 4 eggs
- 1 tablespoon vanilla extract
- 2 teaspoons baking powder
- 1 teaspoon kosher salt
- 3 cups cake flour
- 1 cup buttermilk
Instructions
- Preheat oven to 350°F. Coat 2, 8 or 9- inch round cake pans with nonstick spray. Cut two pieces of parchment paper into 9- inch circles. Place the rounds in the bottoms of the pans. Coat again with nonstick spray. Set aside.
- In the bowl of your stand mixer, fitted with paddle attachment mix the butter and sugar together for 2 minutes. Add in the oil, eggs, vanilla, baking powder, and salt, and continue mixing for an additional minute until smooth and combined, scraping the sides of the bowl as necessary to make sure everything is evenly mixed.
- Turn the mixer to low speed and in alternating portions add in the buttermilk and flour, beginning and ending with flour. Mix for 30 seconds, until combined and smooth, again, scraping the sides of the bowl as needed.
- Pour half of the cake batter into each prepared pan.
- Bake for 30 – 35 minutes, or until the center of the cakes are set, and a toothpick inserted in the middle comes out clean.
- Allow the cakes to cool in the pans for 10 minutes, and then remove the cakes and allow to cool completely on a wire rack.
Notes
Frost the cake with your desired frosting. I used my Perfect Buttercream Frosting in the pictures and video for this recipe.
If you’re making ahead, wrap the cakes tightly in cling wrap and store at room temperature for up to 2 days. Alternately you can wrap the cakes in cling wrap, then place them each in a large zip-top bag and freeze for up to a month.
*This post is in partnership with Challenge Dairy. All opinions expressed are my own.