You’ll absolutely melt over these adorable and delicious Cinnamon Roll Snowmen! With blueberry buttons, a chocolate chip smile, and bacon arms, they make the cutest, yummiest holiday breakfast.

A Jolly, Happy Holiday Breakfast
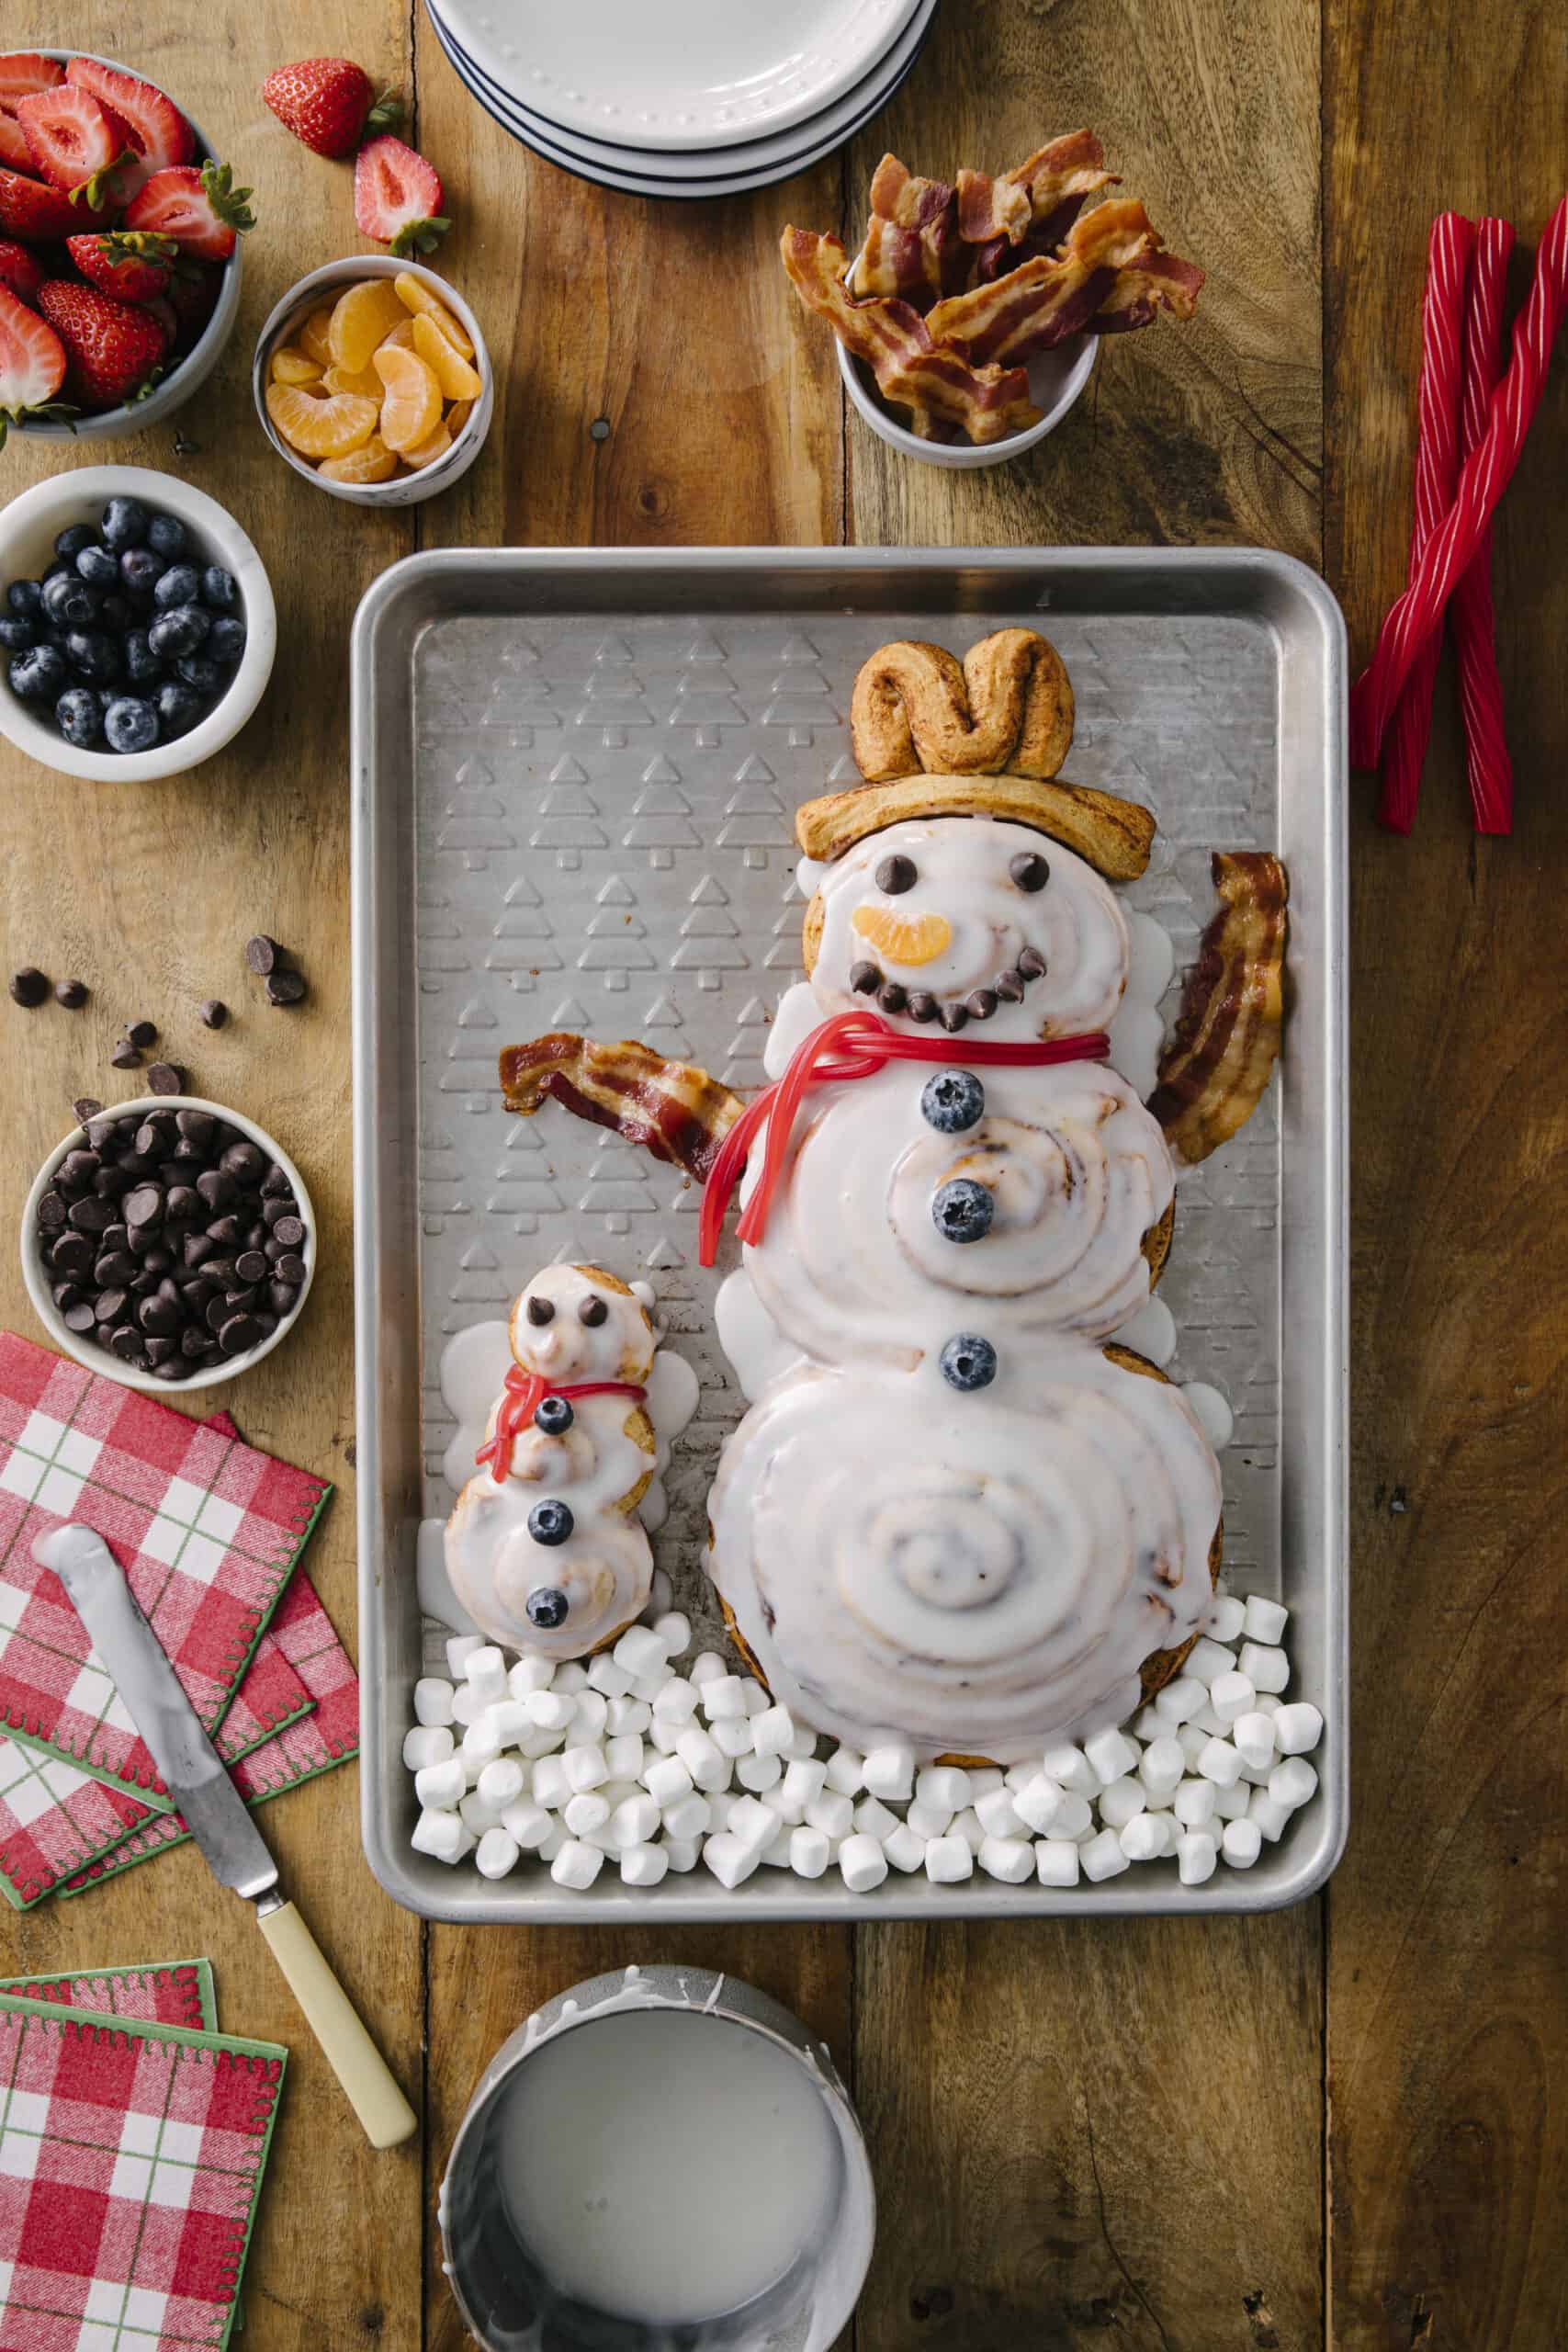
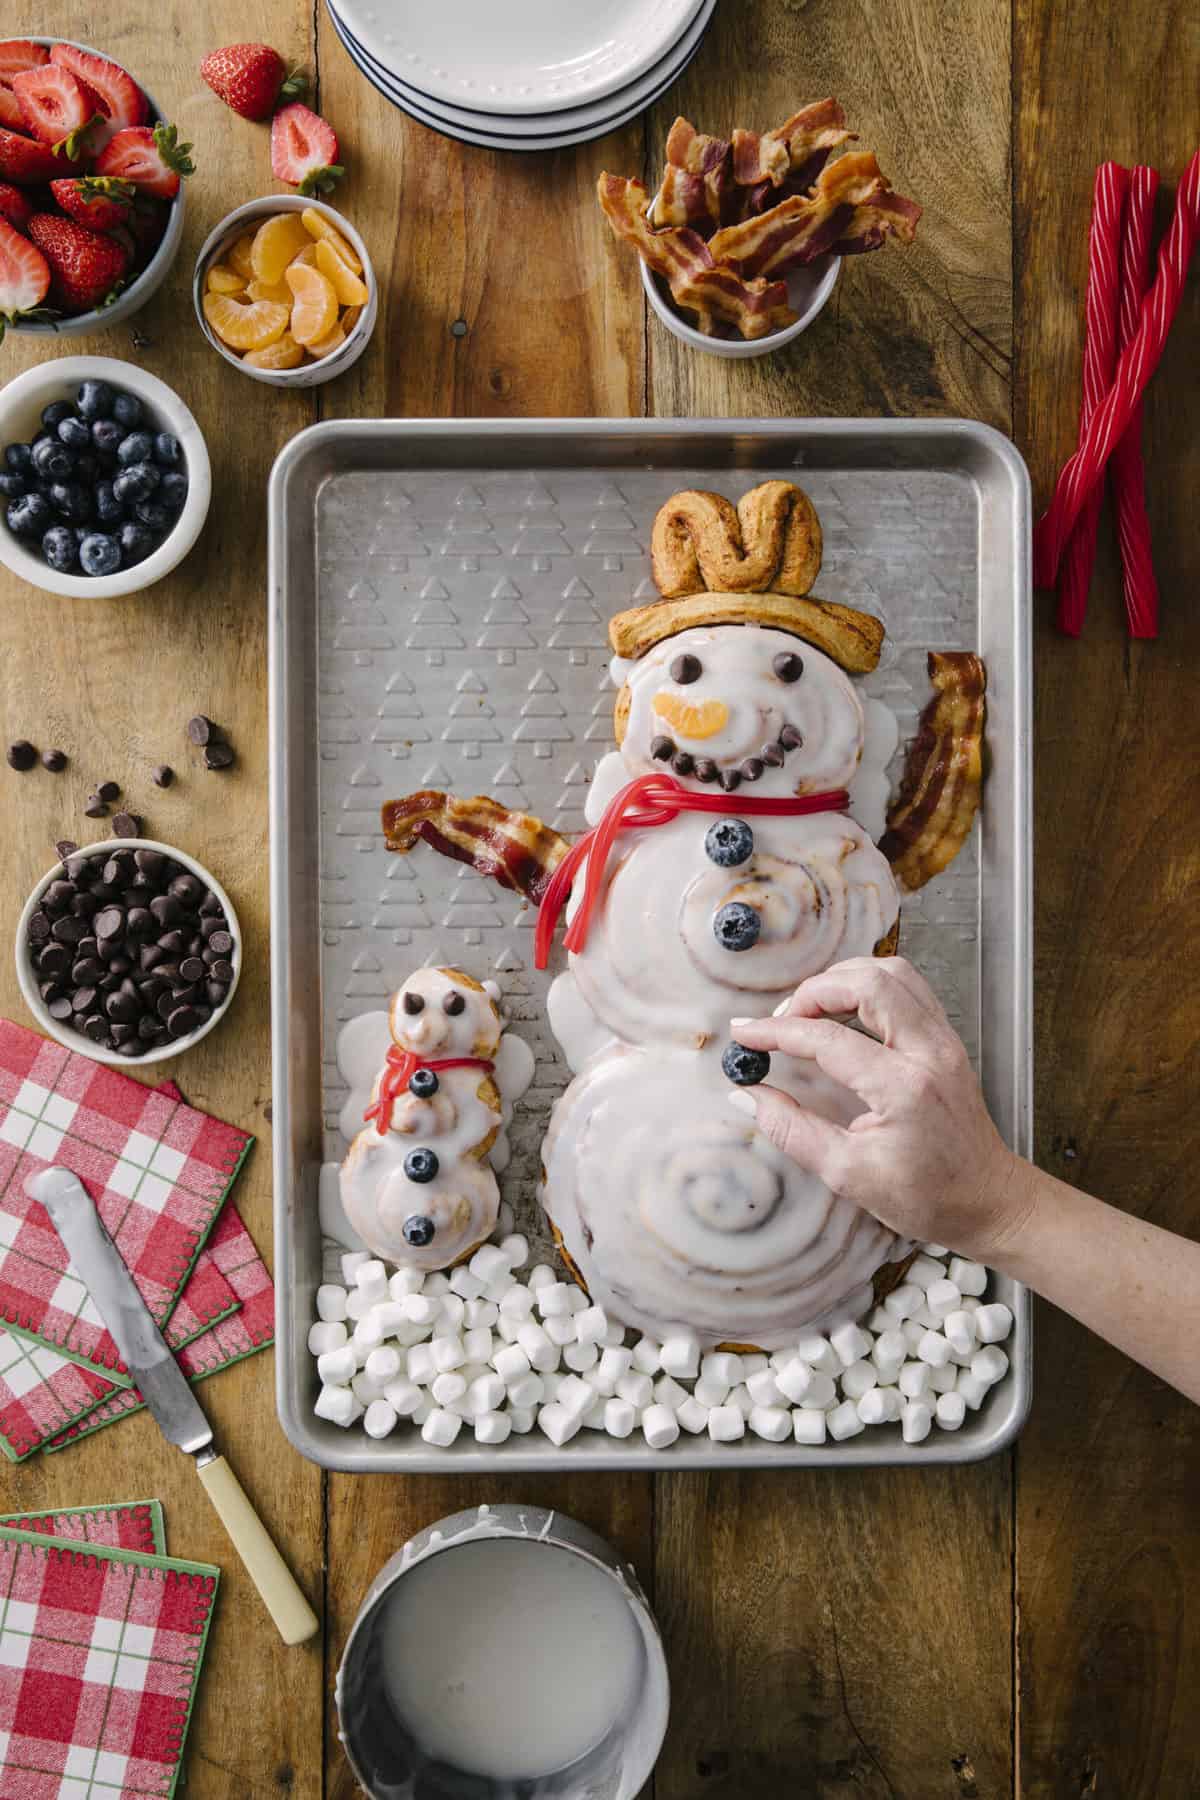
Not only are these Cinnamon Roll Snowmen so festive and delicious, it’s such a fun activity to do with the kids! We loved creating our frosty friends together. A bed of mini marshmallows makes the perfect winter wonderland setting, don’t you think? And canned cinnamon rolls take all the stress out of baking up the snowmen themselves. It could not be easier and more fun. And the yum is in the details! From chocolate chip eyes to blueberry buttons and bacon arms, these cinnamon roll treats only get more delicious.
How to Make Cinnamon Roll Snowmen
First, preheat oven to 350°F. Then spray a large cookie sheet with cooking spray or line with parchment paper. Separate cinnamon rolls into individual rolls.
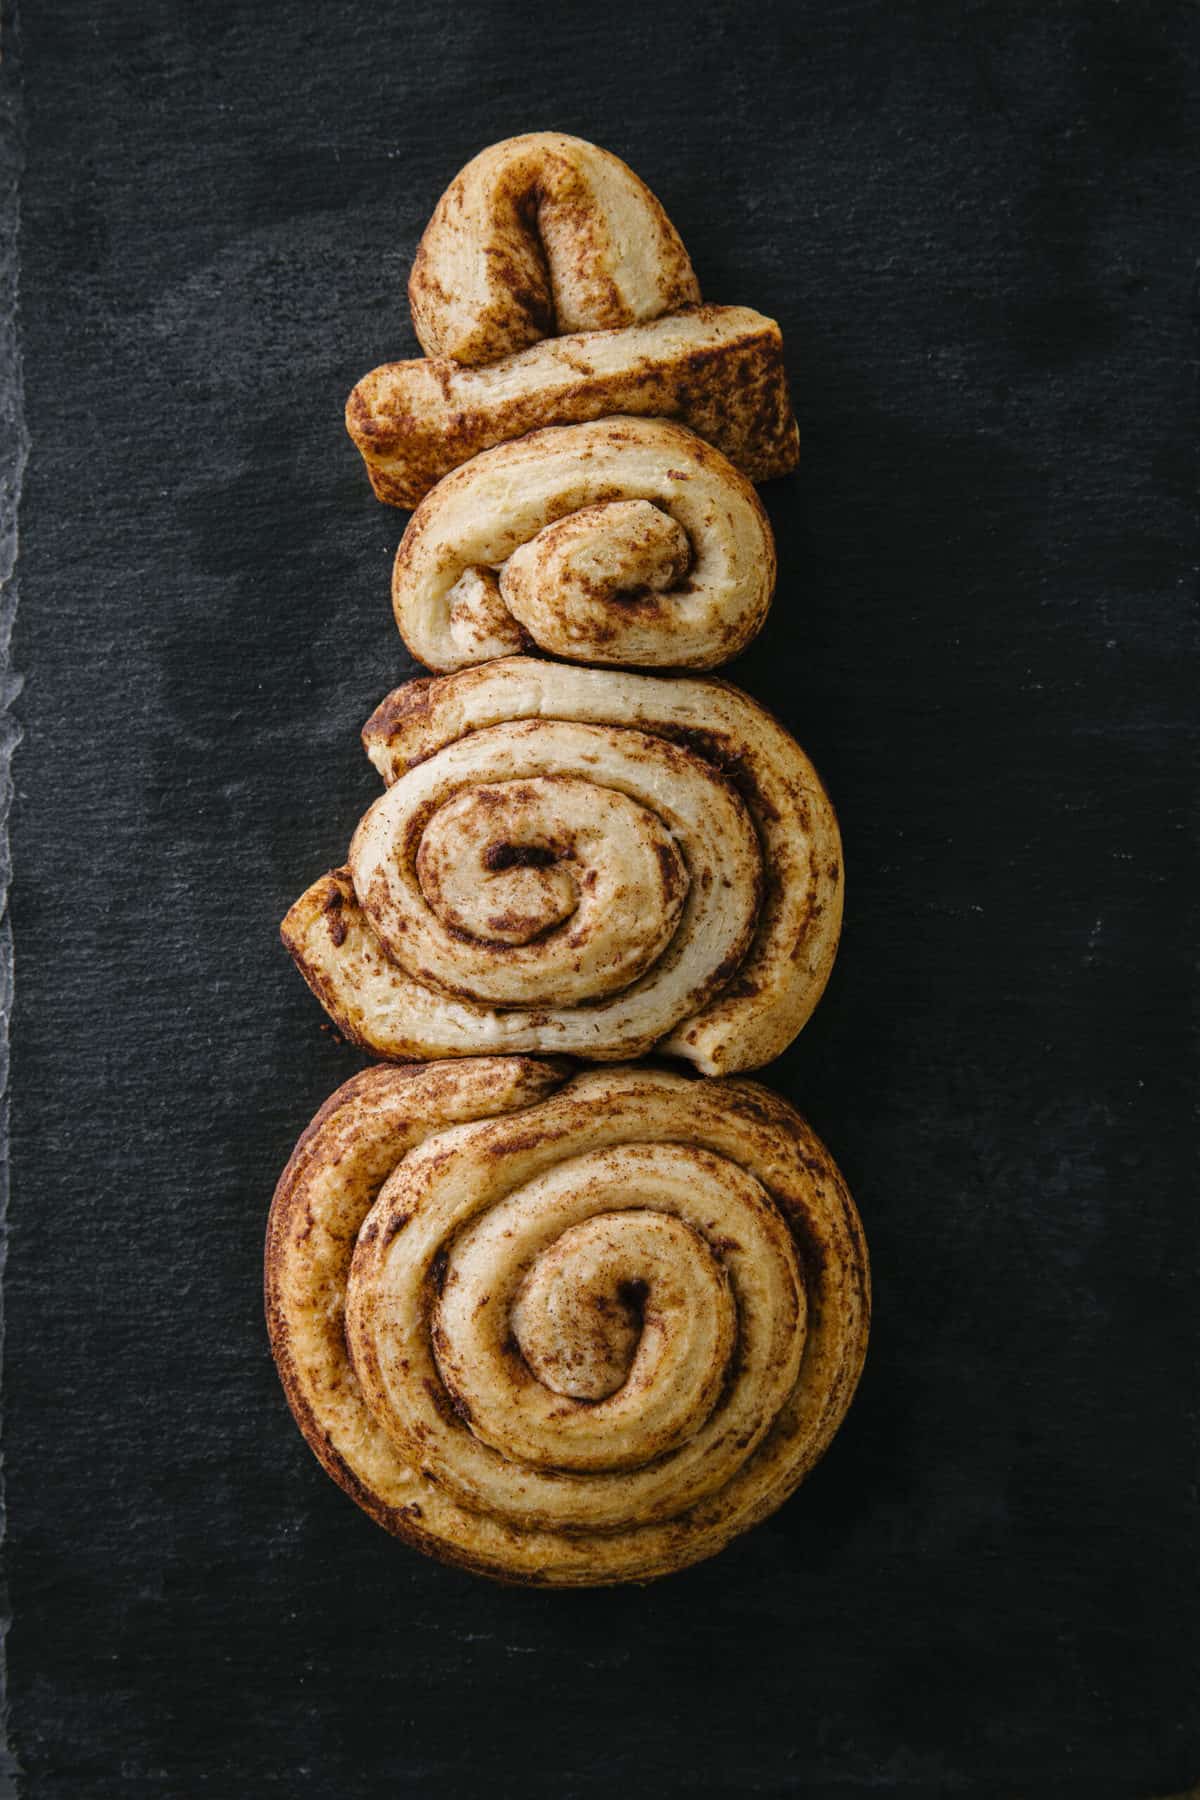
Snowman: Place 1 roll toward the top of the pan. Then place another roll in the middle of the pan. Unroll one roll into a strip then loosely coil it around the roll in the middle of the pan. Press the top roll down near the middle rolls so they’re almost touching each other. Place another roll toward the bottom of the pan. Unroll 2 more rolls into strips and loosely coil each strip around the roll. Press the bottom rolls up near the middle rolls. Unroll just part of another roll so you have a short strip of dough. Place the dough straight across the top roll on the sheet pan to form the bottom of the snowman’s hat. Fold the remaining portion of the cinnamon roll and press it up against the flat piece to create the full hat.
Snowbaby: start unrolling a cinnamon roll and re-rolling it tighter about 5 times for the base “snowball” then cut it, continue rolling it about 4 times for the middle “snowball” and use the final piece of the cinnamon roll for the head of the snowman, rolling it a little bit tighter if needed to stay together. Press the three “snowballs” tightly together to build a snowbaby.
Snowkid: Place one roll near the bottom of the pan. Unroll a second roll and reroll about ⅔ of the roll before cutting off the last part of the cinnamon roll. Re-roll the part cut off of the last cinnamon roll to create the top ball of the snowkid. Unroll just part of a third roll so you have a short strip of dough. Place the dough straight across the top roll on the sheet pan to form the bottom of the snowkid’s hat. Fold the remaining portion and press it up against the flat piece to create the full hat.
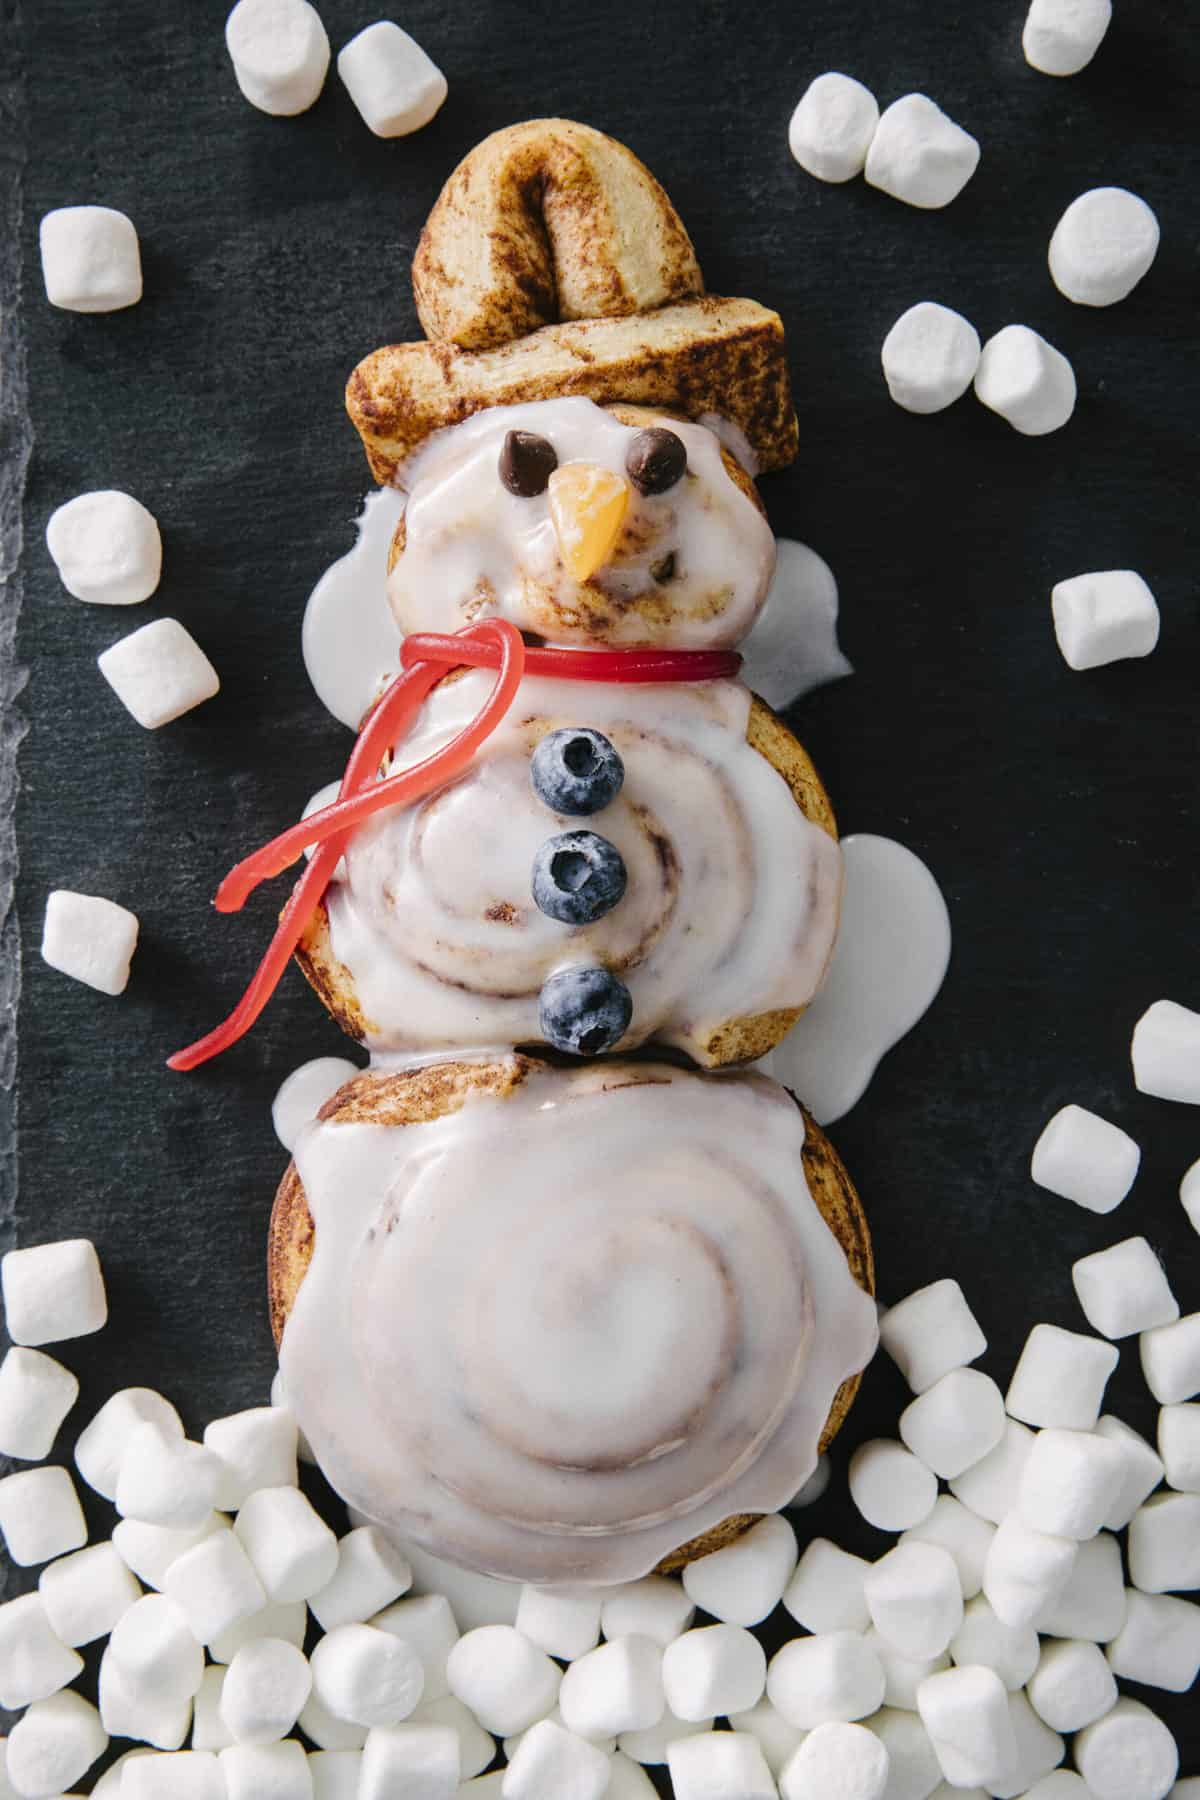
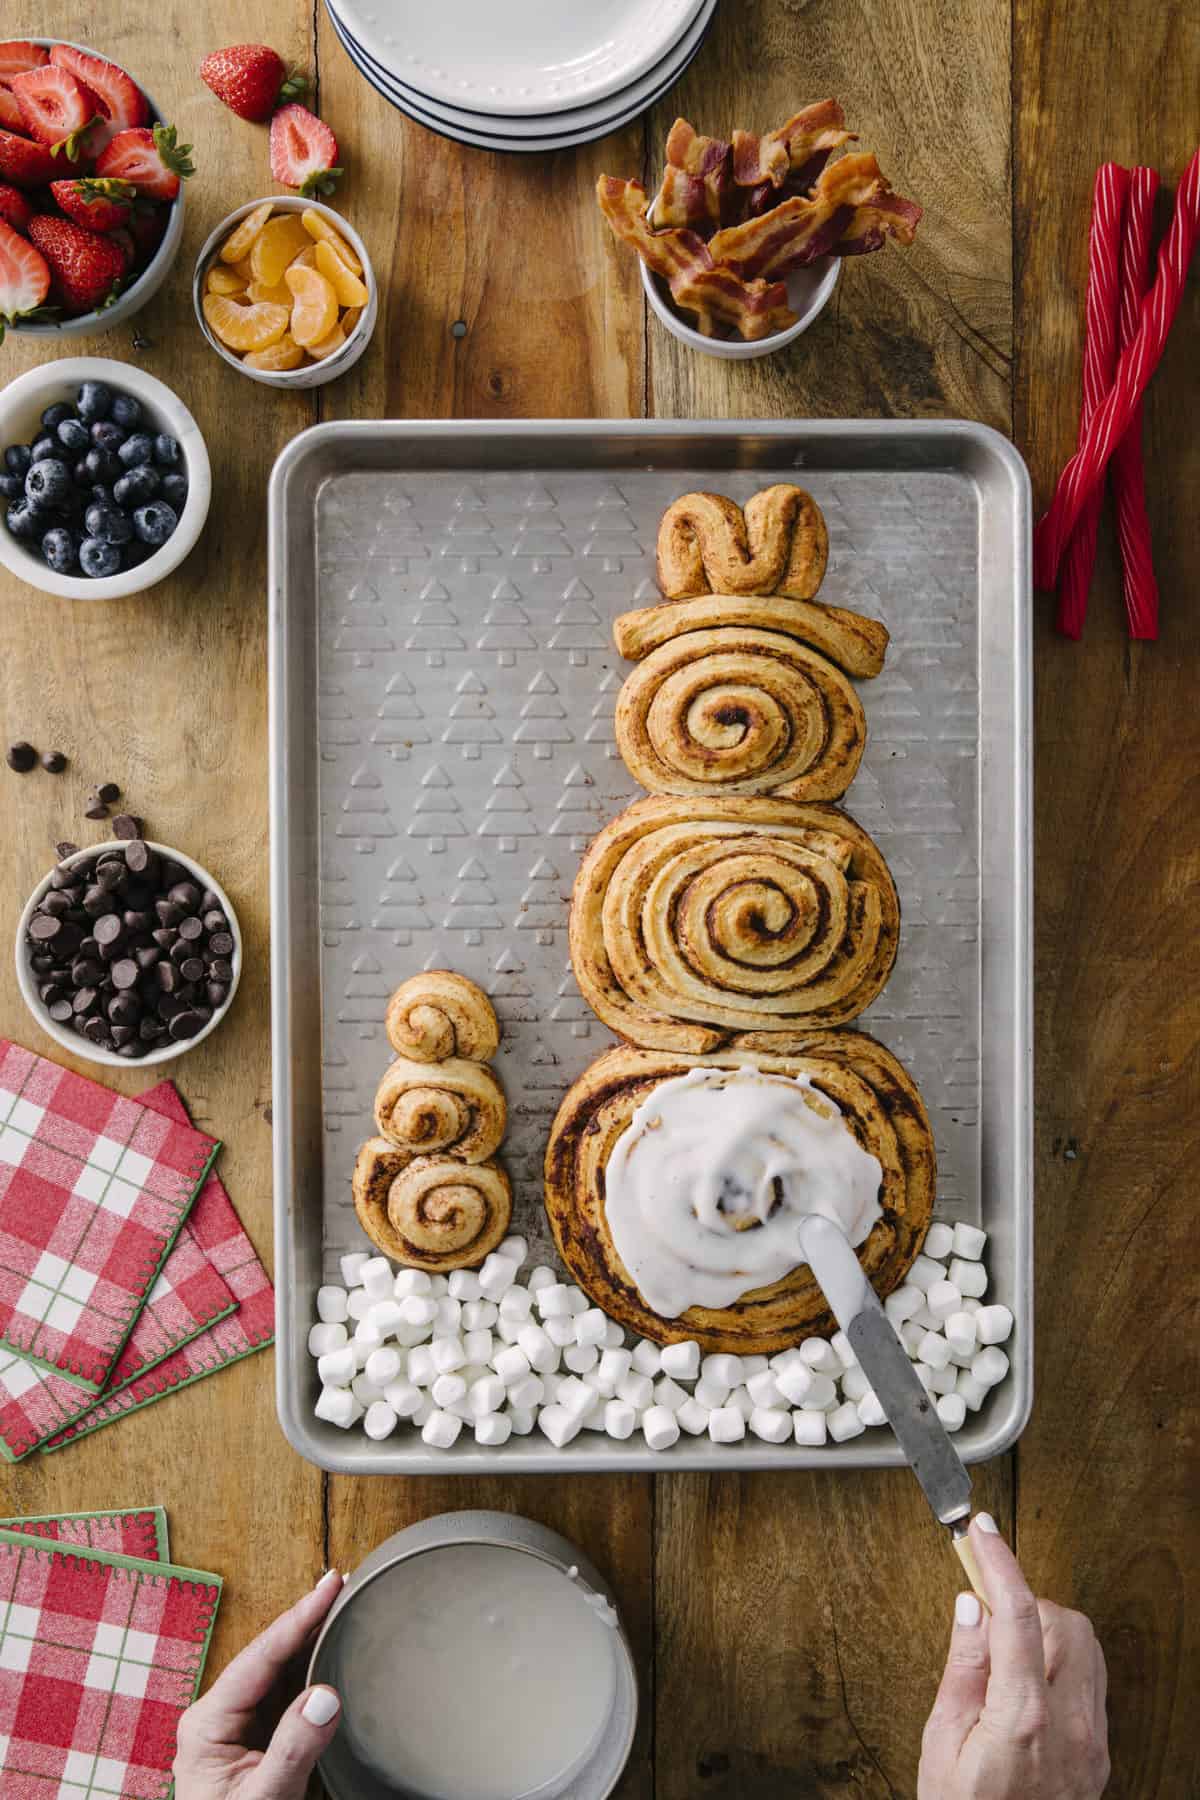
Bake for 15-20 minutes or until golden brown. Then remove from oven and immediately drizzle and smear the icing over the baked snowmen.
Watch for More!
Take a look at this video for more tips on how to form your snowmen!
How to Decorate Cinnamon Roll Snowmen
Snowman: First, place two chocolate chips for the eyes and 7 chocolate chips for the mouth, a slice of mandarin orange for the nose, 3 blueberries for the buttons, 2 strands of Twizzlers Pull-n-Peel to create the scarf, and one slice of bacon broken in half for the arms.
Snowkid: Use 2 chocolate chips for the eyes, a mandarin orange slice cut in half for the nose, one strand of Twizzlers Pull-n-Peel to create the scarf, and three blueberries for the buttons.
Snowbaby: Place two chocolate chips for the eyes, three blueberries for the buttons, and then one strand of Twizzlers Pull-n-Pell to create the scarf.
Serve with additional toppings, fruit and bacon. Enjoy!
More Festive Cinnamon Roll Goodness
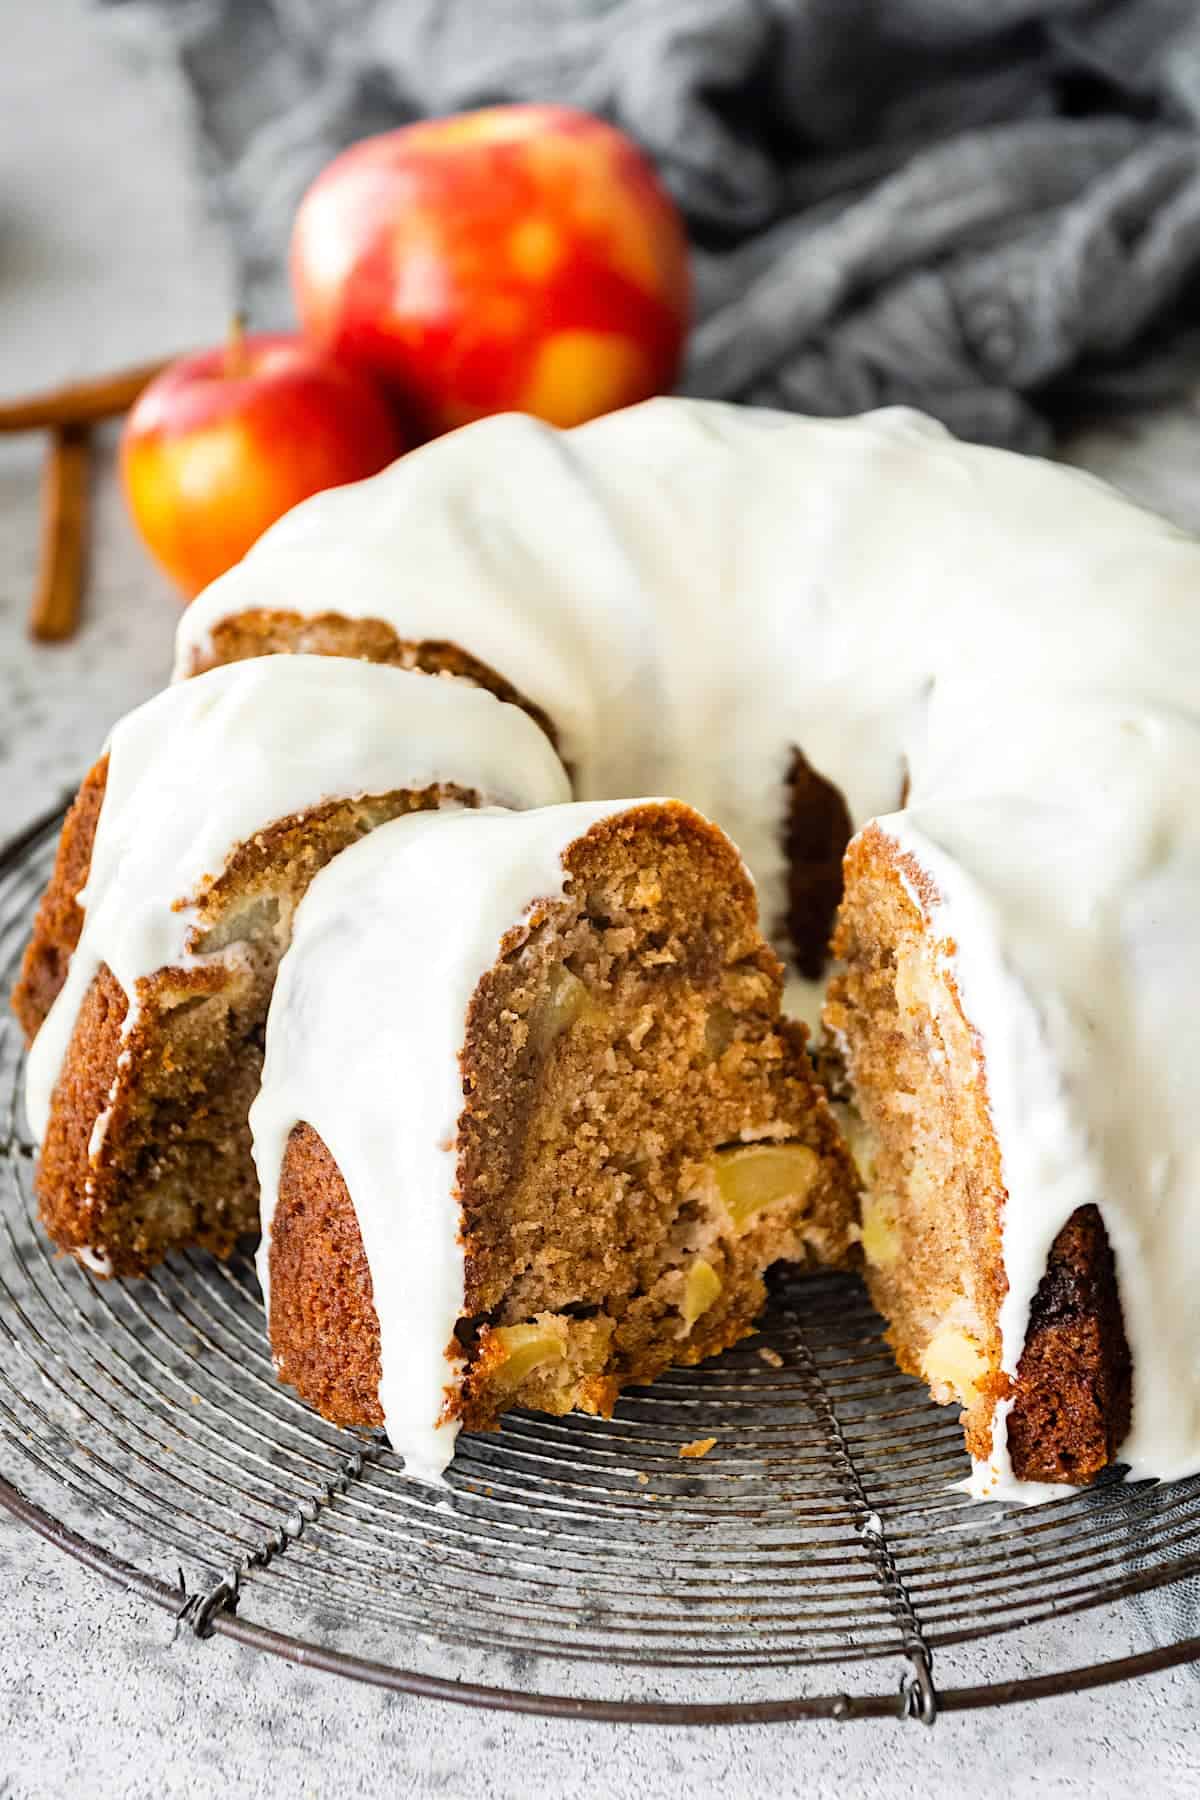
Bring some seasonal cheer to your holiday brunch with this scrumptious Cinnamon Roll Wreath. Sugared cranberries and fresh mint make this breakfast favorite even more festive and delicious. These Festive Christmas-Shaped Cinnamon Rolls are too cute and so yummy! Get the family together and make some sweet holiday memories with a playful breakfast treat. Or try a Family-Size Skillet Cinnamon Roll for a scrumptious and shareable twist on everyone’s favorite morning sweet roll!
If you make these adorable Cinnamon Roll Snowmen with your family, be sure to snap a picture and share it with me or tag me on Instagram @thebakermama so I can see.  I love seeing how inspired and creative y’all get with the recipes I share. Have fun and enjoy!
xoxo,


Cinnamon Roll Snowmen
Prep Time: 10
Cook Time: 15-20
Total Time: 22 minute
Yield: 10
Description
You’ll absolutely melt over these adorable and delicious Cinnamon Roll Snowmen! With blueberry buttons, a chocolate chip smile, and bacon arms, they make the cutest, yummiest holiday breakfast.
- 10 jumbo or grand cinnamon rolls
Decorations:
- chocolate chips, for the eyes and mouth
- blueberries, for buttons
- mandarin oranges, peeled and separated, for the nose
- baked bacon, for the arms
- Twizzlers Pull-n-Peel, for the scarves
- mini marshmallows, for the decorative snow on the pan
Instructions
- Heat oven to 350°F. Spray a large cookie sheet with cooking spray or line with parchment paper. Separate cinnamon rolls into individual rolls.
- To Make the Snowman: Place 1 roll toward the top of the pan. Then place another roll in the middle of the pan. Unroll one roll into a strip then loosely coil it around the roll in the middle of the pan. Press the top roll down near the middle rolls so they’re almost touching each other. Place another roll toward the bottom of the pan. Unroll 2 more rolls into strips and loosely coil each strip around the roll. Press the bottom rolls up near the middle rolls. Unroll just part of another roll so you have a short strip of dough. Place the dough straight across the top roll on the sheet pan to form the bottom of the snowman’s hat. Fold the remaining portion of the cinnamon roll and press it up against the flat piece to create the full hat.
- To make a Snowkid: Place one roll near the bottom of the pan. Unroll a second roll and reroll about ⅔ of the roll before cutting off the last part of the cinnamon roll. Re-roll the part cut off of the last cinnamon roll to create the top ball of the snowkid. Unroll just part of a third roll so you have a short strip of dough. Place the dough straight across the top roll on the sheet pan to form the bottom of the snowkid’s hat. Fold the remaining portion and press it up against the flat piece to create the full hat.
- To make a Snowbaby: start unrolling a cinnamon roll and re-rolling it tighter about 5 times for the base “snowball” then cut it, continue rolling it about 4 times for the middle “snowball” and use the final piece of the cinnamon roll for the head of the snowman, rolling it a little bit tighter if needed to stay together. Press the three “snowballs” tightly together to build a snowbaby. (see video on the blog post: https://thebakermama.com/recipes/festive-christmas-shaped-cinnamon-rolls/)
- Bake for 15-20 minutes or until golden brown.
- Remove from oven and immediately drizzle and smear the icing over the baked snowmen.
- To decorate the Snowman, place two chocolate chips for the eyes and 7 chocolate chips for the mouth, a slice of mandarin orange for the nose, 3 blueberries for the buttons, 2 strands of Twizzlers Pull-n-Peel to create the scarf, and one slice of bacon broken in half for the arms.
- To decorate the Snowkid, use 2 chocolate chips for the eyes, a mandarin orange slice cut in half for the nose, one strand of Twizzlers Pull-n-Peel to create the scarf, and three blueberries for the buttons.
- To decorate the Snowbaby, use two chocolate chips for the eyes, three blueberries for the buttons, and one strand of Twizzlers Pull-n-Pell to create the scarf.
- Serve with additional toppings, fruit and bacon. Enjoy!

