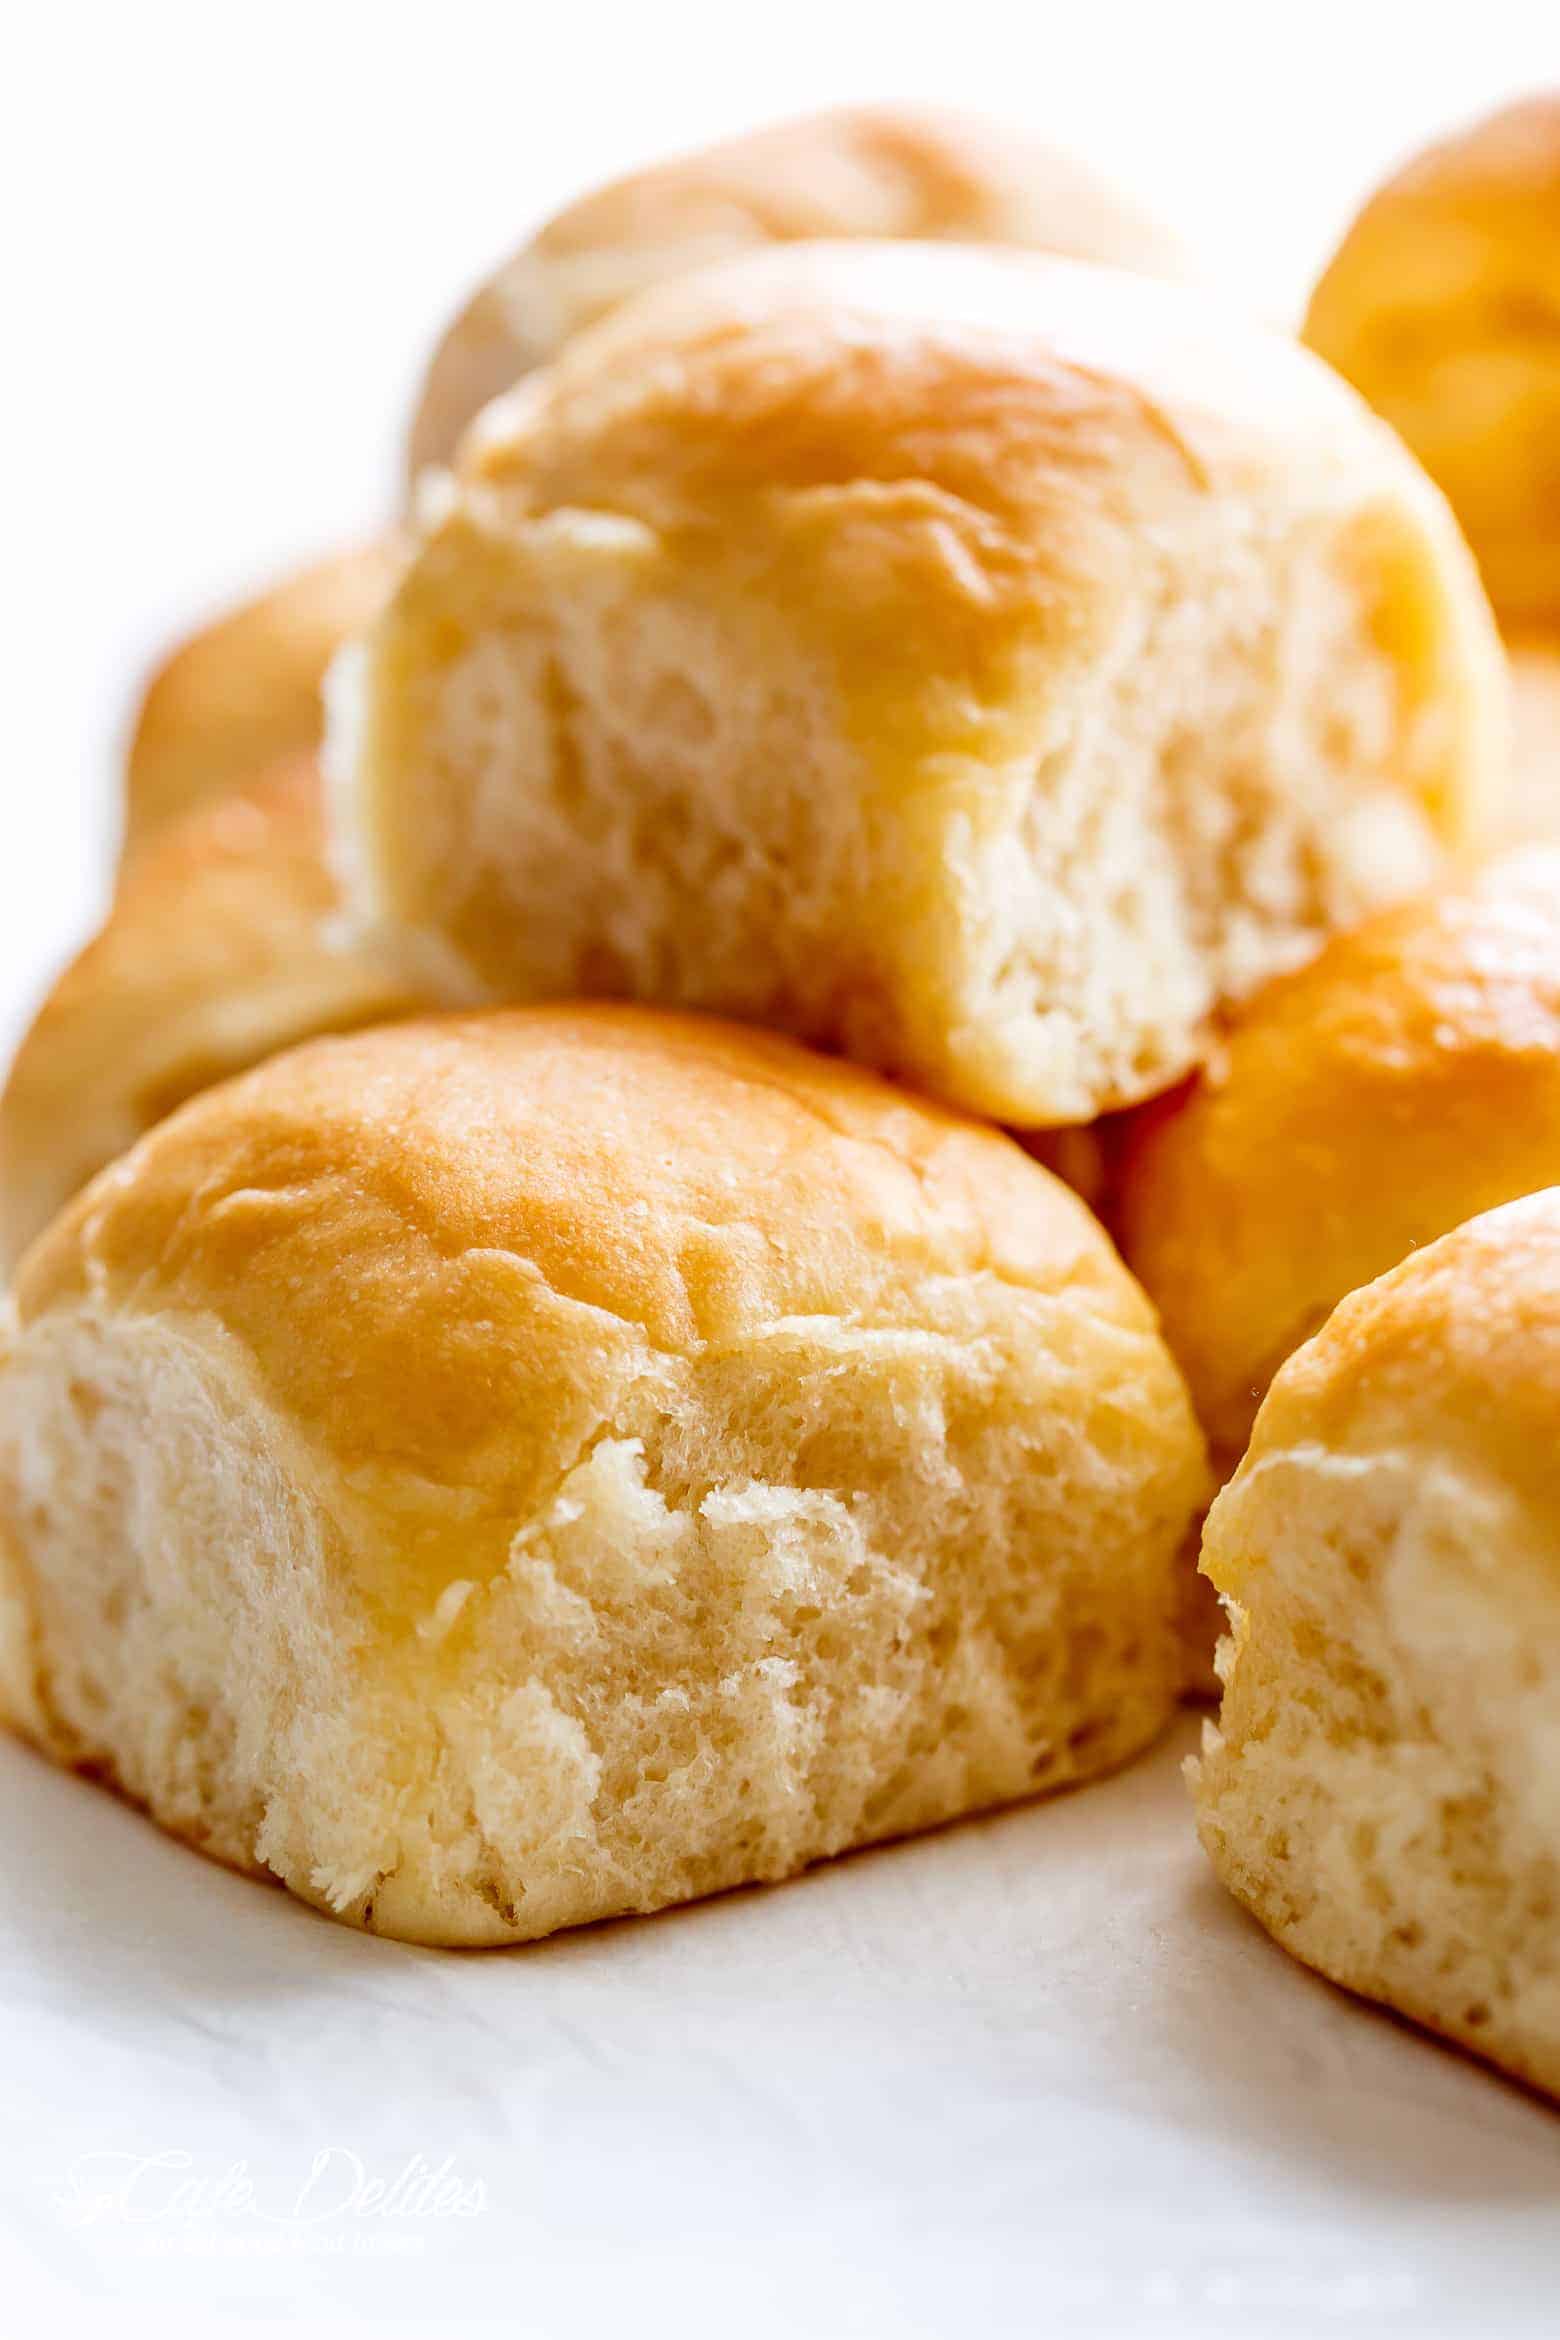
Easy Soft Dinner Rolls (NO MIXER + EGG FREE)
When it comes to bread, this Easy Soft Dinner Rolls recipe is so SIMPLE to make! No mixer needed and hardly ANY kneading!
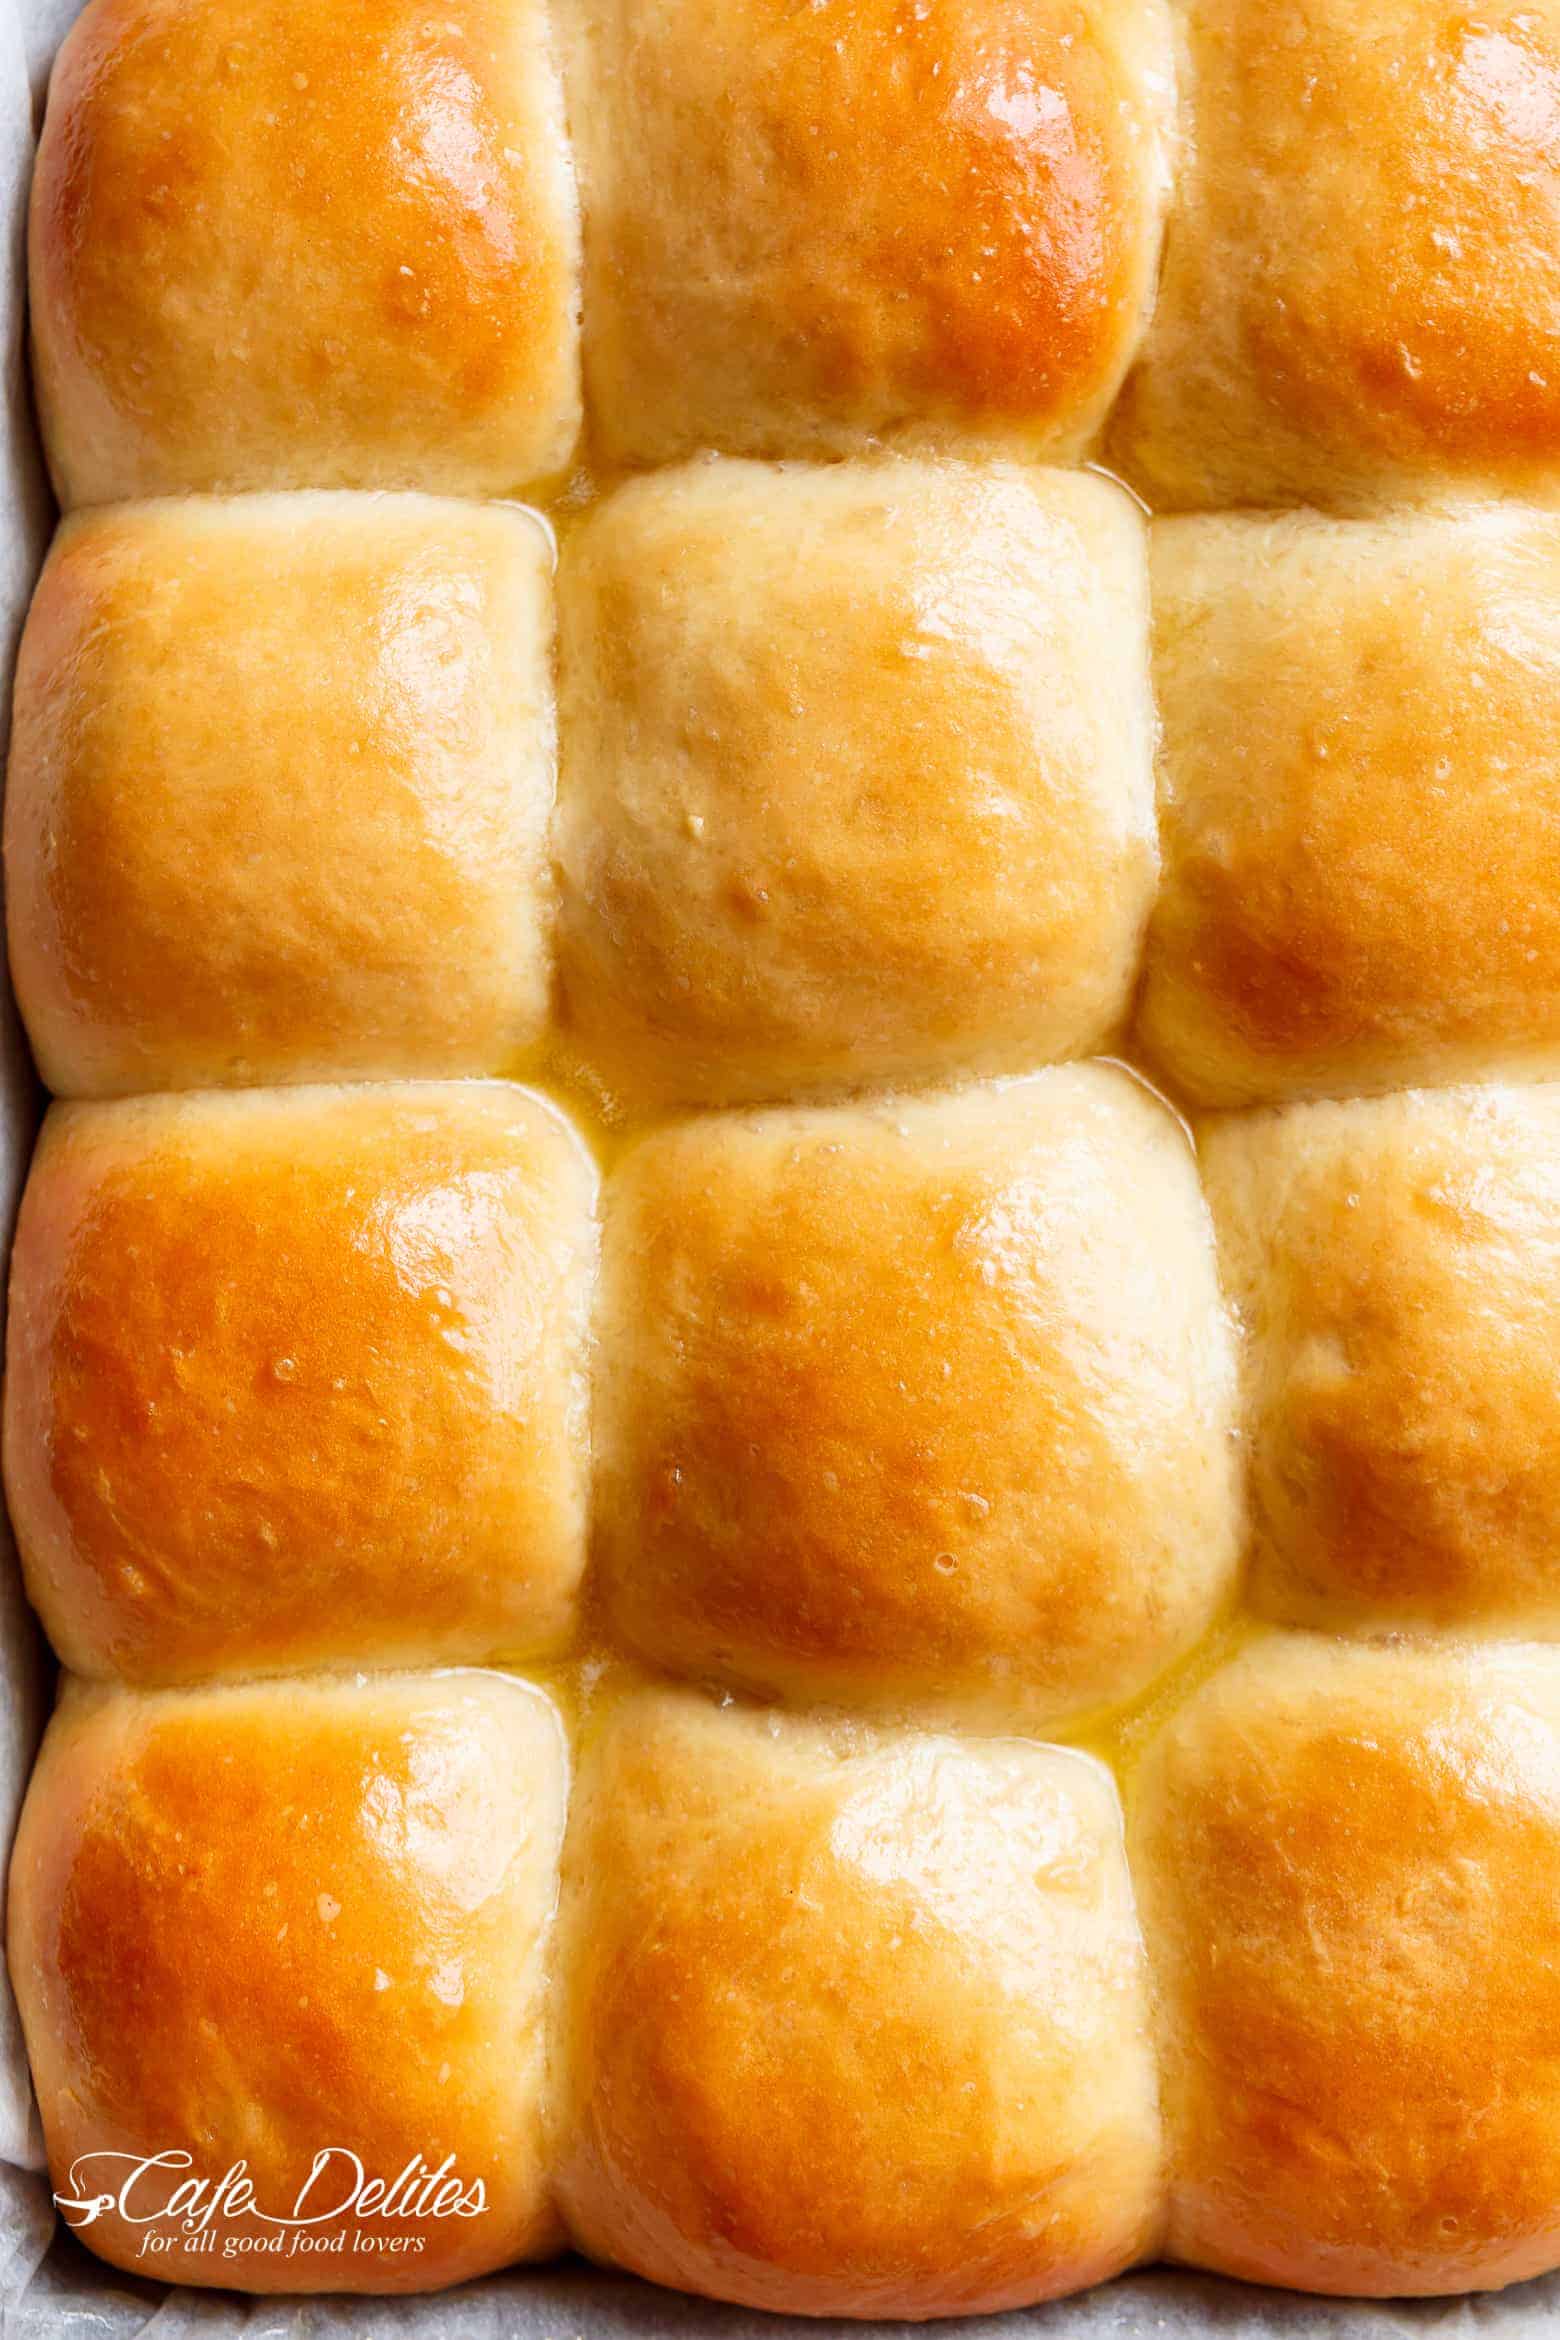
With only 2 sets of rising times and a handy trick to get your dough rising quicker than normal, you guys are going to love this one! So fluffy and soft on the inside AND outside, with the perfect salt and sugar ratio to make these rolls absolutely wayyyy better than anything store bought.
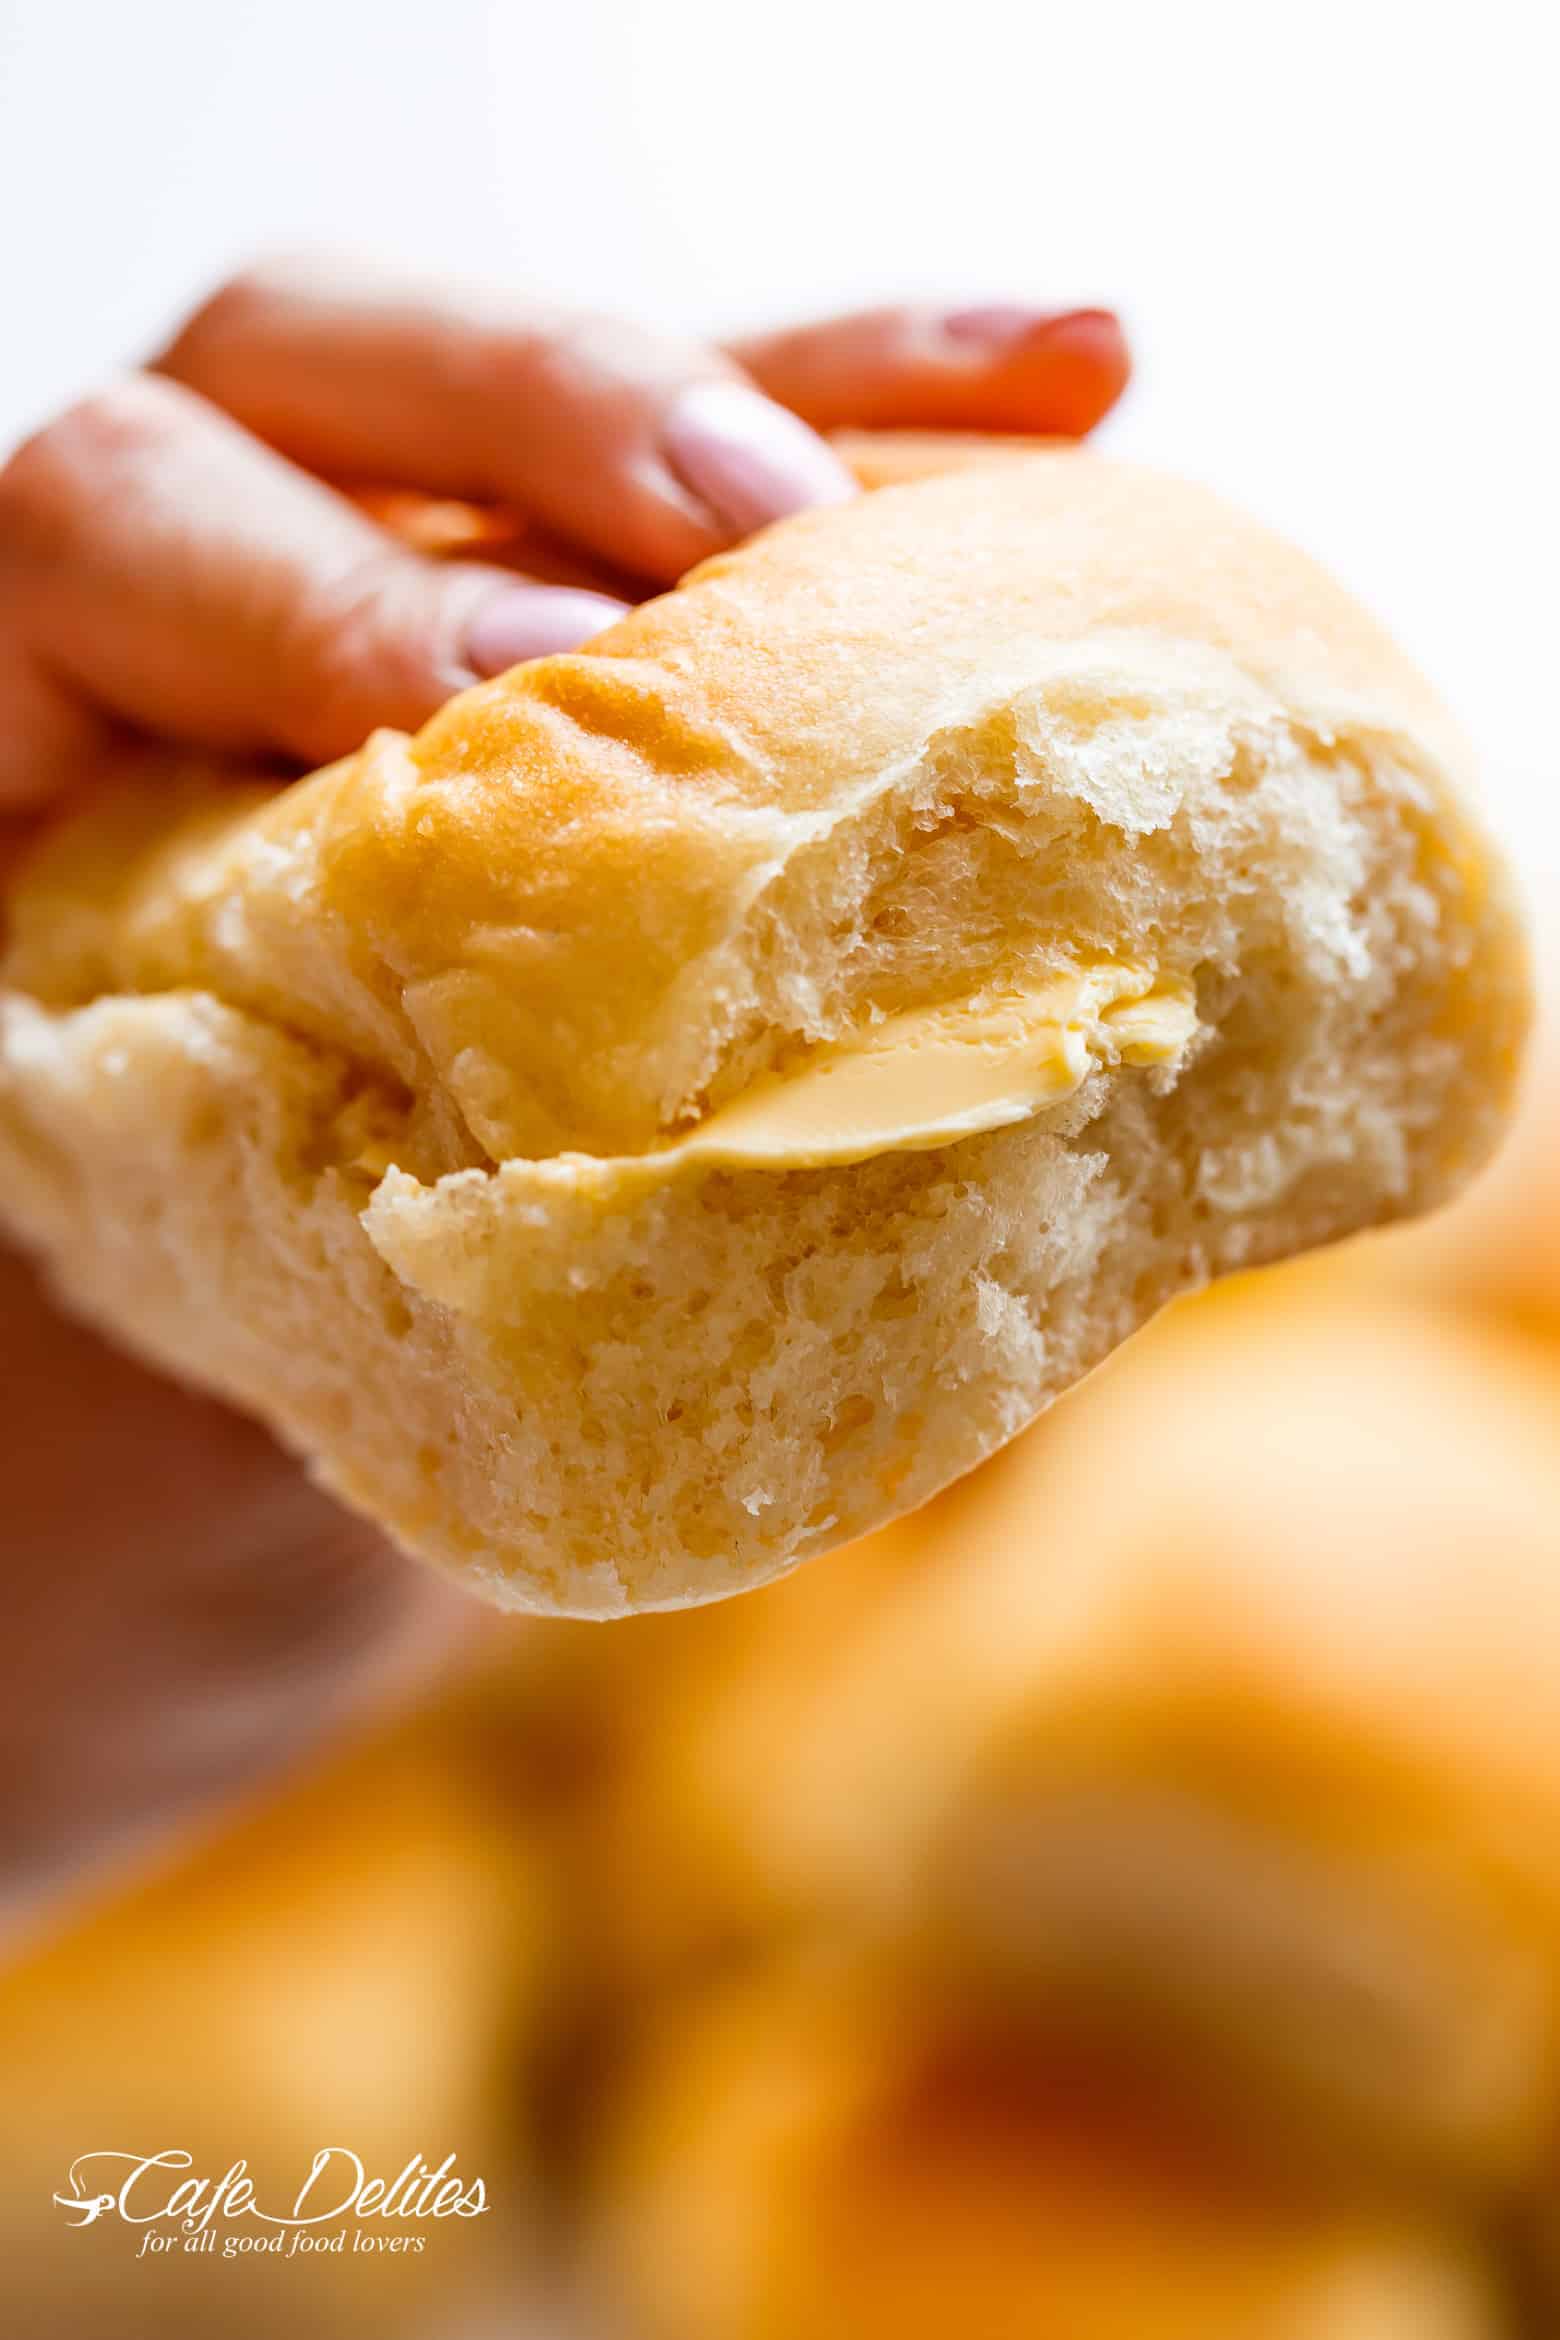
The softer and fluffier, the better. Especially when you’re saving your beloved roll to mop up the last globs of sauce or gravy on your plate.
I don’t even want to tell you how many batches of bread I went through to get this one right. How many hours and sleepless nights I spent on the internet researching all about yeast and flour and eggs or no eggs and milk or just water and…arrgghhhh!!!!! TOO. MUCH. WORK. And then came the testing. With eggs/without eggs…with just milk OR buttermilk or just water or a mixture. Lord, help me.
Then, what feels like I hit the jackpot with this batch, these rolls came out of the oven looking and smelling and feeling SO perfect, I cried.
You know what the best part is? Carb lovers, gather round now, I know you’re feeling me when I say this → that warm, fresh bread smell wafting through the kitchen and into every room in my house. THAT right there is best part.
To get to the point of the no-mixer thing, don’t get me wrong. I HAVE a mixer, but in the time it takes to drag the 200 pound machine out (ok, minor exaggeration), and get the attachments set up, I had already mixed my flour through the activated yeast mixture.
Throwing my mixer out the window.
How To Make Easy Soft Dinner Rolls with NO MIXER
- Remember these Quick Soft Cinnamon Rolls? Remember how we preheated our oven on low heat, then turned it off before adding our bowl full of dough? We’re doing that again here. THIS is the way to get your dough to proof in an hour or less, and won’t dry it out if you cover your bowl with a clean, WARM DAMP towel. If you DON’T want to do this, I’ve heard people using their dryers! Or boiling kettles and placing the bowl next to it. Personally, I like my oven!
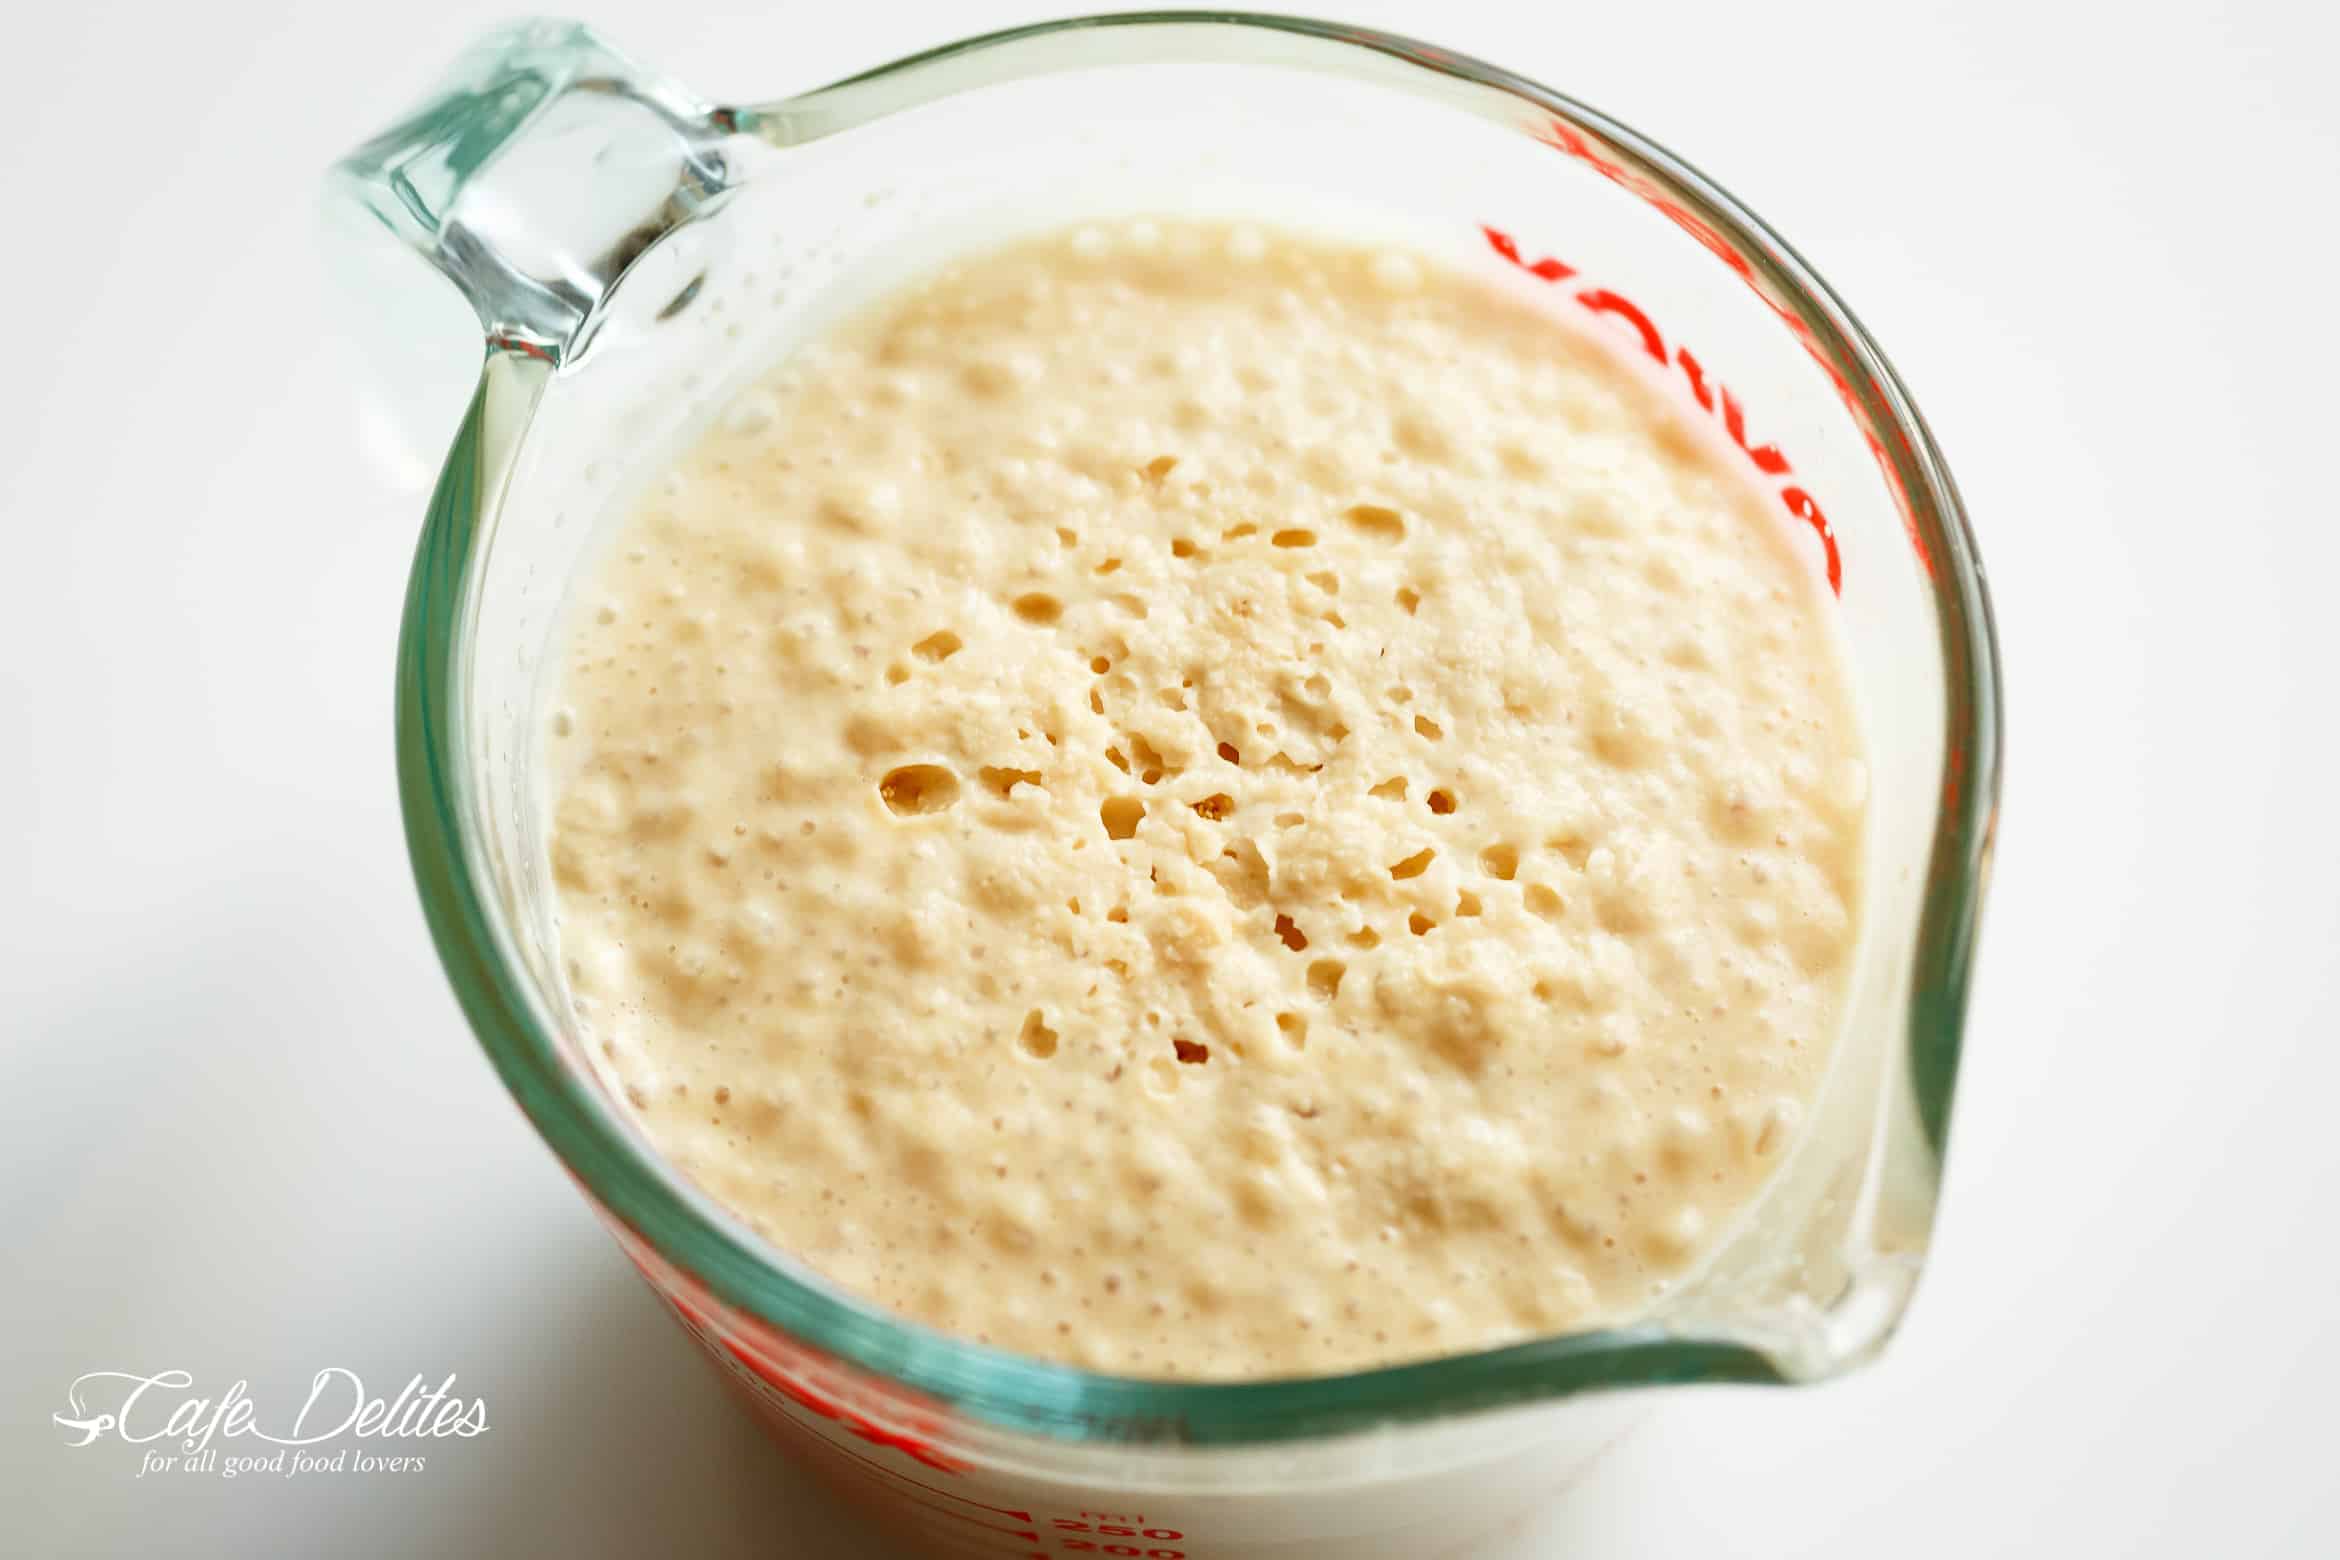
- Activate your yeast. Now, even though I use a rapid rise yeast that technically doesn’t need activating, I still do it. Why? Because I’m sure I have OCD. No, I’m not kidding. I need to do EVERYTHING right, or it can bother me for days until I get it done right.
- THIS is what vigorously activated yeast looks like. If your yeast doesn’t foam and froth in the first couple of minutes, and you’re waiting around the 10 minute mark to see anything happen, you need to get a new one. I’m sorry!
YEAST
- In the first couple of attempts, I was activating the yeast in a jug (as shown above), but as I started to develop this recipe for you all and wanting to keep things super simple, I moved to activating it straight in the bowl I’m using to make the dough. Make sure you use a large, deep bowl, because you will ALSO be proofing your dough in here. You want to give your dough room to rise, are you with me?
- Yeast needs sugar to ‘feed off of’ so to speak, so please don’t miss this step! Don’t try to change it here. This is crucial for your yeast.
DISSOLVING SUGAR IN A MILK/BUTTER MIXTURE
- Warming your milk and butter in the microwave together is quicker than doing them seperate, plus adding your remaining sugar and salt into the warm milk/butter ensures your sugar dissolves before adding it to your mixing bowl. Why this way? So we don’t need to worry about mixing the flour, sugar and salt together in a separate bowl. I’m all about minimising equipment!
- As soon as you pour in your butter/milk mixture into the yeast, add in your flour. This is where having everything handy and ready to use on your bench is going to benefit you greatly.
FLOUR
- THIS is the ONLY thing I’m going to ask you to buy that you may not already have in your kitchen pantries (besides maybe yeast). Bread flour. No, please don’t leave me! You CAN use all purpose or plain flour here, BUT in my testing, I found all purpose flour produced a slightly heavier or denser bread roll, for my liking. If you like super airy and fluffy and SOFT rolls to DIE FOR, go with bread flour.
KNEADING
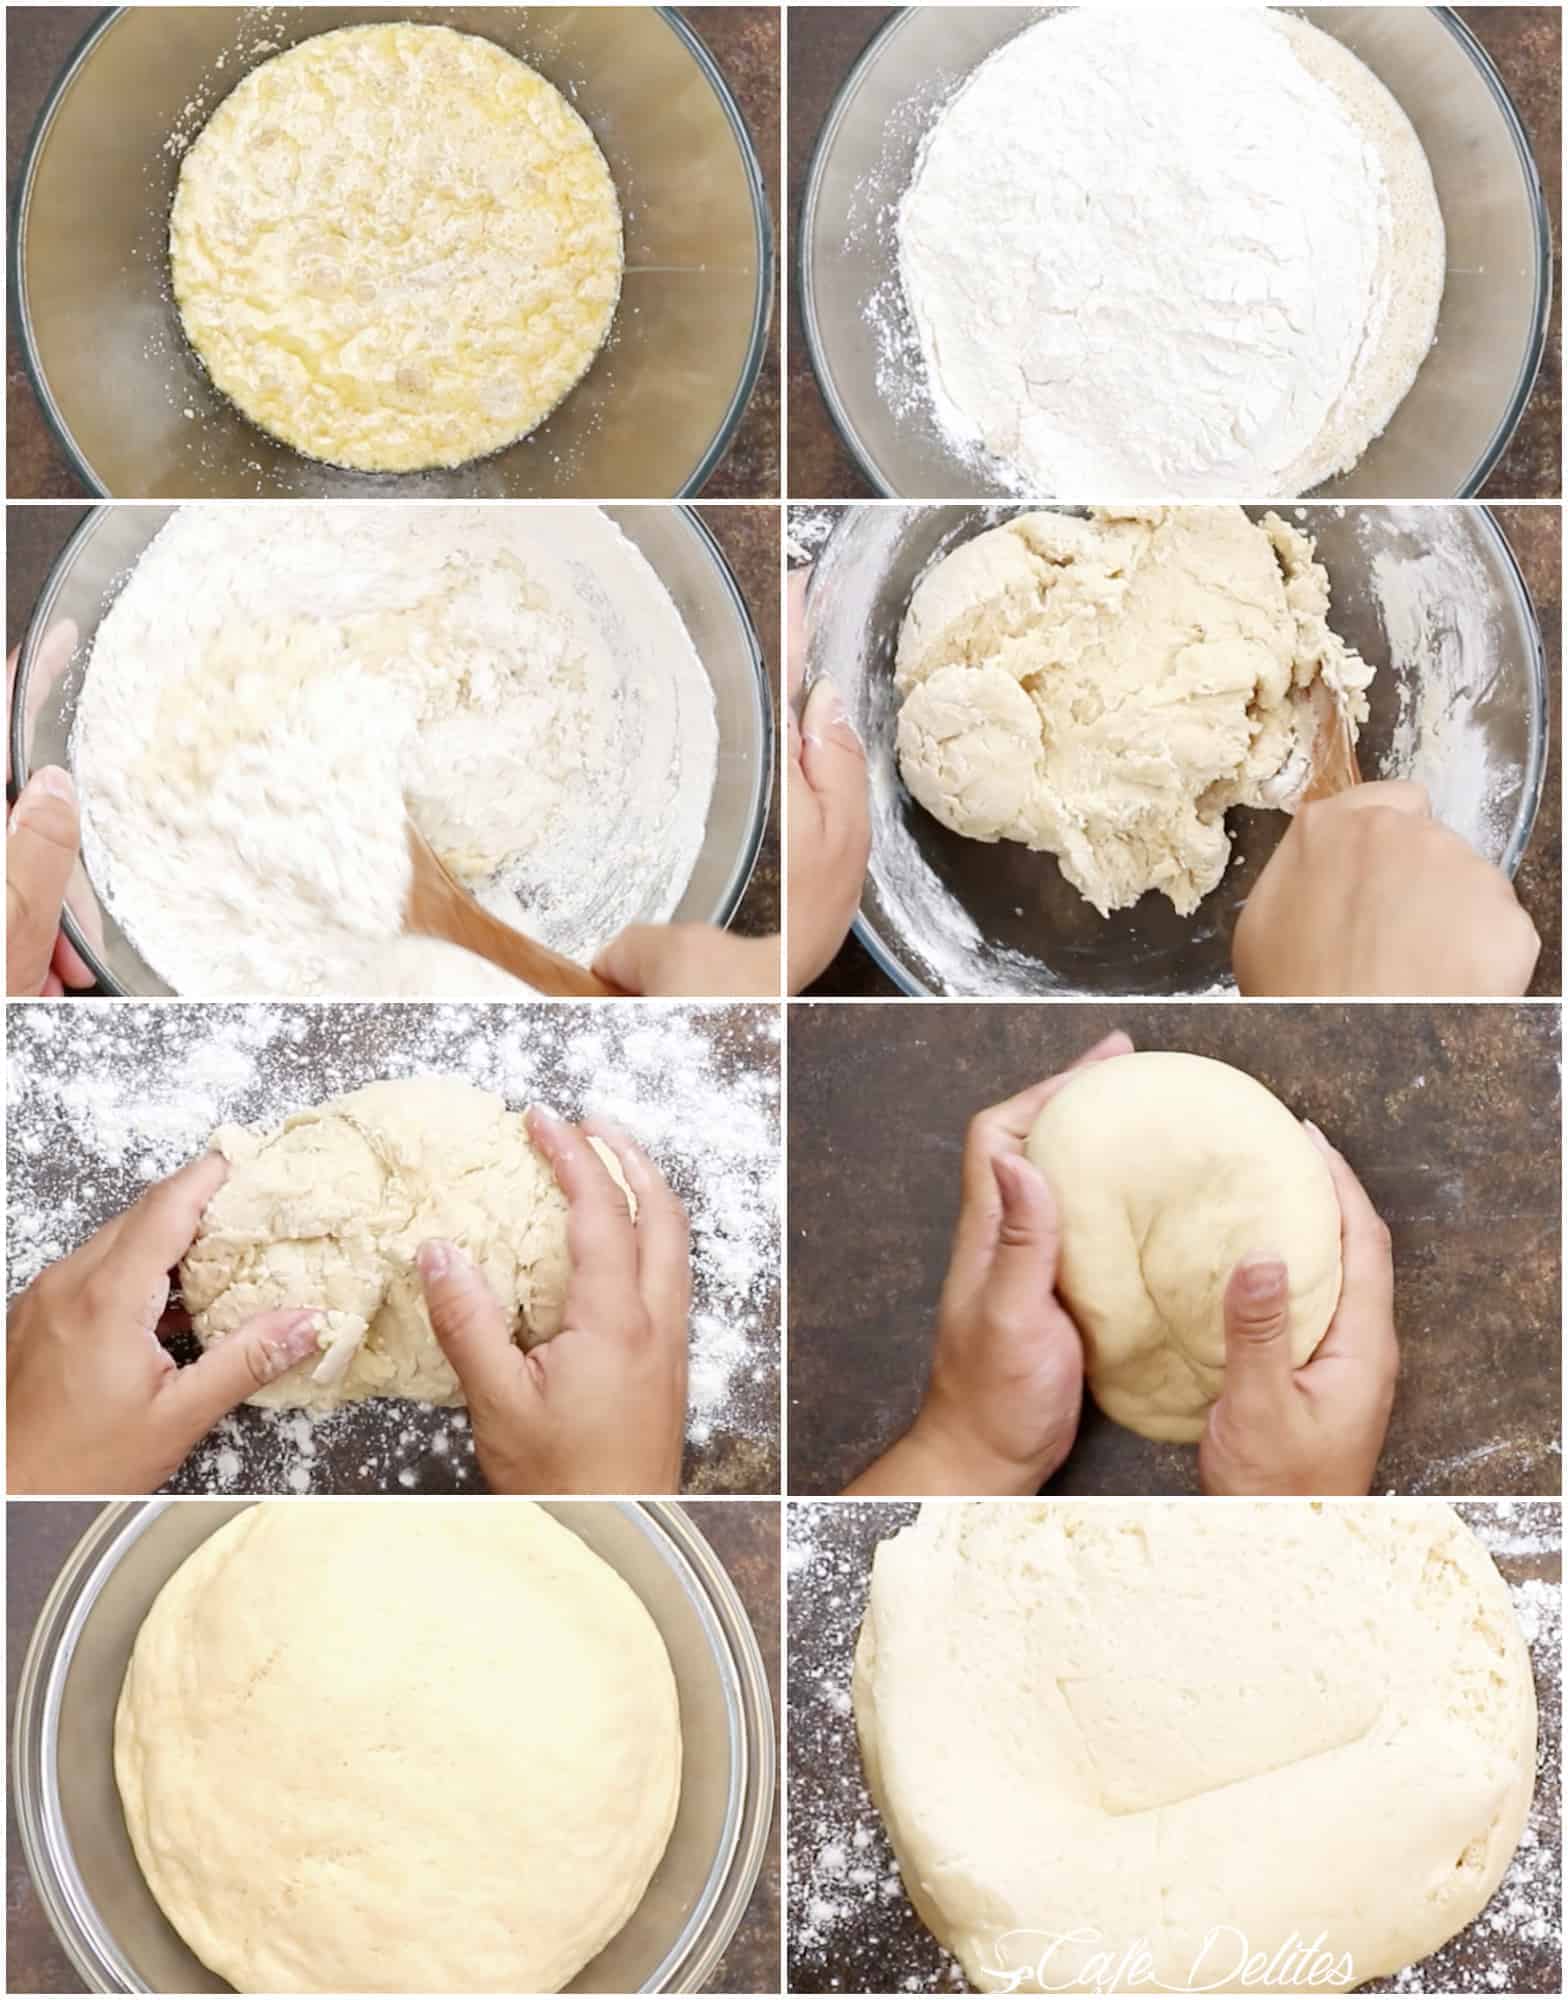
- Now, as promised, not much kneading is needed here. (Say that ten times fast.) You’re going to mix your dough first in your BIG beautiful bowl. As soon as your dough starts to pull away for your bowl, it will still be sticky. I found rubbing your hands in a light coating of oil to get them ready for kneading helps for when your dough gets too sticky. Here are two kneading options I tried.
A: Adding a couple tablespoons of flour over the dough while still in the bowl and giving it a light knead in there. Yeah, this was really cool! I kneaded for about 4-5 minutes, not properly because the dough is not on a bench top, but it still did the trick!
B: Scraping the dough out onto a lightly floured surface to knead. I sprinkled it with 2-3 tablespoons of flour, rubbed my hands in a touch of oil, and went to work for only about 3-4 minutes. The dough came together so fast and became beautifully wet and sticky this way. You DON’T want your dough to dry out too much so don’t add too much flour! You want it tacky and sticking to your fingers.
PROOFING
- Wet a kitchen cloth with warm water and wring it out so it’s not dripping, but not completely dry (somewhere in the middle). TURN OFF YOUR OVEN if this is the method you’re going with and place your covered bowl of dough in there. Leave the door ajar if you can so the dough doesn’t dry out too much. Check it in half an hour. If your towel is becoming too dry, you can transfer it out to your bench top or to a warm, draft free area.
- After an hour of proofing, you’re going to scrape the dough out onto a lightly floured surface, and mould your dough into a rectangle. You CAN give it a light need to bring it all together if it’s too tacky to handle.
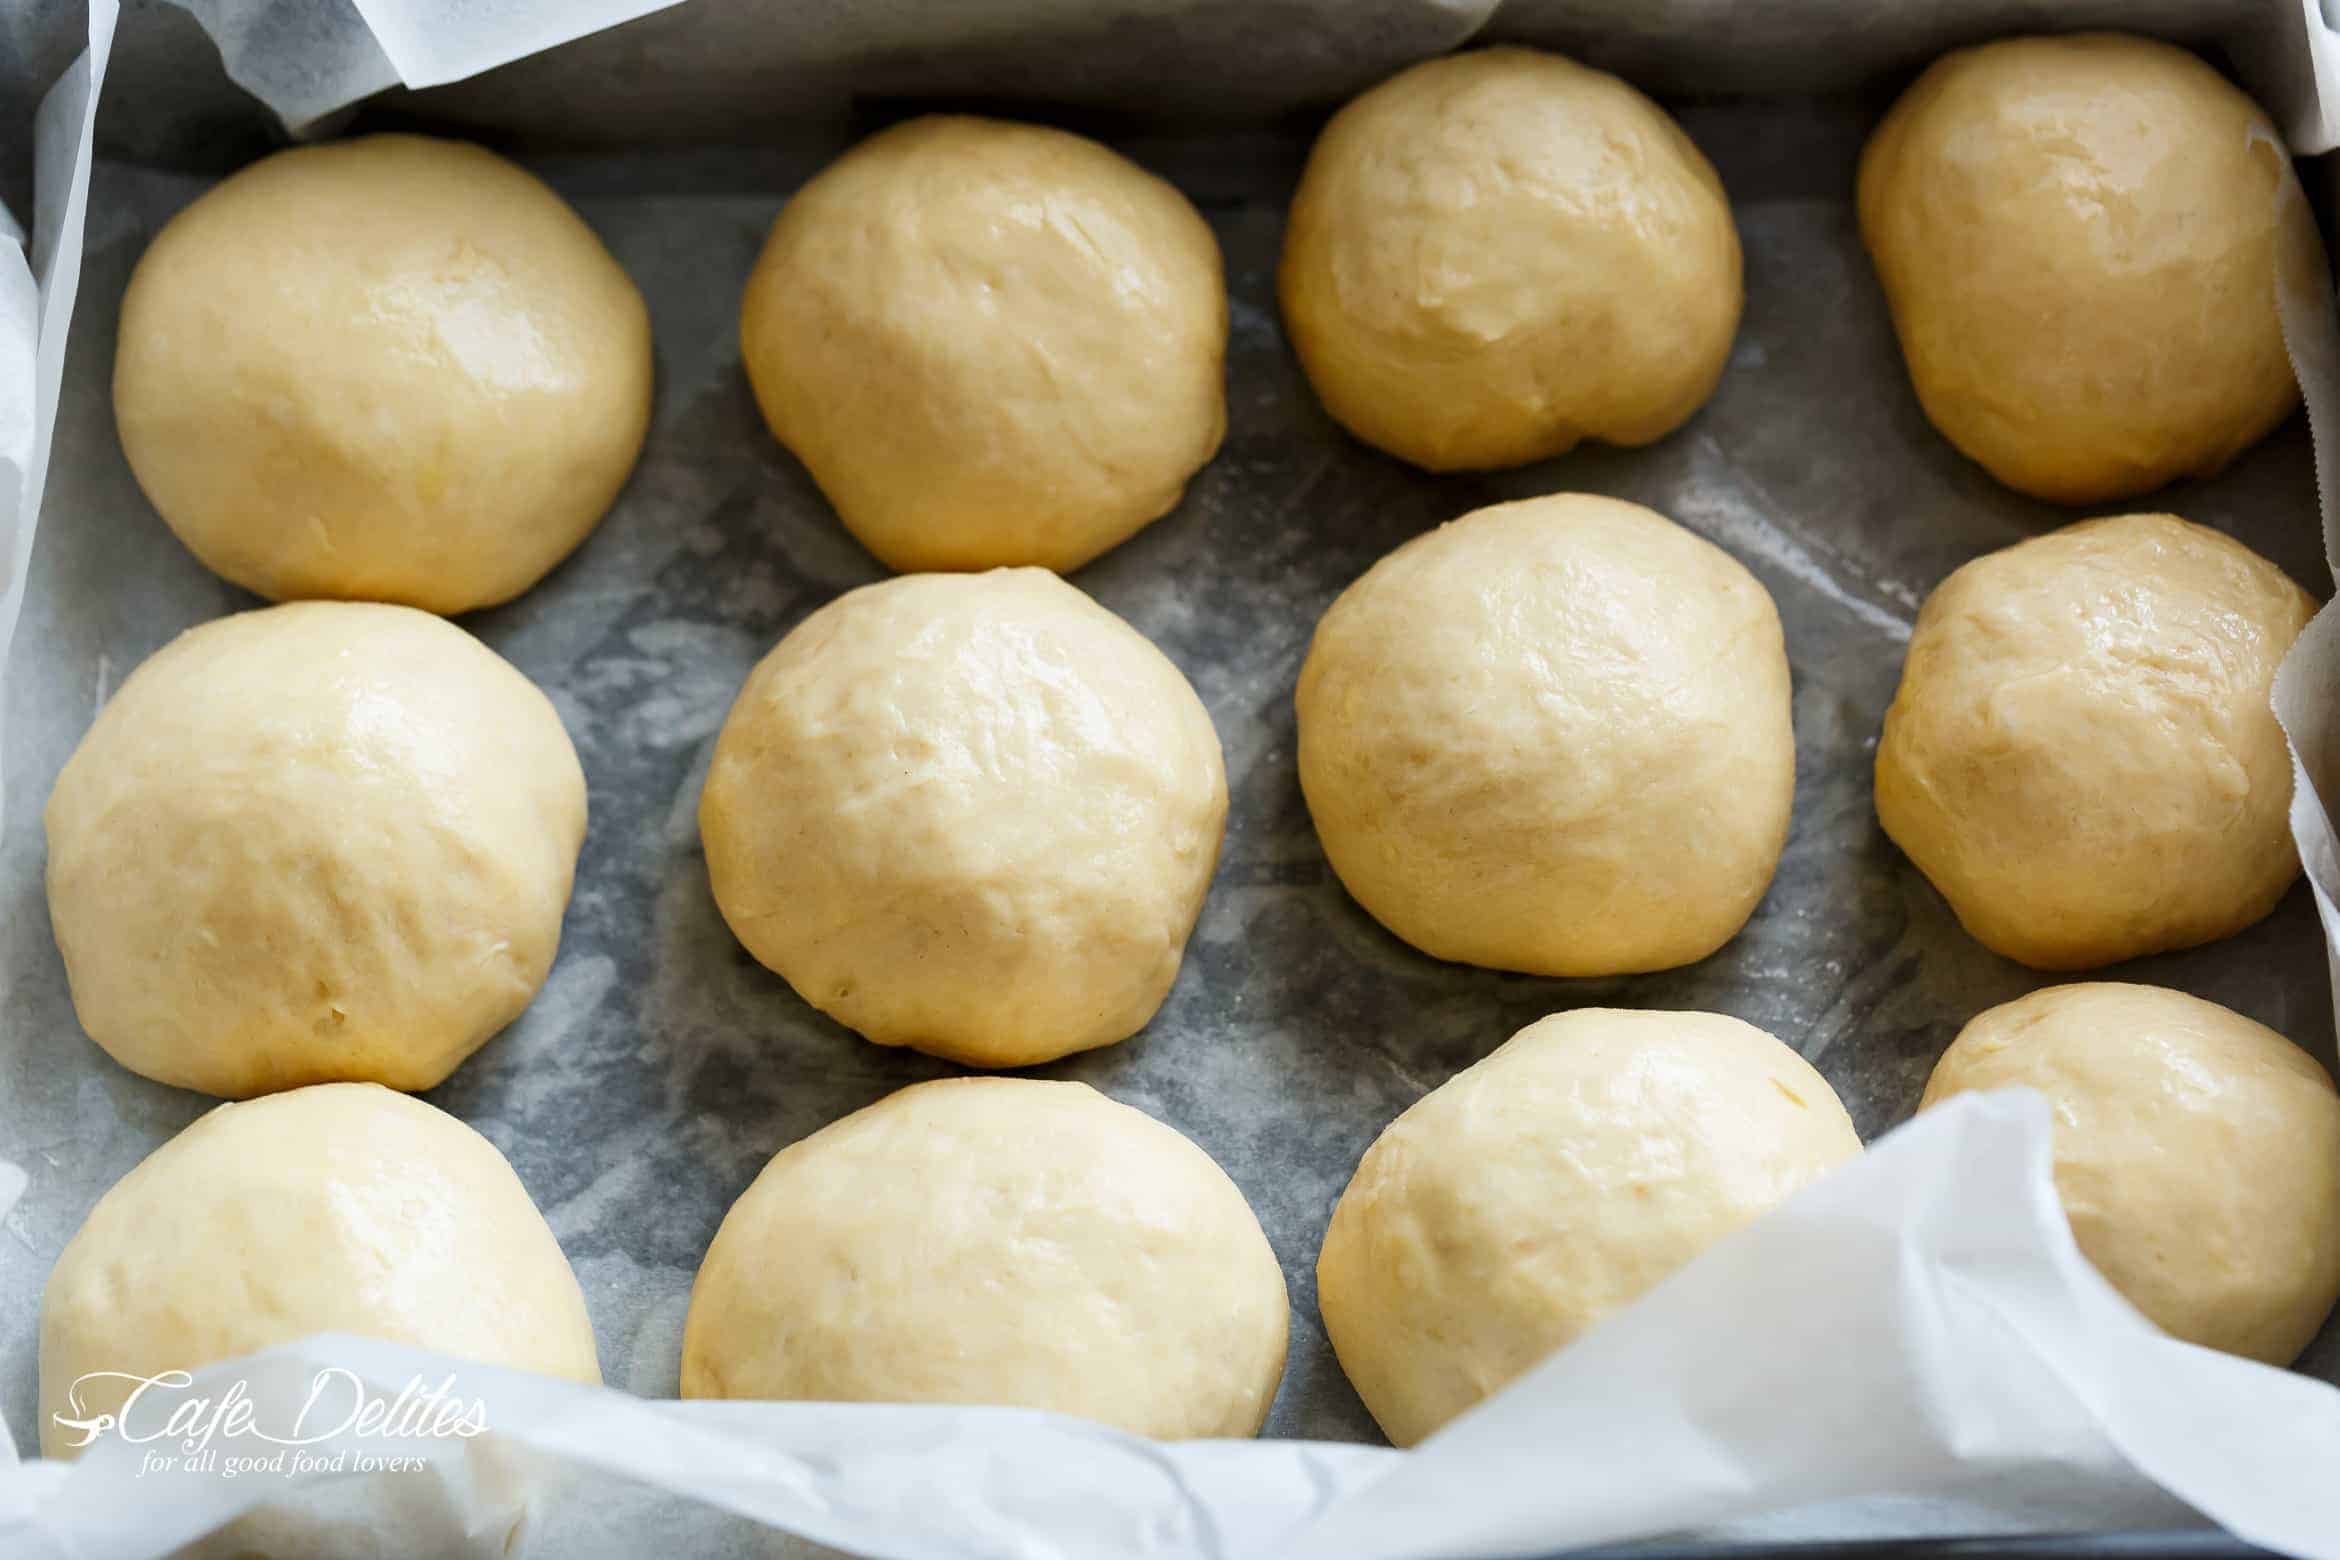
- Divide it in half, then divide EACH half in 6 pieces. Working one by one, LIGHTLY flatten each piece of dough in your hands and pull up the edges into a peak on the top. Pinch this ‘peak’ with your fingertips and turn your dough upside down. It should be a perfect smooth ball! Place each ball into your prepared pan as you go.
- Spray your rolls with cooking oil spray! This keeps them moist while proofing.
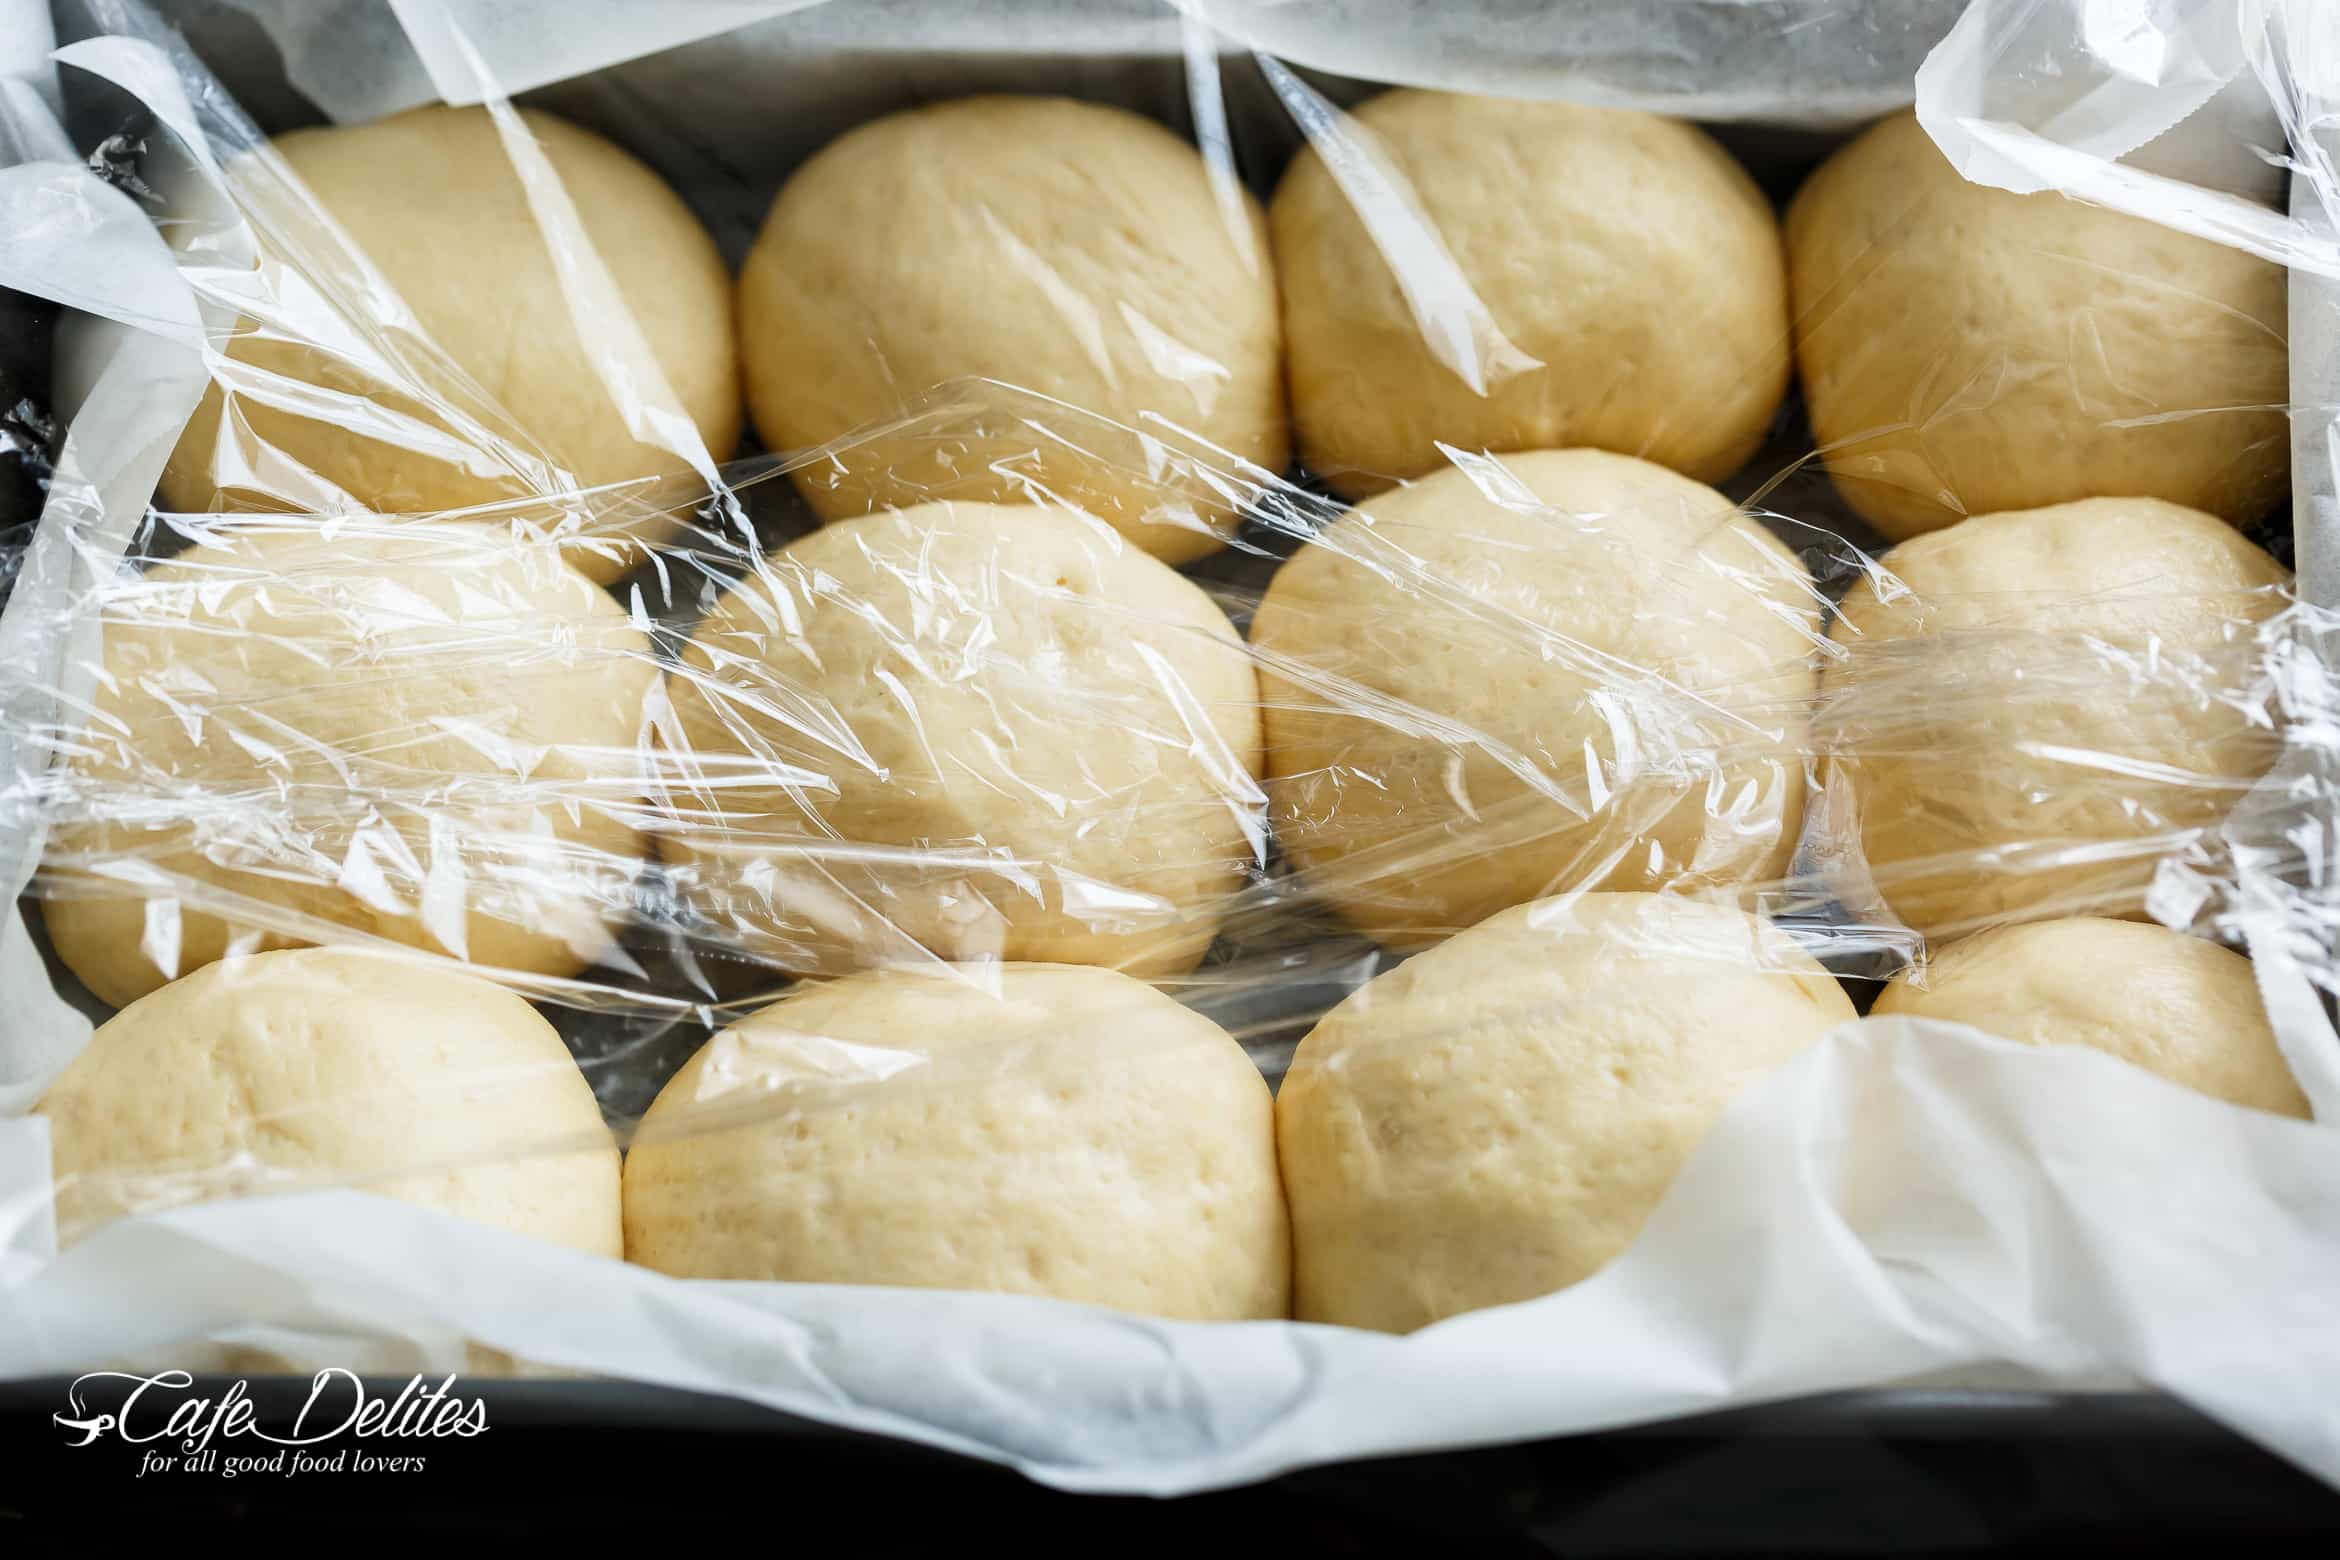
PROOF TWO
- Cover again, this time with plastic wrap, and allow to proof for 20-30 minutes. You can use your damp towel again for this if you don’t want to use plastic. Just wet it again with warm water, and this time wring it out as best as you can.
- During this time, you’re going to preheat your oven ready for baking! Try not to forget this step. Yes, I’m speaking from experience. I turn my oven back on in the last 5 minutes, as my oven gets hot fast. If yours takes time, turn it on earlier.
Ah the smells. The SWEET sweet smells coming from your kitchen are intoxicating.
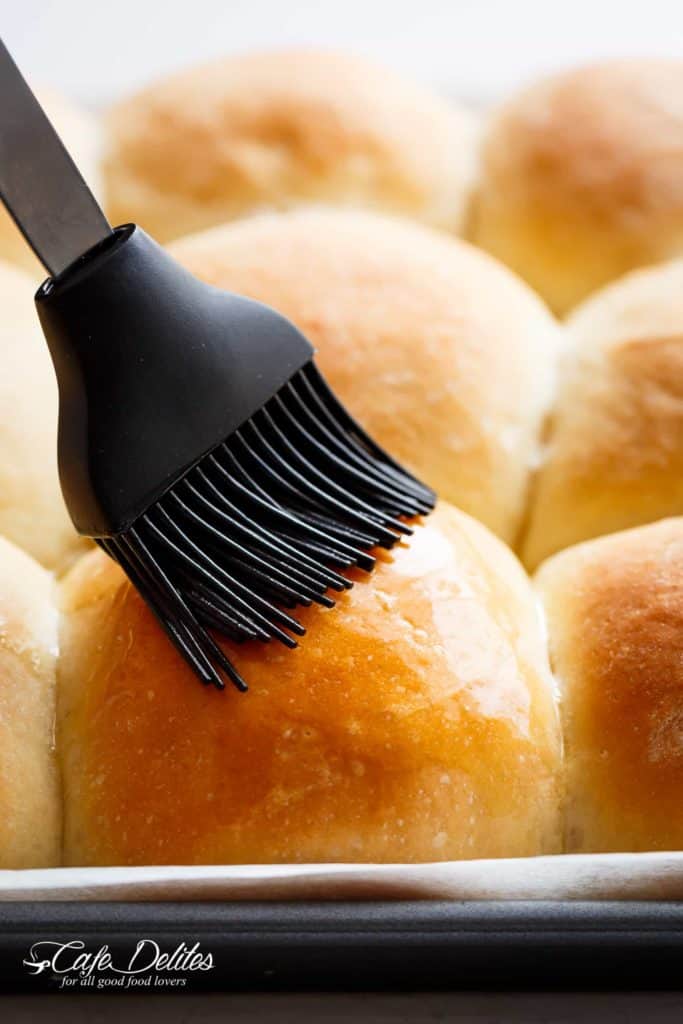
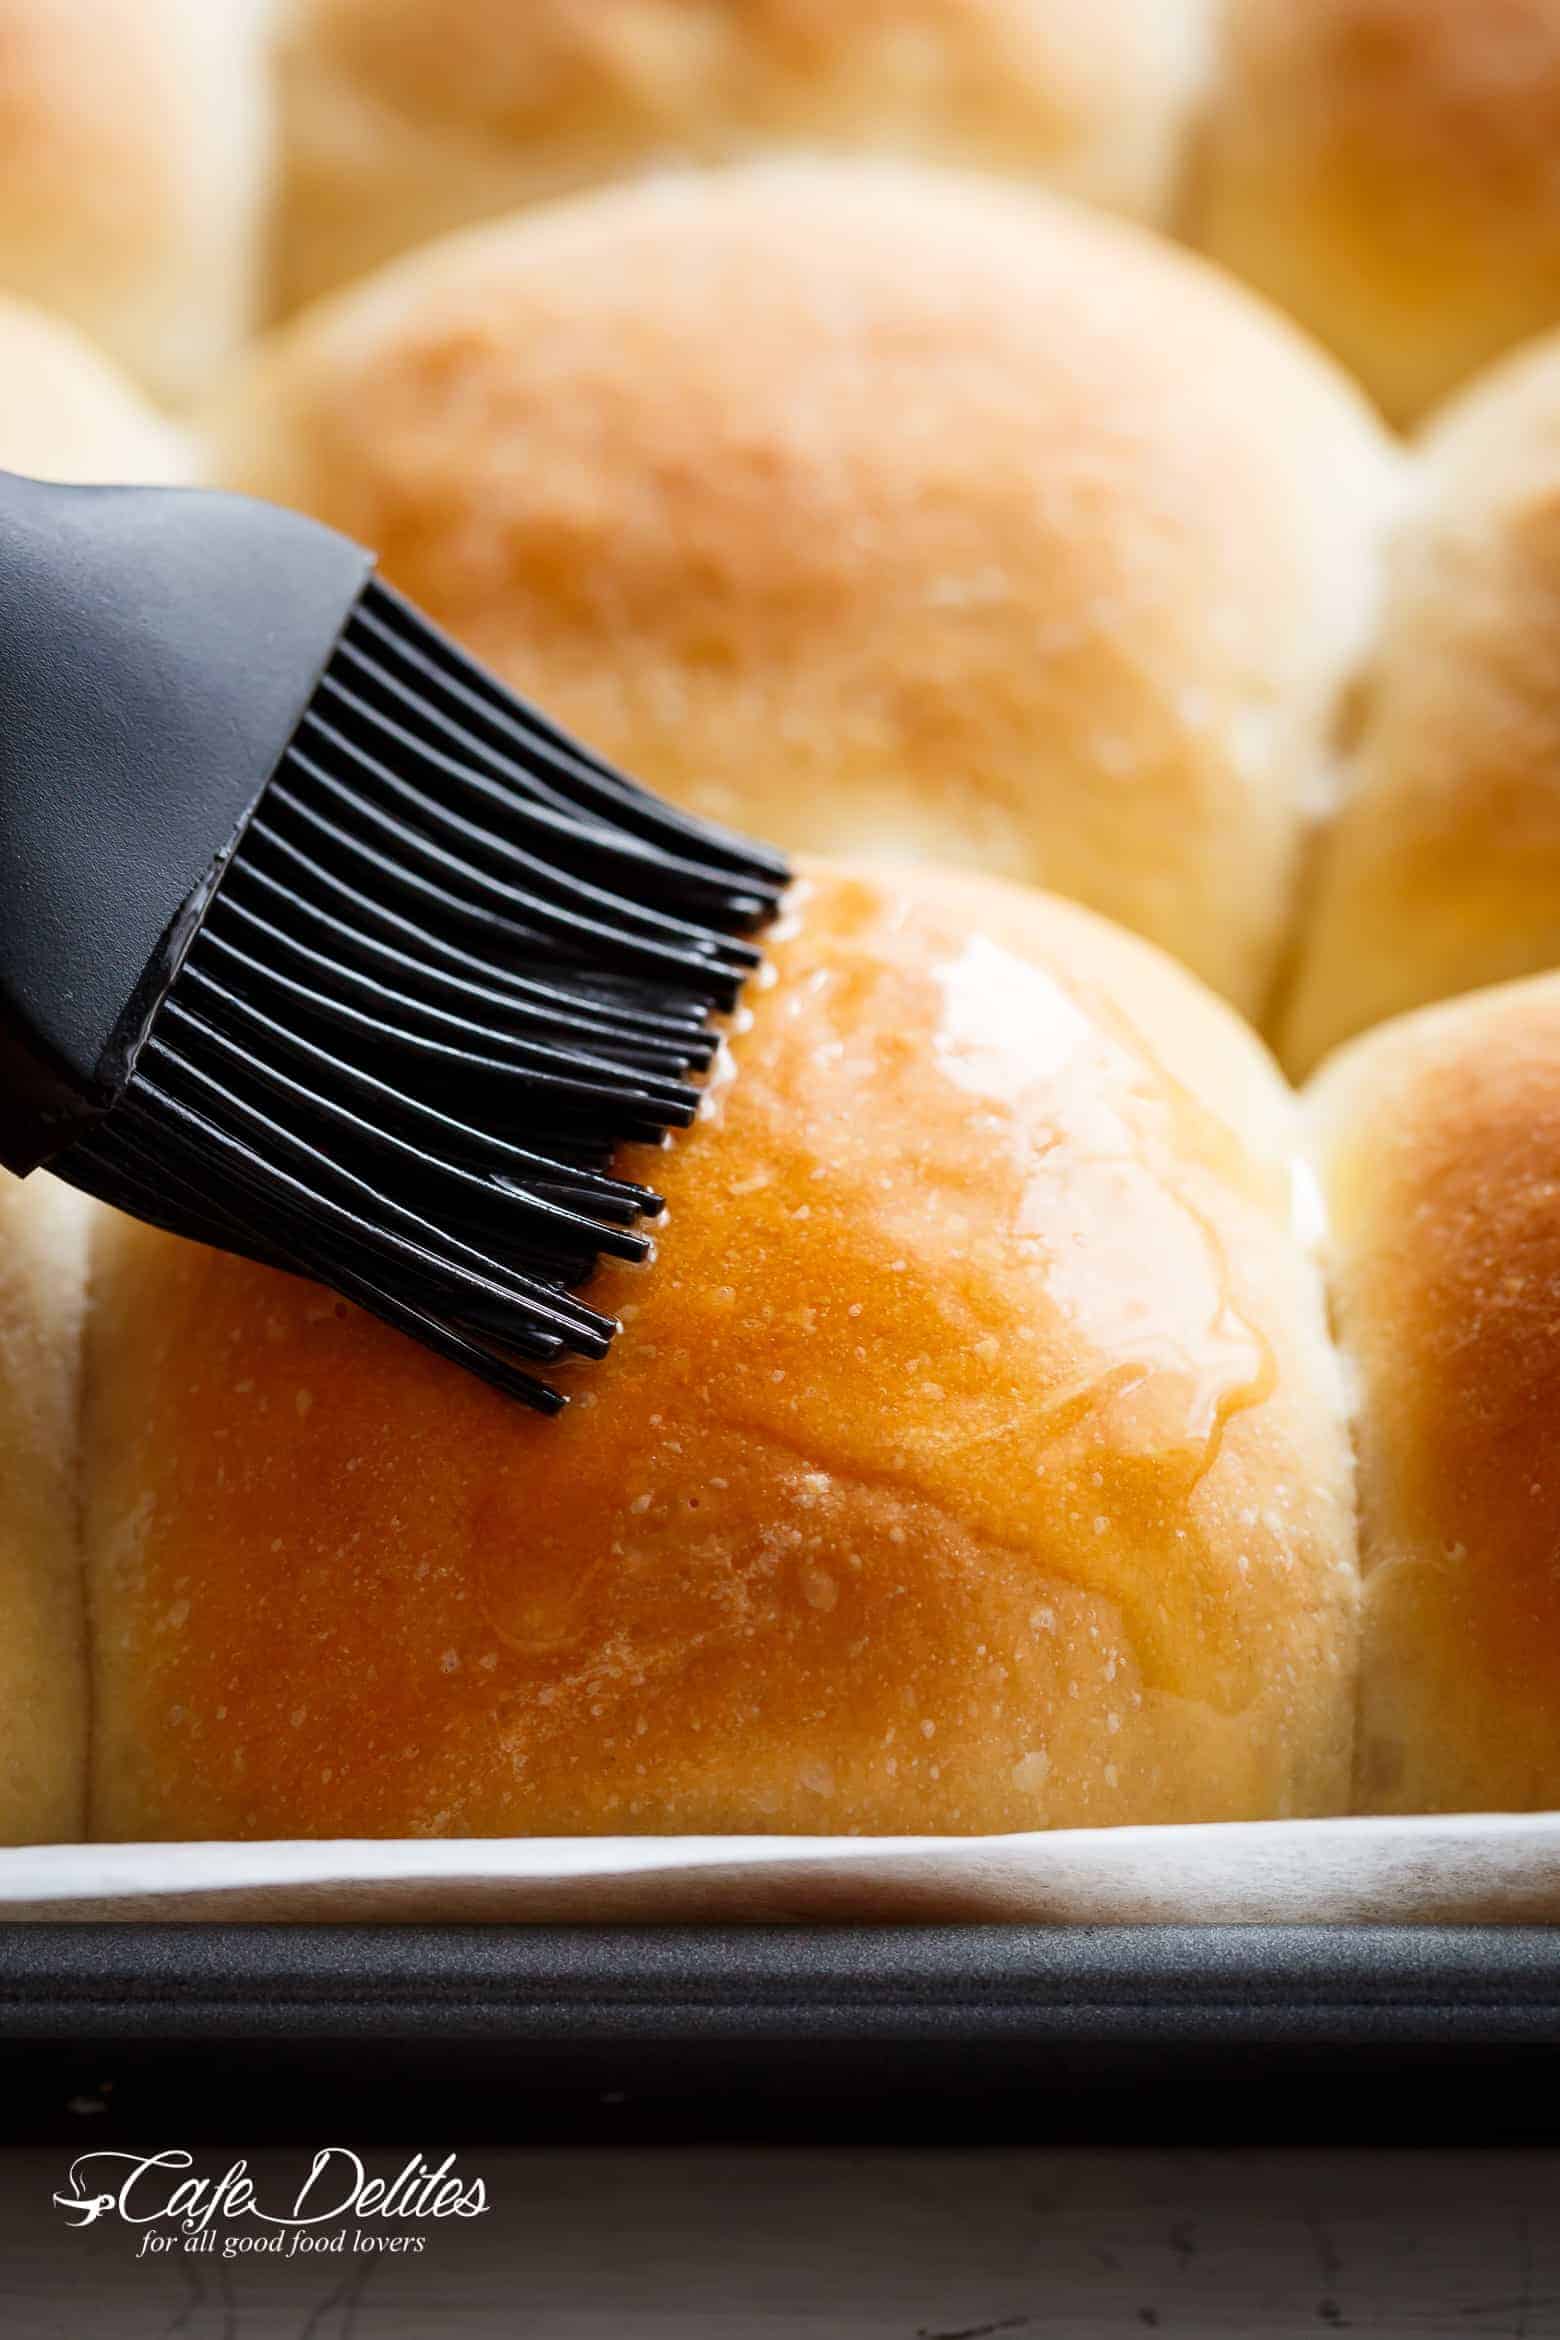
Once your bread is baked, brush them over with a light coating of melted butter. Most people use egg whites or an egg wash, and you can totally do this if you like! We have egg allergies over here, which is why this Easy Soft Dinner Rolls recipe has no egg!

They’re so good the day OF baking BUT these Easy Soft Dinner Rolls is also amazing the next day! ↓
Thanksgiving, here we come!
Easy Soft Dinner Rolls

When it comes to bread rolls, this Easy Soft Dinner Rolls recipe is so EASY to make! No mixer needed and hardly ANY kneading! PLUS NO EGGS! Fluffy, soft and perfect for sliders, sandwiches, or to mop up sauce or gravy!
- 1 tablespoon rapid-rise yeast
- 3 tablespoons white granulated sugar, (divided*)
- 1/2 cup warm water, ((110-115˚F))
- 1 cup milk
- 1/4 cup butter, (melted)
- 1 1/2 teaspoons salt
- 4 cups bread flour, ((or all purpose four), plus about 1/4 cup extra for dusting your work surface)
- 2 tablespoons melted butter, (for brushing baked rolls)
-
Heat oven to 200°F | 100°C (if using your oven to proof the dough).
-
Mix the yeast, 1 tablespoon of sugar and warm water in a large bowl. Let sit for 7-10 minutes until foamy and frothed.
-
While yeast is activating, combine the milk and butter in a 2-cup capacity microwave safe jug. Microwave on high for about 40-50 seconds, or until butter has half melted and milk is luke warm. Stir in remaining sugar and salt. Give it a light mix until the butter completely melts through the milk, and the sugar dissolves. Add to the yeast in the bowl.
-
Add in 2 cups of flour, giving it a light mix to combine with a wooden spoon, then add in the remaining 2 cups of flour. Mix until starting to pull away from the walls of the bowl (about 1-2 minutes). Turn out on a lightly floured work surface and use the extra 1/4 cup of flour in tablespoon increments to knead until smooth, elastic and slightly sticky (about 4-5 minutes kneading). (Lightly oil your hands if the dough gets too sticky.)
-
Transfer dough back into the bowl. Cover with a warm damp towel.
TURN OVEN OFF and transfer bowl of dough to the warm oven, leaving the door ajar for the first 10-15 minutes or so.
After 15 minutes, close oven door and allow the dough to double in size (another 45 minutes).
-
Scrape dough onto a lightly floured work surface or kitchen bench, knead lightly for about 30-40 seconds if needed to bring the dough together, and mould into a loaf shape. Cut in half, then cut both halves into 6 equal pieces (you should now have 12 equal pieces all together).
-
Working one by one, lightly flatten each piece of dough in the palm of your hands, then bring up all sides to form a peak on top (like a tent shape), and pinch and seal this peak. Flip it over and you should have a smooth top! Ensure there are no cracks. If there are, turn the roll upside down again and smooth the cracks out towards the peak you just made, pinching the seal again, and flip over to double check the top is smooth. (Use a light dusting of flour in your hands to prevent sticking if you need to.)
-
Arrange rolls, smooth side up into a lightly greased 9×13-inch baking pan or dish (you can line your pan or dish with parchment paper if you wish).
Preheat oven to 375˚F | 190˚C (or 350°F | 180°C for fan forced ovens).
-
Lightly spray rolls with cooking oil spray, cover with plastic wrap and let rise again until just about doubled in size, (about 30 minutes).
-
Bake in a preheated oven for 20-25 minutes, or until rolls are golden browned. (Check them after 18 minutes to make sure they are ok.)
-
Lightly brush with a little extra melted butter, and transfer to a cooling rack.
*If you like your bread a tiny bit sweeter, use 4 tablespoons of white granulated sugar — 1 tablespoon in the yeast and 3 tablespoons in the milk/butter mixture.

The post Easy Soft Dinner Rolls (NO MIXER + EGG FREE) appeared first on Cafe Delites.


)