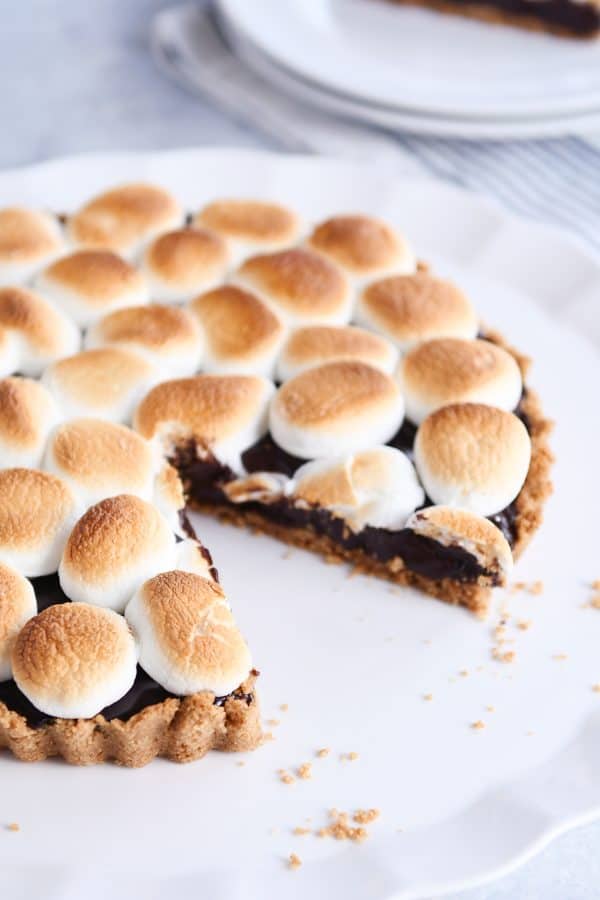
You’ll never believe how such a short list of simple ingredients can make such a decadent, delightful dessert! This s’mores pie is incredible – fun to look at and even more fun to eat!
If I was a food blogger worth her salt, I’d maybe, probably wait until summer (a.k.a. s’mores season) to post a dessert such as this decadent and super easy s’mores pie.
But I like to live on the wild side and post recipes out of season just to see how many people I can annoy by doing so. Just kidding. I’d never do that (insert nervous laughter). The truth is, I believe s’mores should a year long eating endeavor! And how would you feel inside your heart if I kept the secret of this decadent and delicious s’mores pie all to myself for three more months just to be an appropriate food blogging rule follower? BORING!
That would be a travesty. So here you go. S’mores pie in February. And you will not believe how easy and delicious it is.
This recipe is a true testament of how a few, simple ingredients (and a very simple method) can combine to make a truly killer dessert.
This easy s’mores pie is made up of the following shockingly easy components:
-A 9-inch pie plate or tart pan {aff. links}. I’m using a tart pan in the photos since it usually sits lonely at the top of my pantry, and it just felt fun and special to put it to use, plus that removable bottom just makes my heart happy. However, rest assured, a 9-inch pie plate will do just fine.
–Graham cracker crust. I’m honestly not sure if I love anything else in the world more than a really good, buttery graham cracker crust. Well, except my chickens…and my kids. You’ll get extra rock star points for making the easy homemade crust in the recipe below!
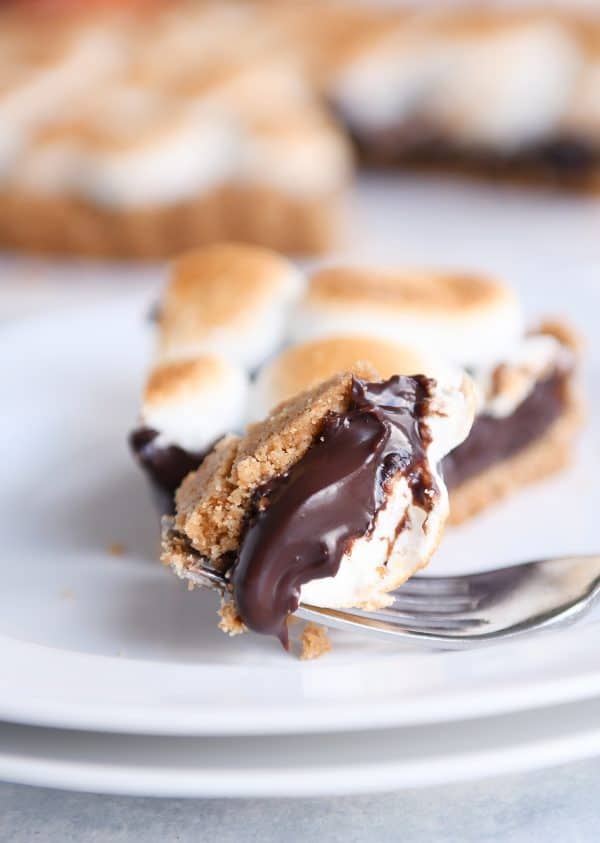
–Chocolate ganache. If the word “ganache” scares you, first let’s get out of the way that it is pronounced “guh-nosh” so you won’t be like me and refuse to say it out loud for years afraid it will come out something like “guh-natch-ee” Second, beloved ganache is a ridiculously fancy word for cream + chocolate that is heated and stirred together until glossy and utterly decadent. With the right proportions of cream and chocolate, after setting up and chilling, you’ll end up with the most glorious, rich chocolate filling known to mankind. Hint: chocolate ganache is the same thing at the center of a really good chocolate truffle. As I type that, I now think this dessert should be called S’mores Truffle Chocolate Pie. Oh yes.
-Marshmallows. Of course! You can’t have s’mores without an appropriate and healthy amount of marshmallows. We’re not going any sort of homemade marshmallow route here. Remember, this is a simple and easy s’mores chocolate pie. Grab a bag of large marshmallows, cut them in half (like a hamburger bun) and layer them on top. We’ll get to the toasting of the marshmallows in a sec.
First a quick note about chocolate.
The chocolate flavor is paramount in this recipe. I tend to be a bit of a chocolate chip snob (not a surprise to those of you who have been around for more than half a second). I highly encourage using a good-quality (but still grocery store available) chocolate, like Ghirardelli or Guittard. Those are my faves in all flavors. They melt exceptionally well and the flavor is rich and strong without some of the artificial, waxy notes that come through with other brands (particularly generic or store brands).
What about the type of chocolate? Is semisweet, bittersweet or milk chocolate best for this recipe?
If you aren’t a dark chocolate fan by nature (it’s ok, we can still be friends), don’t go choosing bittersweet chocolate for this recipe. You’ll regret it. Go for a sweeter chocolate, like semisweet…or maybe even a combo of milk chocolate + semisweet. Personally, I think 100% milk chocolate will be too gaggy sweet, but by all means, don’t let my strong opinions about milk chocolate stop you. I made this (and will continue to make this) with half semisweet/half bittersweet. It was absolute perfection, but I am a dark chocolate lover through and through.
Now for the toasting of the marshmallows.
The original recipe calls for browning the marshmallows in the oven. The resident food snob that lives in my brain thought for sure I would eschew this method (totally just had to look up the word “eschew” just now to make sure I was using it appropriately) in favor of my trusty kitchen torch {aff. link}.
Because I was sure that’s what Ina Garten would do.
Yeah, no. When I tried it, it was a total disaster. The marshmallows got splotchy and burned with little black dots that looked like tiny, itty bitty bugs and it was impossible (for me) to brown the marshmallows evenly. Don’t get me wrong, we still ate the s’mores pie (no s’mores pie left behind at this house), but it wasn’t pretty.
I’m not saying you won’t be able to do a better job, but when I finally humbled myself to use your average, every day oven, the result was so easy and terribly spectacular. In just about 45 seconds, watching like a hawk, your marshmallows will go from boring to beautiful.
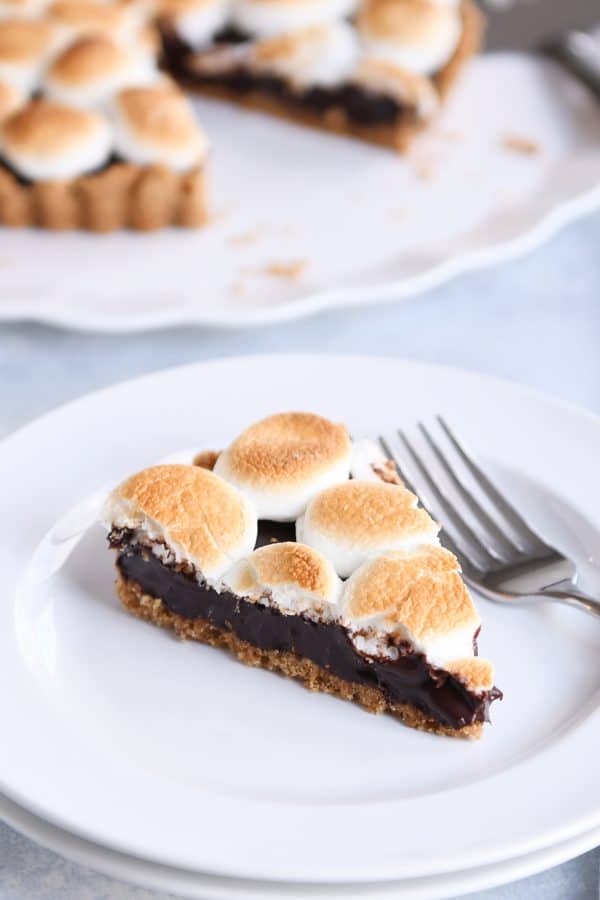
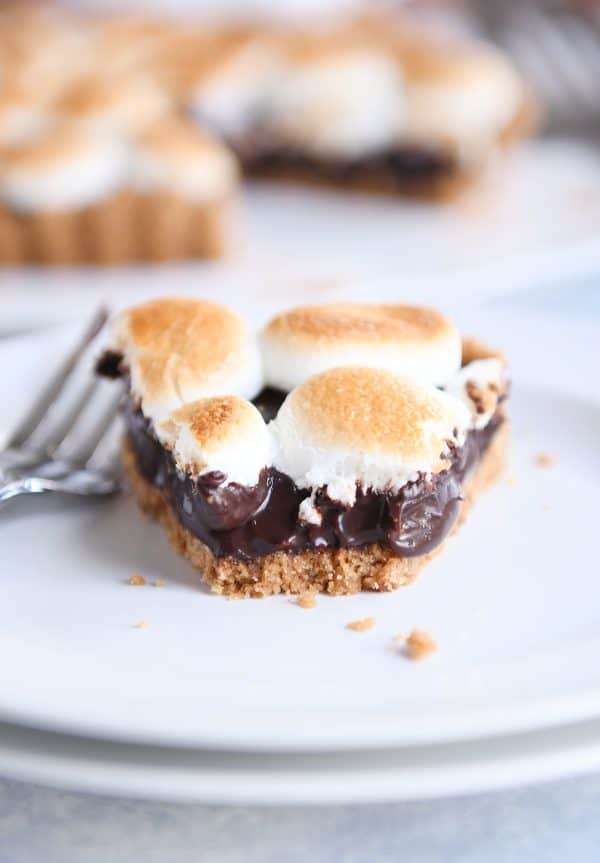
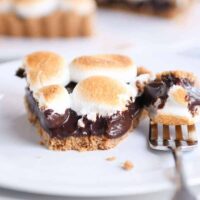
I was pretty sure I’d have to resort to saying some bad words to cut slices out of this tart. Hello, sticky marshmallows! Not the easiest ingredient to cut through these days. But surprisingly, after resting for a bit (so that glorious ganache layer can firm up again after the marshmallow step), it was really easy to cut fairly clean slices.
It helps to use a longer, thin knife (like an 8-inch Chef’s knife – aff. link) and run it under hot water and wipe clean between slices.
If you love a good s’mores dessert and all the flavors wrapped up in the classic combination, this classy and elegant s’mores pie is sure to win you over. It’s obviously kind of pretty to look at it…but it’s even more fun and delicious to eat.
Also, since I have s’mores on the brain now, here are a few of my other favorite s’mores treats! Are you a s’mores lover??
S’mores Hershey Blossom Cookies
S’mores Cookie Bars
S’mores Chocolate Chip Cookies
One Year Ago: Extra Fudgy Brownies {One Bowl!}
Two Years Ago: Sweet Balsamic Glazed Pork {Slow Cooker + Instant Pot}
Three Years Ago: Mexican Chopped Salad with Cilantro Lime Vinaigrette
Four Years Ago: Shepherd’s Pie
Five Years Ago: Death by Chocolate 7-Layer Bars
Prep Time:
45 minutes
Cook Time:
15 minutes
Additional Time:
1 hour
Total Time:
2 hours
Ingredients
Crust:
- 1 1/2 cups graham cracker crumbs (1 package, 13 rectangle graham crackers, about 6-7 ounces)
- 2 tablespoons brown sugar
- 7 tablespoons butter, melted
Filling:
- 9 ounces (1 1/2 cups) semisweet or bittersweet chocolate chips or bar chocolate, chopped (see note)
- 1 cup heavy cream
- 1/2 teaspoon vanilla extract
- 1/8 teaspoon coarse, kosher salt (use half the amount, just a pinch, for table salt)
Topping:
- 20-25 large marshmallows, cut in half (like a hamburger bun) – see note
Instructions
- Preheat the oven to 350 degrees F.
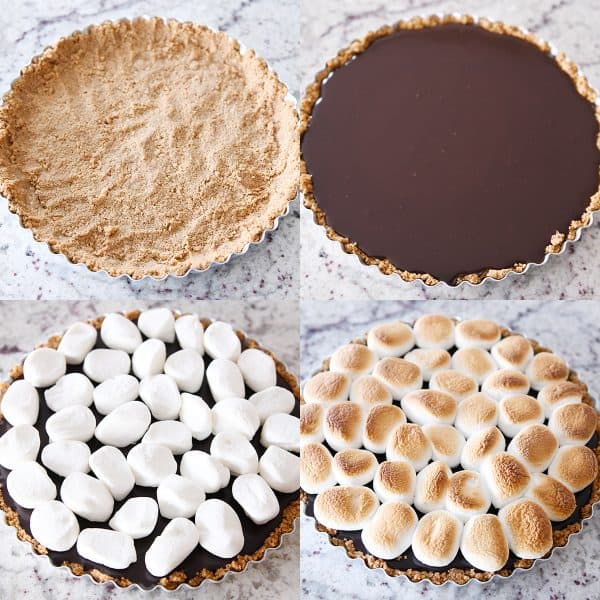
- For the crust, combine all the ingredients together in a small bowl and stir until the graham cracker crumbs are evenly moistened. Press the mixture evenly into the bottom and up the sides of a 9-inch pie plate or 9-inch tart pan. Bake for 8-10 minutes until just lightly golden. Remove from the oven and let cool completely.
- For the filling, add the chocolate to a medium bowl. Heat the cream (in a saucepan or microwave) until it starts to steam and small bubbles form at the edges. Pour the cream over the chocolate and let sit for 1-2 minutes. Stir to combine well; it will look separated and grainy as you first start to stir, but eventually it will combine into a glorious, glossy, thick mixture.
- Pour the chocolate ganache into the cooled crust and spread evenly. Chill in the refrigerator for at least an hour (or up to overnight). About an hour before serving (can do this up to 2-3 hours in advance), preheat the oven broiler and place an oven rack 5-7 inches away from the heating element.
- Cover the top of the pie with the cut marshmallows (cut side down). Broil the pie until the marshmallows puff and turn golden, about 1 minute, turning the pie several times to evenly brown the marshmallows. KEEP A CLOSE EYE ON THE PIE THE WHOLE TIME- it can go from beautiful to burned in a matter of seconds!
- Let the pie rest at room temp for about an hour or pop in the refrigerator for 20-30 minutes to allow the chocolate layer to set up after being broiled. The pie can be refrigerated (or left at room temp) for 2-3 hours after the marshmallows have been toasted. Any longer and the marshmallows might get stickier and kind of wet.
- Slice the pie into pieces with a sharp knife (dip it in hot water and wipe clean between slices for more even cutting) and serve.
Notes
I use half semisweet/half bittersweet chocolate for a very dark, rich filling. For a more moderate approach, semisweet or half semisweet/half milk chocolate may be the best bet.
If you want to fill in the gaps on top, use mini marshmallows to plug in those holes before broiling. I’ve found the best way to cut the marshmallows is to lightly grease kitchen scissors with nonstick cooking spray and cut the large marshmallows in half (and grease again as needed).
Recommended Products
As an Amazon Associate and member of other affiliate programs, I earn from qualifying purchases.
Recipe Source: adapted from this Weekends with Yankee recipe after Brandy, a MKC reader, sent it to me (thanks, Brandy!)
Disclaimer: I am a participant in the Amazon Services LLC Associates Program, an affiliate advertising program designed to provide a means for me to earn fees by linking to Amazon.com and affiliated sites.


